...
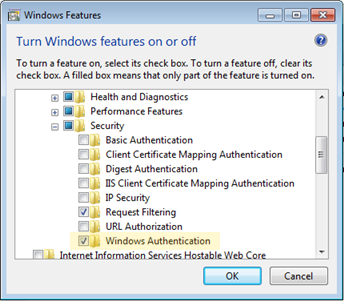
- Make sure that the machine has the 'Windows Authentication' feature installed for IIS. This can be installed via Control Panel -> Programs and Features -> Turn Windows features on or off -> Internet Information Services.
- In the Internet Information Services (IIS) Manager, select the Continua web site, then select the 'Authentication' feature.
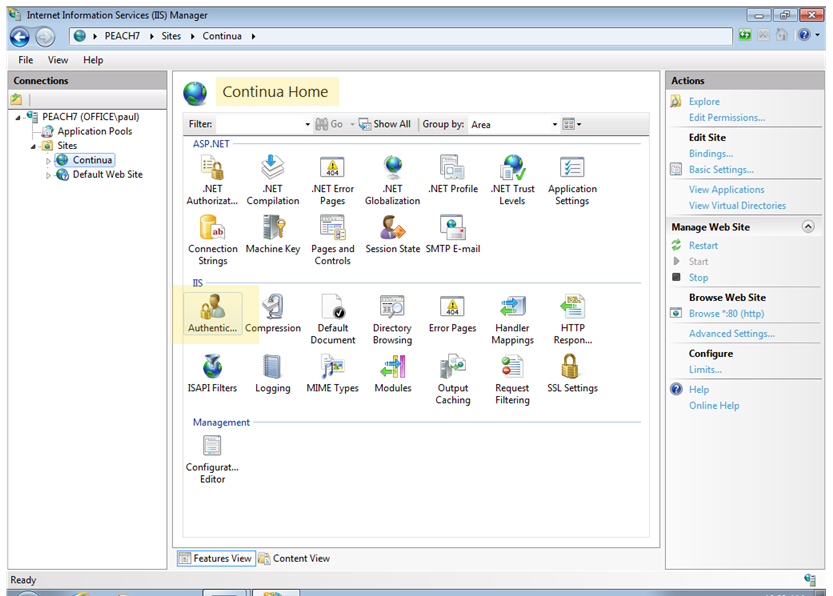
- In the 'Authentication' feature view, set the following options:
- Anonymous Authentication to DISABLED
- Forms Authentication to DISABLED
- Windows Authentication to ENABLED

- Close the Internet Information Services (IIS) Manager and open Notepad with Administrative rights (right click, Run as Administrator).
- Open the following file, changing the path if necessary, 'C:\Program Files\VSoft Technologies\ContinuaCI\Server\Continua.Server.Service.exe.config'.
- Add the following line to the 'continua-configuration' node, changing the attribute values to reflect your environment, '<ldap enabled="true" fqdn="office.vsoft.local" administratorsGroup="Continua Administrators" />'
- fqdn - The fully qualified domain name of your domain.
- administratorsGroup - The LDAP group that contains the users who will automatically have administrative rights in Continua, users in this group will be used to configure Continua for the rest of the organisation.
NOTE: When logging into Continua for the first time, the user must be a member of the group specified by administratorsGroup.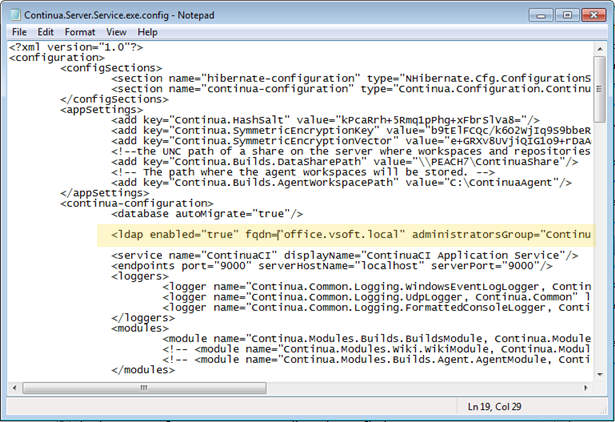
- Save the file, then restart the ContinuaCI Application Service via the Control Panel -> Administrative Tools -> Services.
<ldap enabled="true" fqdn="office.vsoft.local" administratorsGroup="Continua Administrators" />