The HTTP Request build event handler can be used to call any HTTP endpoint. This can be used to signal other systems when the Continua CI build reaches a certain point or status. You can call any HTTP webhook or endpoint API that suits your needs, such as Slack channel messaging.
The build event handler can be set to automatically respond to any Build Events in the life-cycle of the build. This allows the HTTP endpoint to be hit at any stage of the build process.
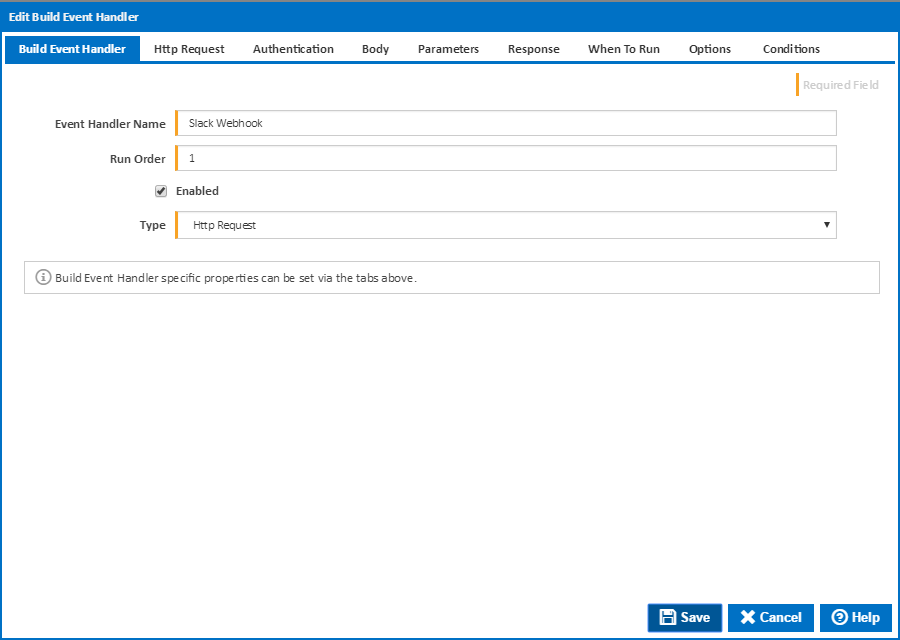
Event Handler Name
Friendly name for the event handler (this will be visible in the 'Events' section of the website)
Run Order
The order in which the event handler will be run (relevant in the situation where multiple event handlers are present).
Enabled
Whether this event handler will be run or not. Disabling event handlers can be useful when setting up a build process.
Type
The type of event handler to be used. Set to HTTP Request to specify a HTTP request for the build event.
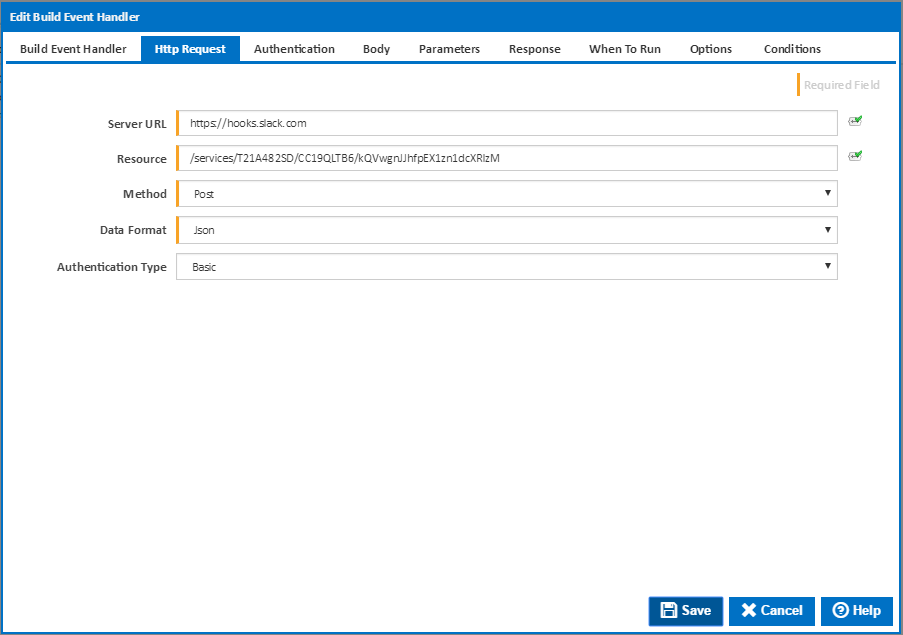
Server URL
The URL of the server that the HTTP endpoint to call exists on. Note that the Continua CI server will require access to the server, as it is responsible for running build event handlers. Please make sure that the server is accessible from the machine your Continua CI server is installed on if experiencing any connectivity issues.
Resource
The resource endpoint on the server that is to be requested. Note that this is just the pure path to the endpoint, any query strings can be added later in the query string section.
Method
The method type to use in the request. The available options here are:
- Get
- Post
- Put
- Patch
- Delete
The method should match what the endpoint requires so that the correct action or resource is accessed on the server.
Data Format
The format that the data sent or requested should be presented in. Note that the build event handler will attempt to parse response data in the format selected before extracting any variable values. If this parsing fails, the variable values will not be assigned.
Also some HTTP endpoints require data to be sent in specific format. If the correct format is not used then the endpoint may fail with a Bad Request response. Make sure the data format is set as required by the endpoint in question.
The context-type header will also be set based on the data format selected. For example, when selecting JSON, the context-type header will be set to application/json.
Authentication Type
The type of authentication to use to interact with the specified endpoint. The types of authentication possible are:
- None
- Basic
- NTLM
- Access token as parameter
- Credentials as parameter
The login method to use will be dependent on the endpoint in question. Some endpoints also offer token-based resource paths to alleviate the need to provide credentials.
Basic & NTLM Authentication
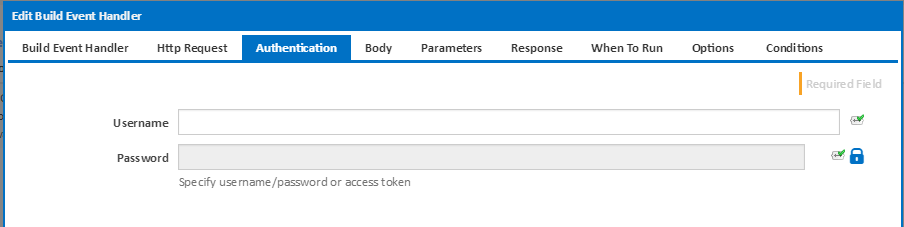
Username
The username to use for basic HTTP or NTLM authentication. Note that the username and password are base64 encoded into a basic authentication HTTP header for the request.
Password
The password to use which matches the username listed above.
Access Token as Parameter Authentication
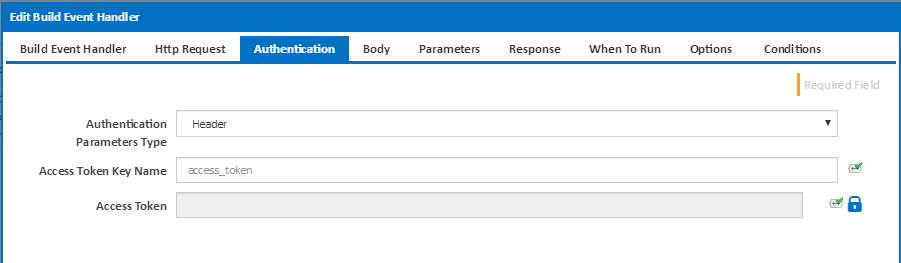
Authentication Parameters Type
The type of parameter to send the access key token as. The valid values of Cookie, Form, Header, and QueryString determine where the authentication parameter will be placed in the request sent.
Access Token Key Name
The name of the parameter for the token. This can differ for each HTTP service implementation. Check with the service in question as to what the expected parameter name is for the key token.
Access Token
The access token to use for the service. This should match the access level require for the requested service.
Credentials as Parameters Authentication
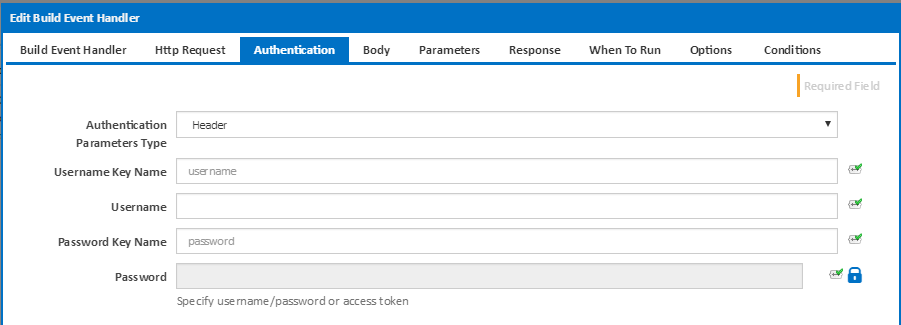
Authentication Parameters Type
The type of parameter to send the access key token as. The valid values of Cookie, Form, Header, and QueryString determine where the authentication parameter will be placed in the request sent.
Username Key Name
The name of the parameter for the username. This can differ for each HTTP service implementation. Check with the service in question as to what the expected parameter name is for the username.
Username
The username of the user accessing the service. This user should have the level of access required to perform the action the HTTP request is asking for.
Password Key Name
The name of the parameter for the password. This can differ for each HTTP service implementation. Check with the service in question as to what the expected parameter name is for the password.
Password
The matching password for the user of the service.
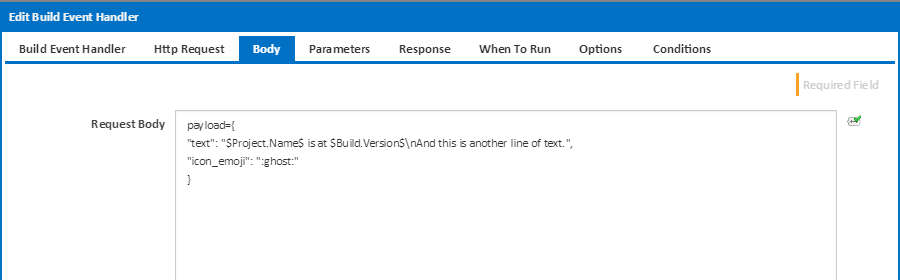
Request Body
The request body is where the information for the request is placed. In the case above, the request expects a JSON object called payload. The object has two properties called name and icon_emoji - each with values provided for the given request.
The values can have Continua CI variables included in them so that build information can be passed onto other systems. In the above example the text message passed onto the HTTP request includes the project name and build version number.
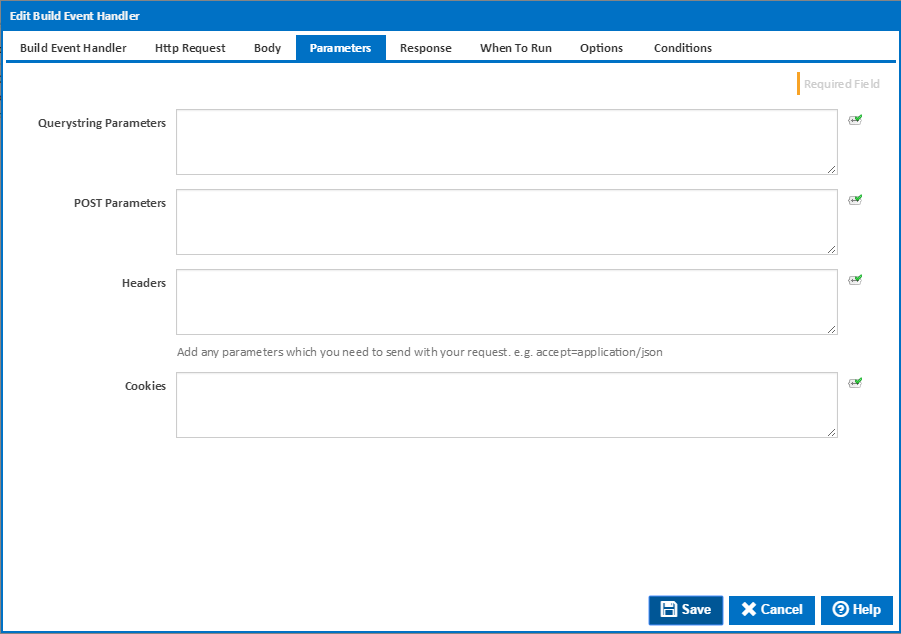
Querystring Parameters
These parameters should be provided in <name>=<value> format. Each parameter will be added to the query string which is sent as part of the request. Adding query string parameters here means that you do not have to get the formatting correct for the HTTP query string yourself. All escaping is handled for you when using the querystring parameter entry box.
POST Parameters
Use this to add any get/post parameters to the request. These are simple parameters that the endpoint may require or use to understand the request being made of it. These parameters should be provided in <name>=<value> format with each pair on a separate line.
Headers
Allows you to add header parameters to the request. These should be entered in the <name>=<value> format with each pair on a separate line.
Cookies
Allows you to add cookie parameters to the request. These should be entered in the <name>=<value> format with each pair on a separate line.

Response Variables
These can be used to extracting values from JSON or XML responses and place them into configuration variables. To extract values from the JSON and XML responses, JSONpath and XPath can be used. Each has their own syntax for extracting values for nodes within the objects they represent. Below is a list of some of the syntax allowed by each.
| XPath | JSONPath | Description |
| / | $ | The base node in the object. |
| . | @ | The current object in the node path. |
| / | . or [] | Accessing a child node, or specific child node |
| .. | n/a | Accessing the parent of the current node. |
| // | .. | Recursive child decent. |
| * | * | Wildcard operator to access any node. |
| @ | n/a | Accessing an attribute. |
| [] | [] | Accessing an element within a list of nodes. |
| | | [,] | Union of two sets of nodes. |
| n/a | [start:end:step] | Accessing elements as a slice of a set of elements. |
| [] | ?() | Accessing nodes with a filter applied. |
Listed below is an example response in JSON and XML.
{
  "messages": {
    "staging": [
      {
        "author"  : "tim_bot",
        "category": "information",
        "message" : "Building..."
      },
      {
        "author"  : "tim_bot",
        "category": "information",
        "message" : "Testing..."
      },
      {
        "author"  : "tim_bot",
        "category": "information",
        "message" : "Completed!"
      }
    ],
    "production": [
      {
        "author"  : "jill_bot",
        "category": "information",
        "message" : "Building..."
      },
      {
        "author"  : "jill_bot",
        "category": "error",
        "message" : "Build Failed!"
      }
    ]
  }
}
| <?xml version="1.0" encoding="UTF-8" ?>
<messages>
<staging>
<author>tim_bot</author>
<category>information</category>
<message>Building...</message>
</staging>
<staging>
<author>tim_bot</author>
<category>information</category>
<message>Testing...</message>
</staging>
<staging>
<author>tim_bot</author>
<category>information</category>
<message>Completed!</message>
</staging>
<production>
<author>jill_bot</author>
<category>information</category>
<message>Building...</message>
</production>
<production>
<author>jill_bot</author>
<category>error</category>
<message>Build Failed!</message>
</production>
</messages>
|
|---|
The following are example XPath and JSONPaths that could be used on the above responses to extract information your looking for.
| XPath | JSONPath | Result |
/messages/staging/author | $.messages.staging[*].author | The authors of all messages sent to staging |
//author | $..author | All the authors of all messages |
/messages/* | $.messages.* | All channels messages were sent to. Staging and production. |
/messages//category | $.messages..category | The categories of all messages. |
//staging[3] | $..staging[2] | The third message sent to staging. |
//staging[last()] | $..staging[(@.length-1)]$..staging[-1:] | The last message sent to staging. |
//staging[position()<3] | $..staging[0,1]$..staging[:2] | The first two messages sent to staging. |
//staging[category="error"] | $..staging[?(@.category="error")] | All the messages sent to staging with an error category. This would return no values. |
//* | $..* | All nodes in the response. |
Successful Response Statues
Check each of the response statuses that would mean the request has been successful. If the request returns a status that is not checked then the build event handler will report an error. If errors are to be treated as failures then the build event handler will fail the build at his point.
When To Run
You can specify when the build event handler runs by linking it to a Build Event on the When To Run tab
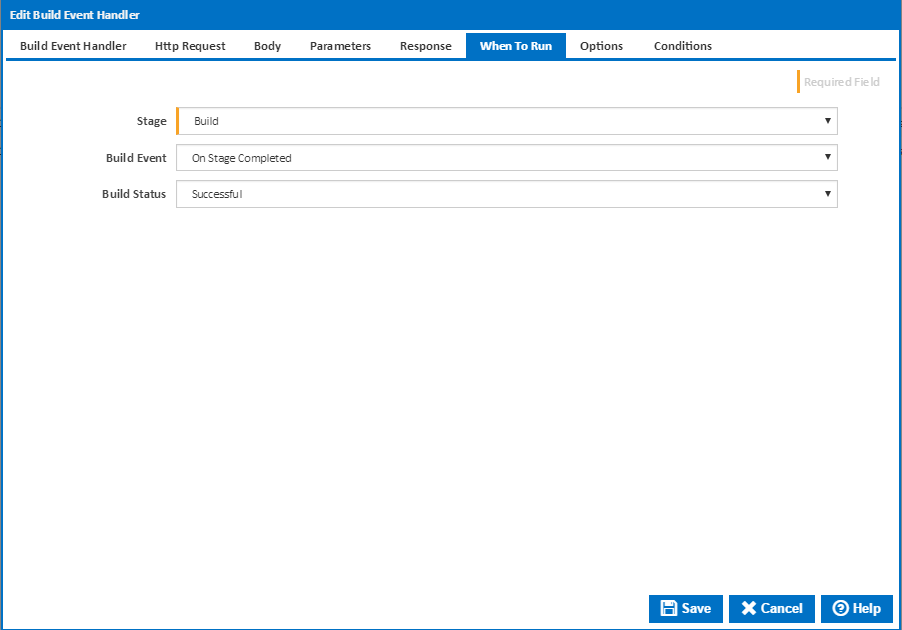
Build Event
Select the event which triggers the tag action. You can choose one of the following Build Events:
- On Build Created
- On Before Build Queued
- On Before Build Start
- On After Build Started
- On Before Stage Start
- On Sending Stage To Agent
- On Stage Completed
- On Build Pending Promotion
- On Before Build Continue
- On After Build Continued
- On Build Stopping
- On Build Completed
Stage
For stage events, select the stage this applies to, or "(all stages)" to trigger the tagging action for all stages
Build Status
For "On Stage Completed" and "On Build Completed", you can choose to trigger the tagging action when the build is Successful or has Failed.
Options
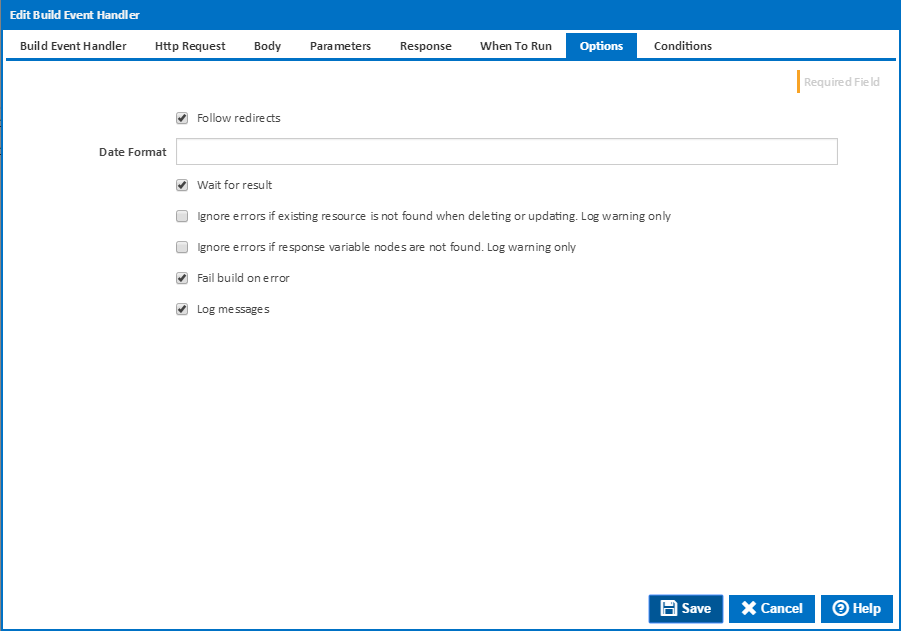
Follow redirects
Clear this option to fail if the HTTP endpoint causes a redirection.
Date Format
Optionally specify the date time format used in your request body. If you leave this blank the action will attempt to parse various formats in the invariant culture.
Wait for result
Clear this option to run the tagging action in a separate thread if you don't care about the result eg. whether the action fails or not.
Ignore errors if existing resource is not found when deleting or updating. Log warning only
An error result will be returned if a Not Found status code is returned when using DELETE or PATCH methods. Tick this option to ignore these errors, only logging a warning to the build log. This is only available if Wait for result is ticked..
Ignore errors if existing response variable nodes are not found. Log warning only
An error result will be returned if a response variable JsonPath or XMLPath expression does not match lease with a matching tag name is not found. Tick this option to ignore these errors, only logging a warning to the build log. This is only available if Wait for result is ticked..
Fail build on error
Tick this to fail the build if the operation returns an error or failure. This is only available if Wait for result is ticked.
Log build messages
When this is ticked, Continua CI will add messages to the build log during execution of the HTTP Request build event handler. Build log messages will only be recorded if Wait for Result is ticked.