Once you are on the Import and Export page in the Administration section, ensure that the Export tab is selected to start the Export Wizard. Then select a project to export and a list of project configurations will then appear for selection.
Configurations
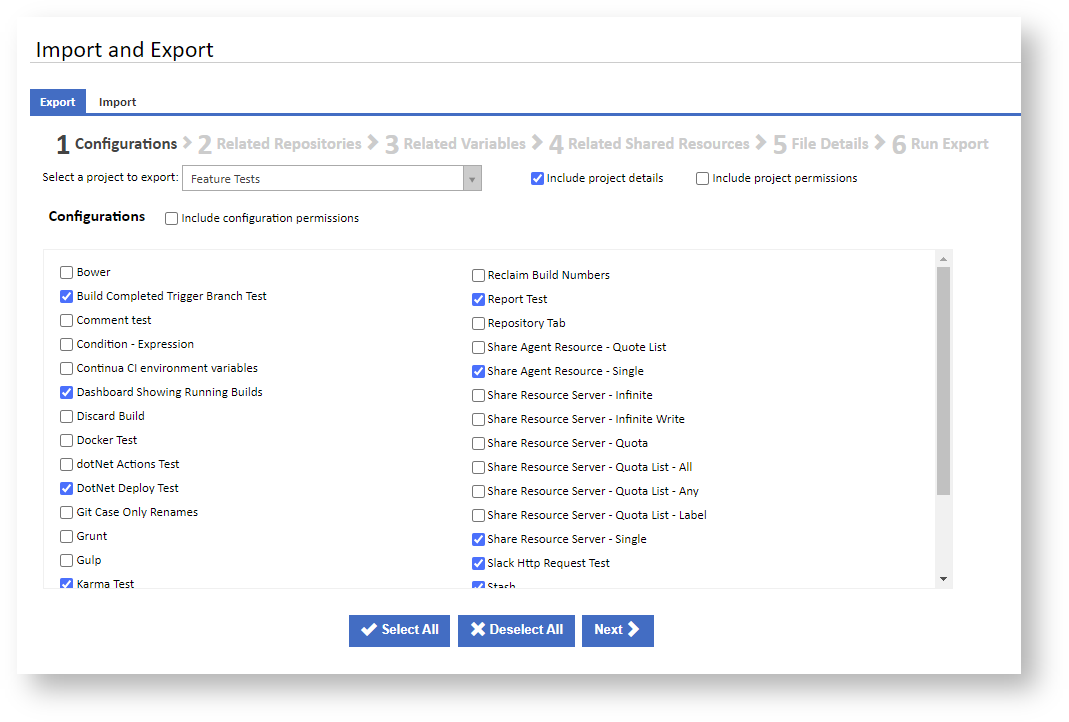
Choose whether you you want to include project details and permissions. These can be used to reproduce the full project on another server, as a new project on the same server or as a backup. Note that exported permissions can only be imported if matching users and roles exist when importing.
Choose one or more configurations to export, and whether to include permissions for all selected configurations, then click Next to continue to the next step of the export wizard.
Related Repositories
If any repositories are associated with the selected configurations, then the Related Repositories step will be displayed. This will show a list of repositories, from all scopes, associated with the selected configurations. If project details was selected, then all project repositories will be listed and preselected. Any configuration-scope repositories owned by the configurations will also be preselected.
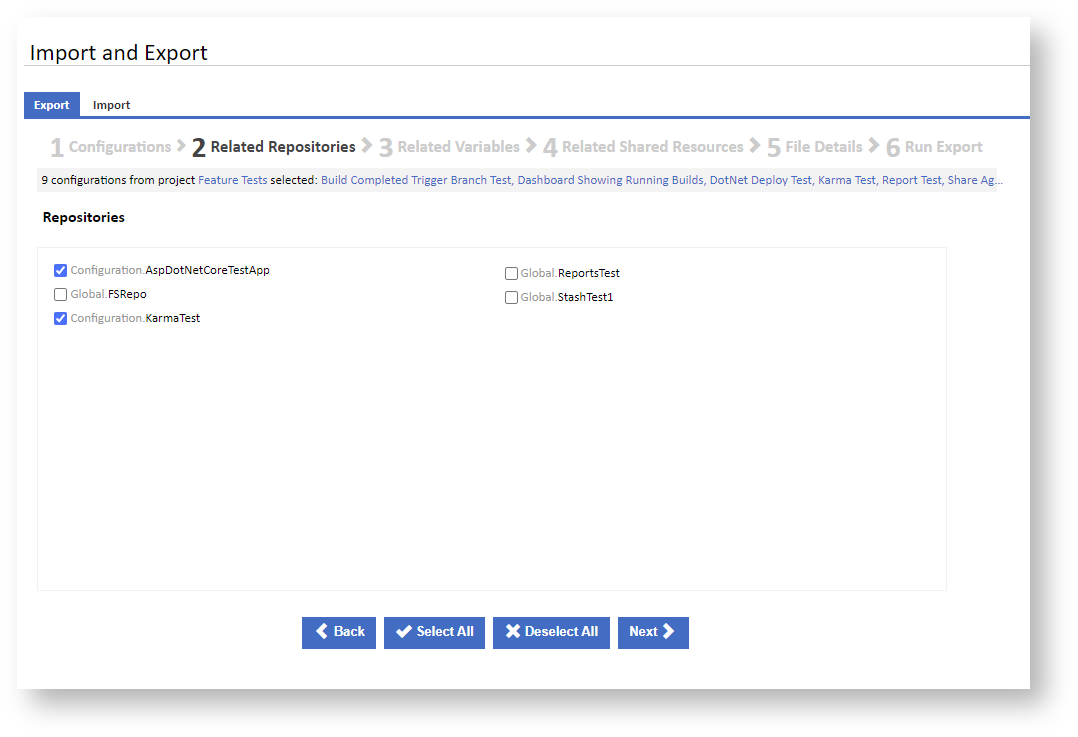
Once you have made your selections, click Next to continue to the next step of the export wizard. You may also click Back to correct previous selections.
Related Variables
If any variables are associated with the selected configurations, then the Related Variables step will be displayed. This will show a list of variables, from all scopes, used by the selected configurations. If project details was selected, then all project variables will be listed and preselected. Any configuration-scope repositories owned by the configurations will also be preselected.
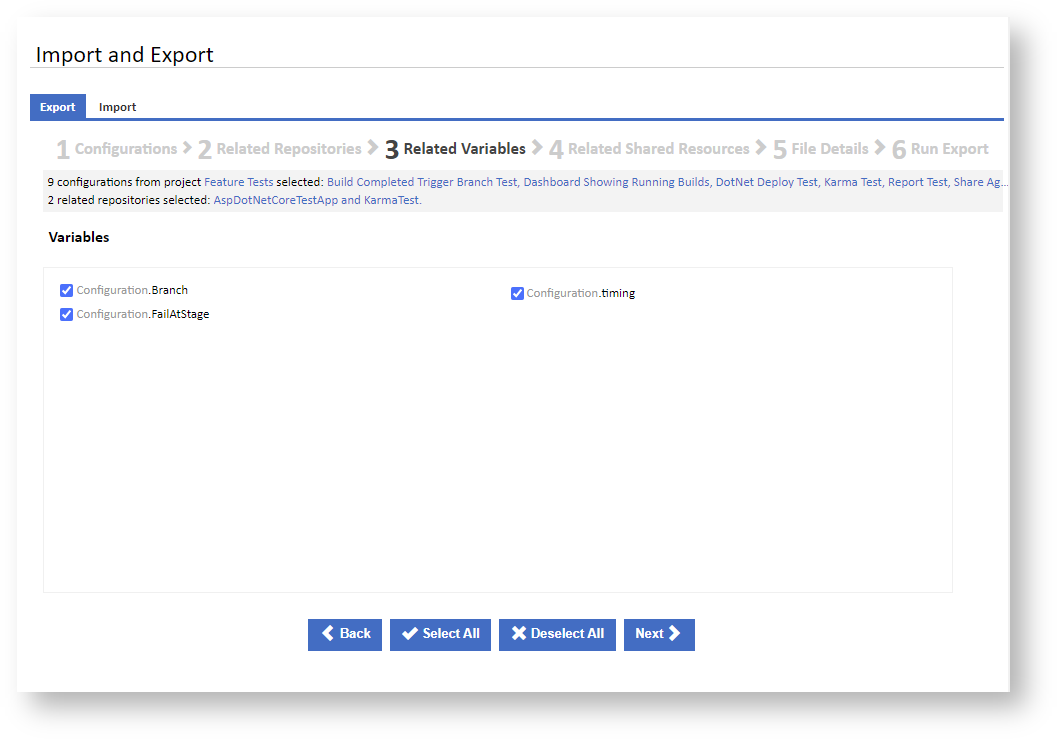
Once you have made your selections, click Next to continue to the next step of the export wizard. You may also click Back to correct previous selections.
Related Shared Resources
If any shared resources are associated with the selected configurations, then the Related Shared Resources step will be displayed. This will show a list of server and agent shared resources, for which any of the selected configurations have a lock defined.
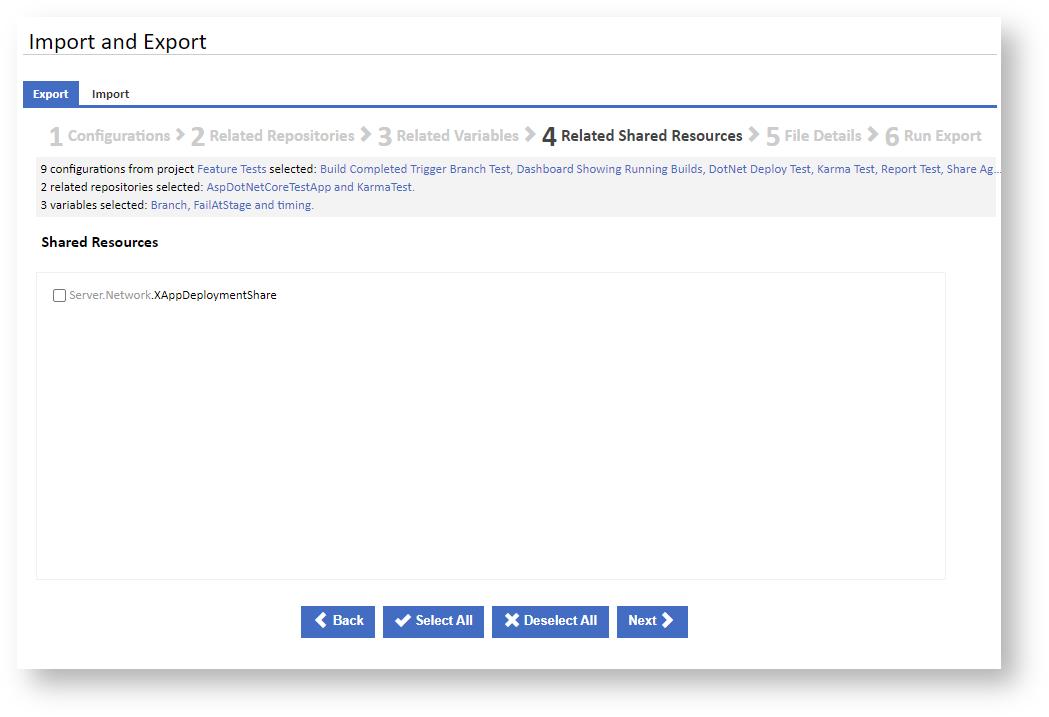
Once you have made your selections, click Next to continue to the next step of the export wizard. You may also click Back to correct previous selections.
File Details
The File Details step allows you to name the export file, choose an export file format and choose other export options.
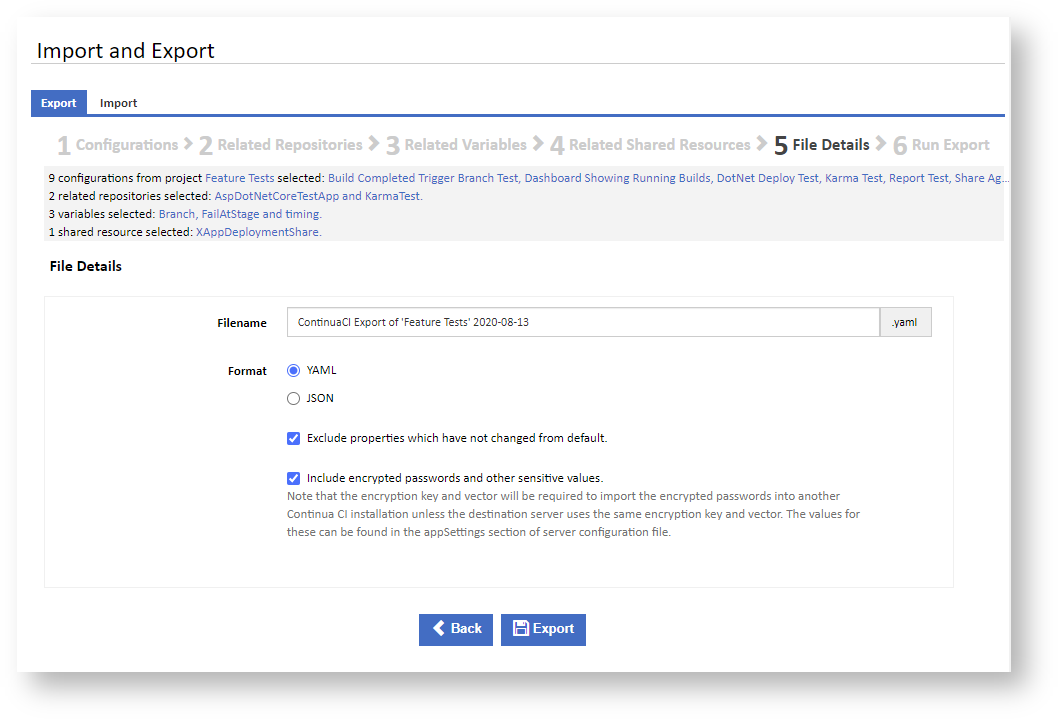
Filename
The export file name is prefilled to include the project name and date. Optionally enter your preferred file name.
Format
You can choose to export as YAML or JSON. There are various opinions about which is best for readability and versioning. Choose whichever you prefer.
Exclude properties which have not changed from default
If this is checked, then only modified properties are exported. This results in a smaller, simpler export file. Uncheck this box to export all properties regardless of whether they have changed. This can be useful to see which properties are available, if you wish to edit the file manually.
Include encrypted passwords and other sensitive values
If this is checked, then passwords and other sensitive values will be encrypted and included in the export files. Uncheck this box to exclude all passwords and sensitive values from the export file.
Note that the encryption key and vector will be required to import the encrypted passwords into another Continua CI installation unless the destination server uses the same encryption key and vector. The values for these can be found in the appSettings section of server configuration file under the keys "Continua.SymmetricEncryptionKey" and "Continua.SymmetricEncryptionVector".
e.g.
<appSettings>

        <!-- DO NOT remove or change the keys BELOW -->
        <!-- They are set during the first installation, changing them will require you to re-enter all passwords fields -->
        <!-- We recommend that you keep a backup of these values  -->
        <add key="Continua.HashSalt" value="**************"/>
        <add key="Continua.SymmetricEncryptionKey" value="**************" />
        <add key="Continua.SymmetricEncryptionVector" value="**************" />
        <!-- DO NOT remove these the keys ABOVE  -->

        .....

</appSettings>
Once you have entered the required details, click Export to start the export process.
Run Export
While the export is running, progress messages are displayed. Once export is complete the resultant file will be automatically downloaded.
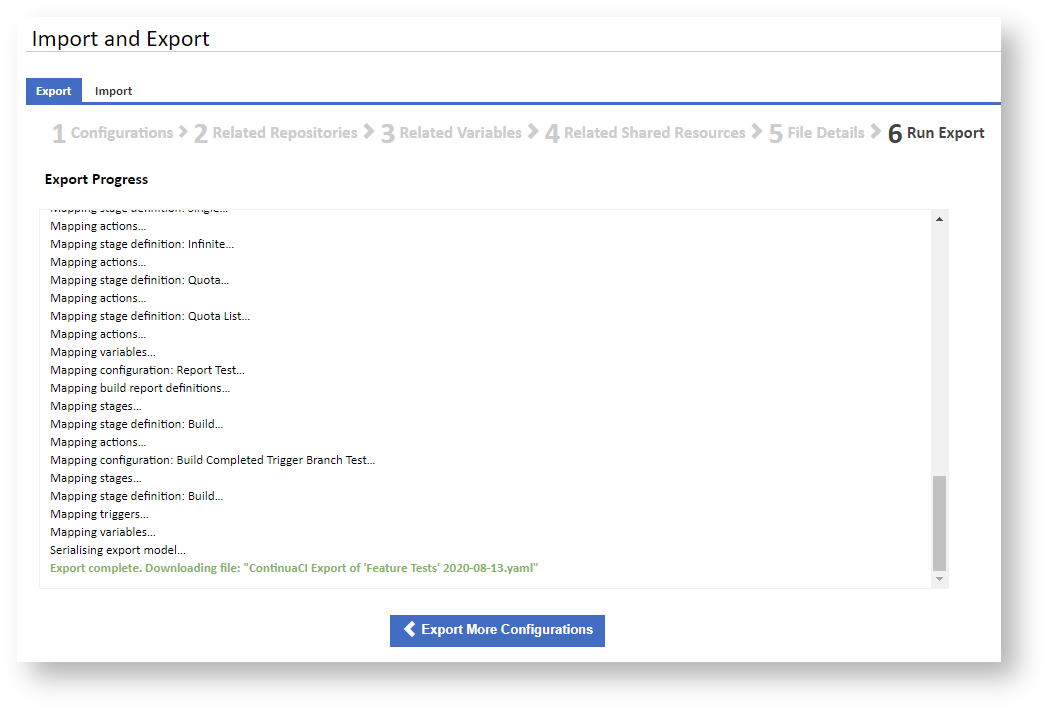
If there are any errors, these will be shown in red and the export will be terminated.