If you are new to Continua, It is recommended that you first read Part 1: Create your First Project. This tutorial assumes that you already have a project created as outlined in Part 1.
Configurations are the most important aspect of Continua CI as they store all information regarding what a build should do when it is executed and how it is executed. You can think of Configurations as the blueprint for each build. Configurations however are not independent and every configuration must be linked to a project. To learn more about Continua's architecture, read Global Settings, Projects & Configurations.
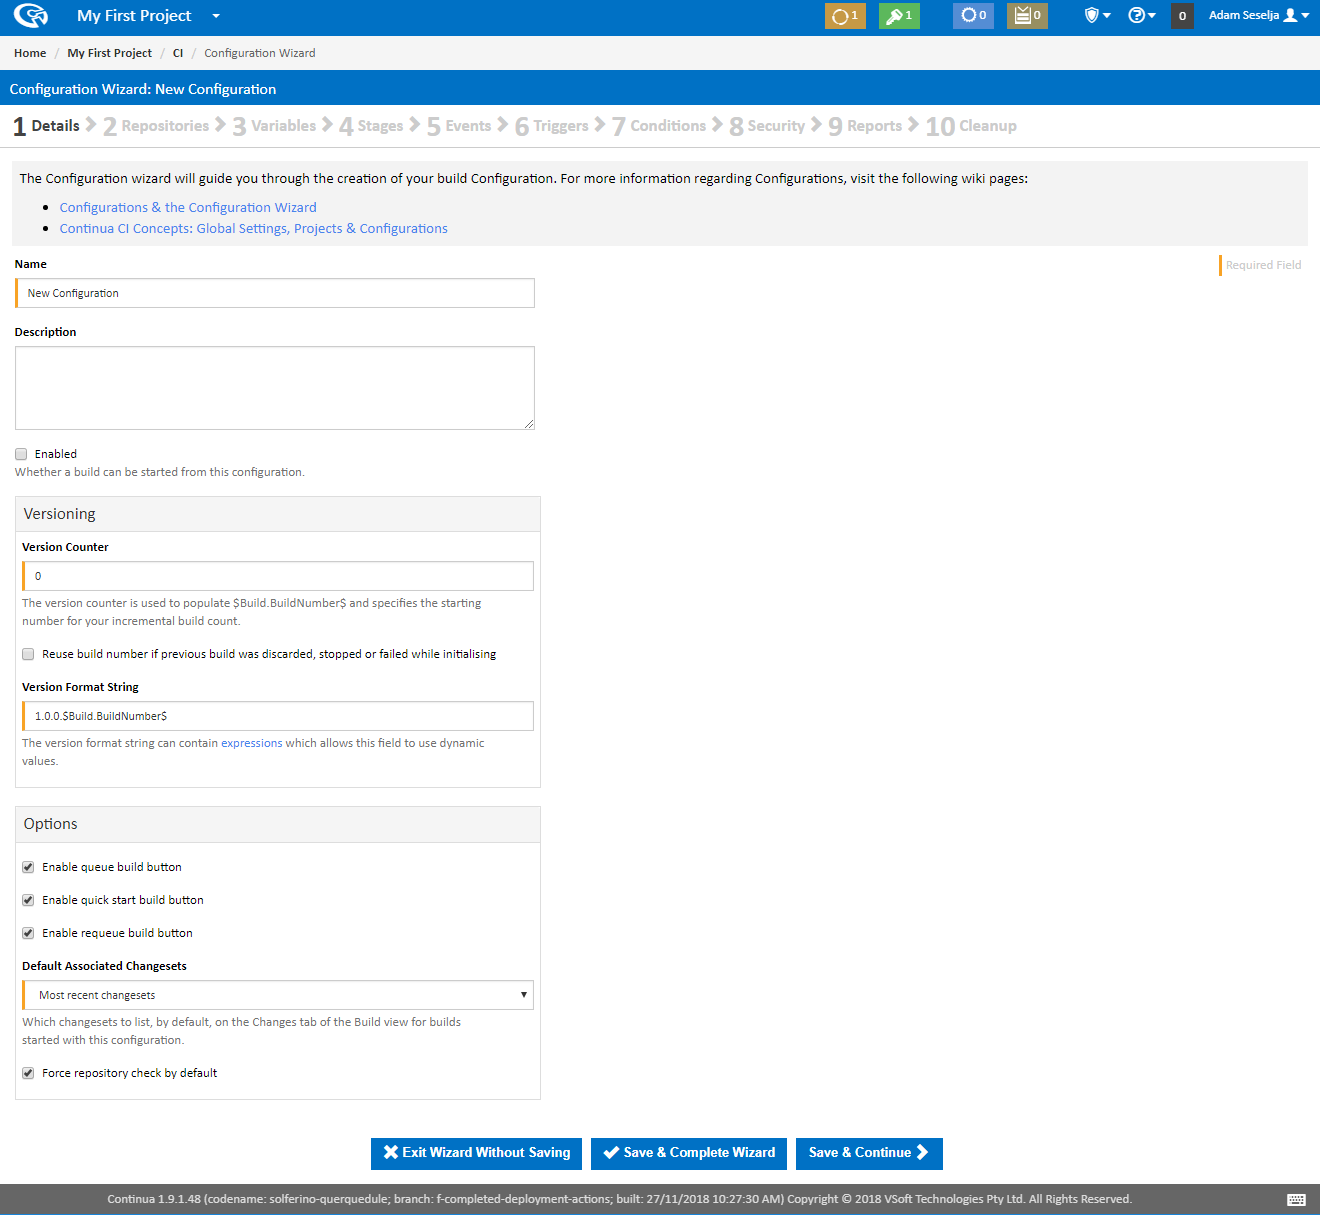
In Part 1 of this tutorial we created our first project but we still need to create a configuration. If you have been following this tutorial then you should now be in the Configuration Wizard and you should see the following screen:
If you are not currently in the Configuration Wizard then the next section outlines how to get there.
Creating a new Configuration (Navigating to the Config Wizard)
Every configuration that is created in Continua must be associated with a project. To create a new configuration we must then first find our existing project.
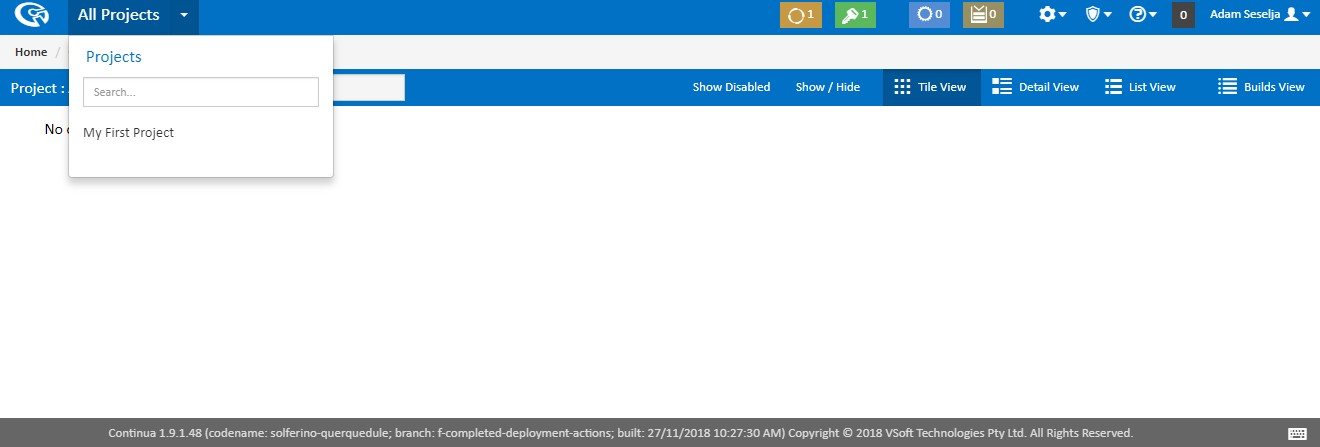
The easiest way to navigate to an existing project is by using the project list located at the top left of every page in Continua, as shown in the image below. You can always check which project you are currently viewing by checking the project name that is displayed. Clicking on the projects name will take you to that project's homepage whilst clicking the dropdown arrow will allow you to select a different project. Once you have several projects in Continua, you can use this list to search for a certain project.
So lets select My First Project from the Project list. This will take us to My First Project's homepage which can be seen below. At the moment this page looks pretty empty and boring but that is because we have not created a configuration yet! A project's homepage shows all the configurations that exist in that project and their current build status. Until we create a configuration there is not much that can be done on this page, so lets create our first configuration.
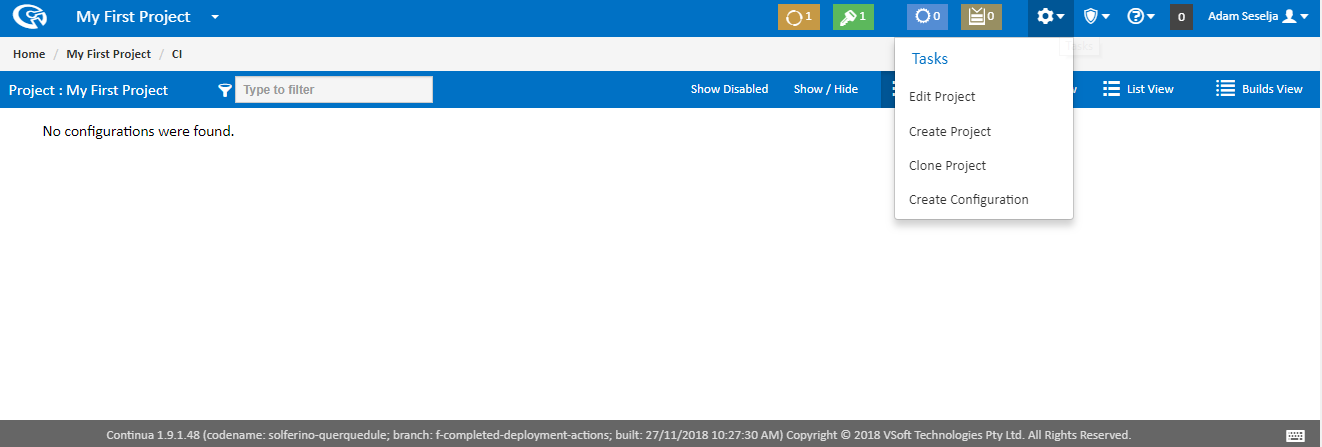
Configurations are created in the Configuration Wizard which can be found by selecting Create Configuration on the Tasks menu. If you do not see these options in the Task Menu then make sure you are on My First Project's homepage.
Configuration Wizard
The first thing you will probably notice about the Configuration Wizard is that it looks similar to the Project Wizard. The reason they look similar is that they share a lot of the same information and properties. Most settings that can be applied to a configuration can also be applied to a project, which means any configuration in that project can access those settings. For example, if you define a variable on a project, all configurations in that project can use that variable when running a build. Conversely, if that same variable was defined on a specific configuration rather then on the project, no other configurations would be able to access that variable or even know that it exists. Anyway, that is getting ahead of ourselves. For now, lets create a simple configuration.
So lets name our configuration so that it matches our first project and lets call it My First Configuration.
There are a few properties that can be set on this page but for this tutorial we do not need to worry about them too much. Check out Creating your first Configuration for more information regarding these properties.
For now though, lets just set the Name, Description and make sure that this configuration is Enabled by ticking the Enabled checkbox.
Once these values have been set, lets save our configuration. Like the Project Wizard, you can either Save & Complete Wizard or Save & Continue. For now we don't want to set any other properties on the Wizard so lets just Save & Complete the Wizard.

Configuration Saved Successfully!
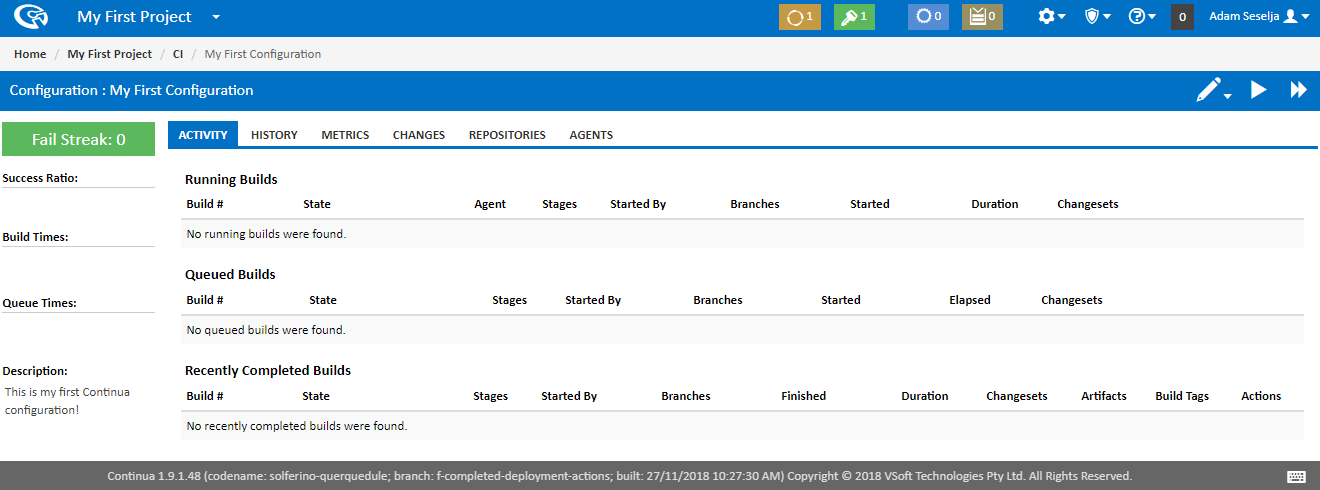
Once you have saved your configuration you will be taken the the Configuration Homepage, as shown below. This page shows you all the recent build activity on this configuration and allows you to manually execute builds. We can run a build now by clicking the Play Arrow, however there isn't any point at the moment as we have not specified a build repository or any build actions.
Editing an Existing Configuration
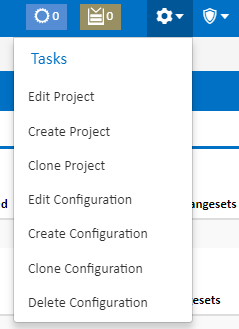
Now that we have successfully created My First Configuration, we will want to edit this configuration at some point in future. If you click on the Task Menu, as shown below, you will notice that it has changed. The actions in this menu change depending on which page you are currently viewing. As we are now on the Configuration homepage we can see the actions for editing, deleting, cloning and even creating new configurations and projects. If you ever need to modify a project or configuration, this menu is the easiest way to get there.
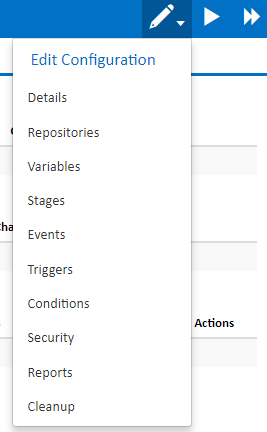
Another way you can edit an existing configuration is through the Edit Configuration Menu. This menu is only available when you are viewing configuration or build pages and it allows you to jump directly to the corresponding page in the Configuration Wizard.
Reviewing Your Projects and Configurations
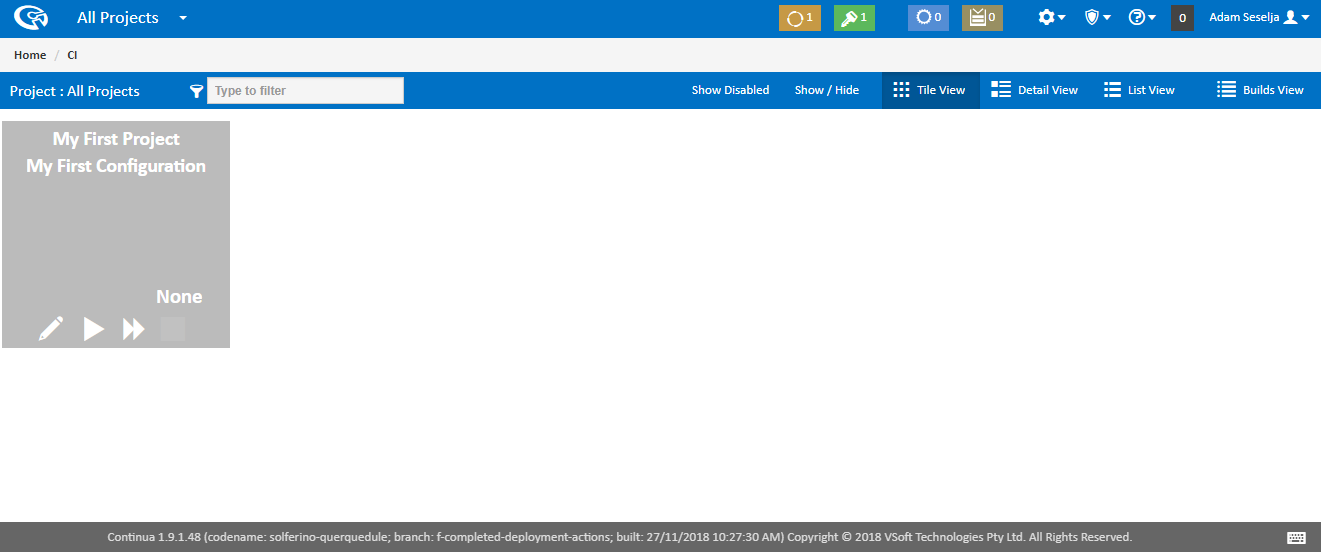
Now that we have created both a project and a configuration, lets head back to the Continua homepage. The Continua homepage can be reached from any page by clicking the Continua logo in the top left of the screen. The homepage, as seen below, now shows our newly created project and configuration! This page is designed to give you an overview of all your projects, configurations and builds. My First Configuration is currently grey because we are yet to run a build.
So far we have learnt how to create and edit projects and configurations, however we still have not executed a build! In the next section of this tutorial, Part 3: Create your First Repository, we will hook our configuration up to a live repository and start playing with a real project.