Additional Stage Information
Workflow Editor
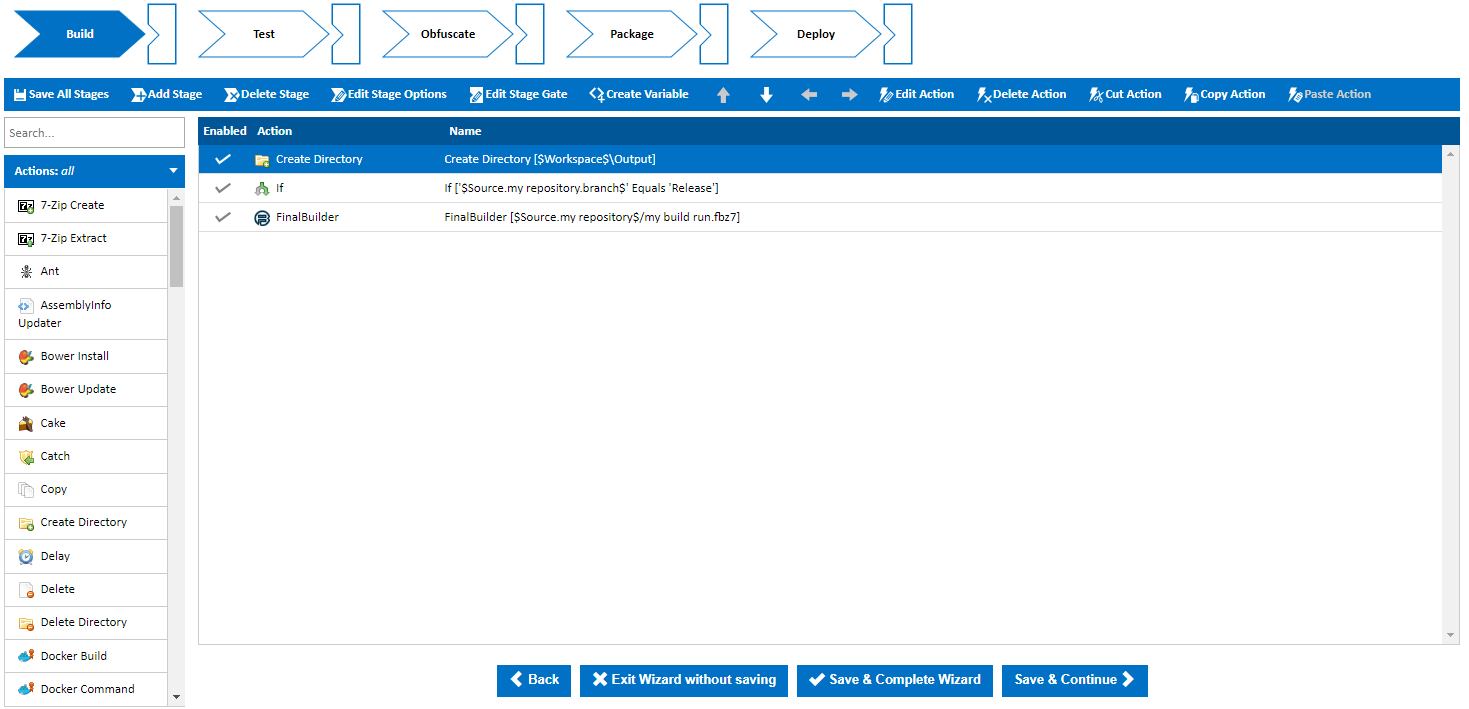
The workflow editor is where you define actions for and control the flow of a build. The workflow editor is where you define a Configuration's Stages and also the actions to be performed in each Stage. The following image shows a newly created Configuration's workflow editor.what your build will do when it is executed. It allows you to break up your build into logical blocks, called Stages. Within these stages you can define the individual actions that are the steps your build will execute when running a build. The image below demonstrates a dummy build within the workflow editor.
UI Elements
Stages and Stage Gates


Above is an example of the stage and stage gate editor which can be found at the top of the workflow editor. Each stage within your workflow Each Stage is shown as a white and blue chevron while each stage gate is represented as block with an triangle removed.
Clicking and selecting a stage will display all the actions within that stage in the 'Action workflow' editor.
Double clicking the stage will display the 'Edit Stage' dialog. See Stage Options for an in-depth guide of the 'Edit Stage' dialog.
Stages can be reordered by dragging and dropping them into the correct location.
Clicking a stage gate will open the 'Edit Stage Gate' dialog. See the 'Edit Stage Gate' section at the bottom of this page for more information about stage gates gray chevron with the stage name in the middle of it. Single clicking on a Stage will display it's action in the Action Workflow below it. Double-Clicking on a Stage will display the "Edit Stage Option" dialog, stage options are explained below. The Stage Gate is displayed as a green chevron. Double-Clicking a Stage Gate will display the "Edit Stage Gate" dialog which is also explained below.
Stage and Action Toolbar


The Stage and Action tool bar provides shortcuts functionality to modify stages and actions. The table below provides a short description of each option.
| Functionality | Result |
|---|---|
| Save All Stages | All changes made in the workflow editor will be saved. |
| Add Stage | Creates a new Stage |
| at the end of the Stage Editor |
| Delete Stage |
| Deletes the currently selected stage. | |
| Edit Stage Options | Pops up a dialog and displays the currently selected stage's options. You can also see this screen by double-clicking the Stage. |
| Edit Stage Gate | Pops up a dialog and displays the currently selected stage's stage gate. You can also see this screen by double-clicking the Stage's Stage Gate. |
| Create Variable | Pops up a Create Variable dialog like the ones seen on the Variables wizard pages. Variables created through this dialog are Configuration Variables. |
| Move Up | Moves the currently selected action up the workflow. Actions can also be moved up with the 'Ctrl + UP' keys |
| Move Down | Moves the currently selected action down the workflow. Actions can also be moved down with the 'Ctrl + DOWN' keys |
| Move Left | Makes the currently selected action a child of the previous action. Actions can also be moved up with the 'Ctrl + LEFT' keys |
| Move Right | Makes the currently selected action a sibling of the previous action. Actions can also be moved up with the 'Ctrl + RIGHT' keys |
| Edit Action | Pops up a dialog containing the currently selected action's options. You can also see this screen by double-clicking an action. |
| Delete Action | Prompts the user to delete the currently selected action. You can also |
Actions Workflow
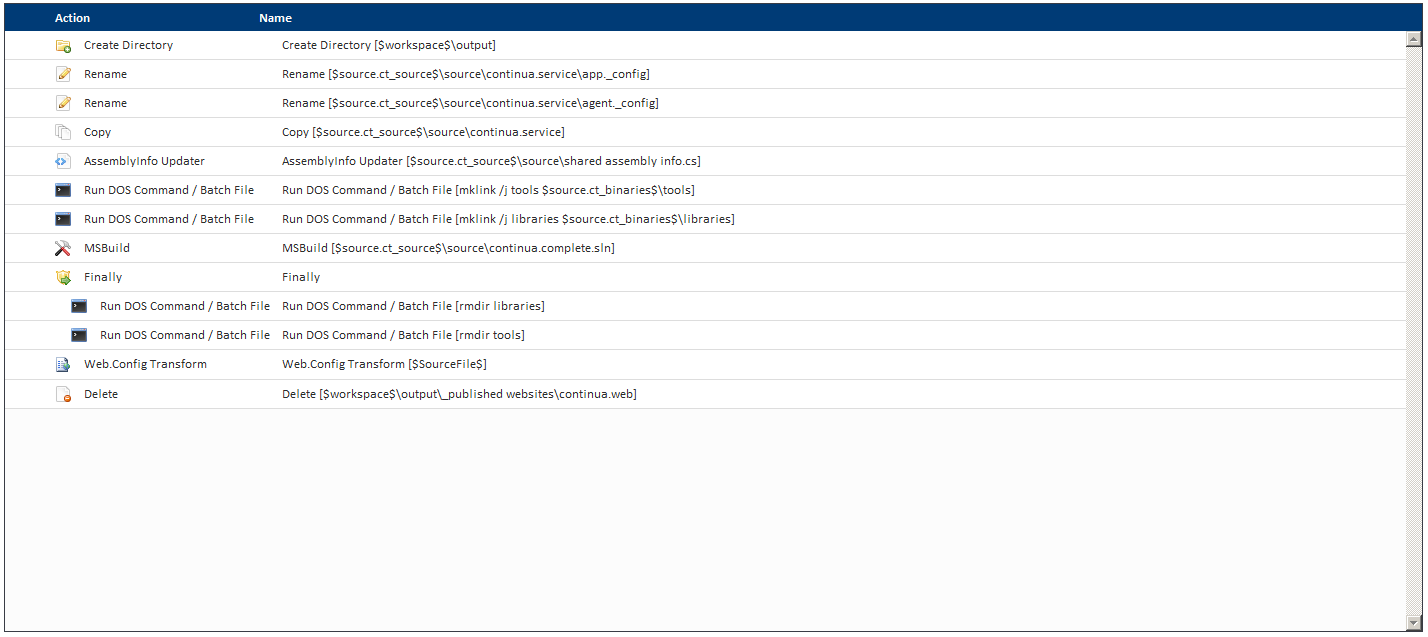
The actions workflow is a list of actions in execution order from top to bottom. Actions can be moved around by using the arrow buttons on the tool bar and can be edited by double clicking them.
Action List
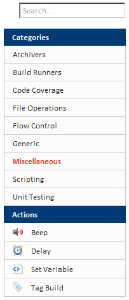
The action list allows you to search for actions by name and groups actions into categories for each navigation. When searching or click a category, the actions are displayed in the bottom pane under "Actions". Clicking an action will pop up a dialog and allow you to input properties for that action. The action will then be inserted as the last element in the action workflow. Alternatively, you can drag and drop an action from the action list to the exact position in the action workflow. Upon dropping the action, the same dialog pops up prompting you to input the action's properties.
Using the editor
Editing Stage Options
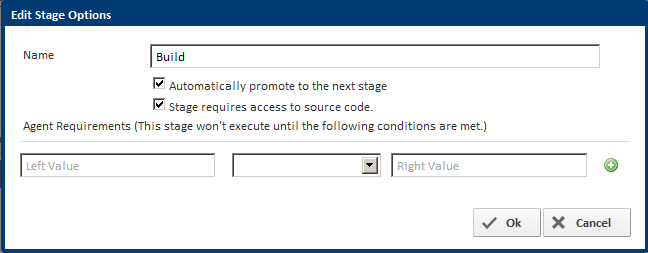
Stage Options are defined per stage and offer a number of ways to control the flow of the workflow. When a stage is executed on an agent, the agent will look for any repositories attached to the configuration and copy the contents of those repositories to its local machine. If your stage does not require access to anything in those repositories then there's no use copying those repositories so you would un-ticked the option "Stage requires access to source code". If you would like to stop a build at a certain stage so you can review the result before the next stage executes then you would un-tick the "Automatically promote to the next stage" option.
Note: If a stage is setup to not automatically promote to the next stage, you can later manually promote that stage from the builds page for that build.
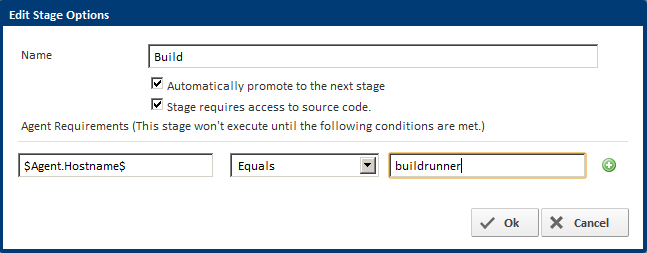
Finally, you can choose to put Agent Requirements on the Stage which are checked before the stage is executed. By using conditions you can tell Continua to only executed that stage when all those conditions are met. For example, you can specify that the stage only run on an agent with a hostname of "buildrunner". The condition would look like this:
Editing Stage Gates
delete an action with the delete key. | |
| Cut Action | Removes the selected action and its children and places it on the clipboard |
| Copy Action | Copies the selected action and its children and places it on the clipboard |
| Paste Action | Inserts the current clipboard action and its children into the current stage |
Using the Editor
Editing Stage Options
See Stage Options
Editing Stage Gates
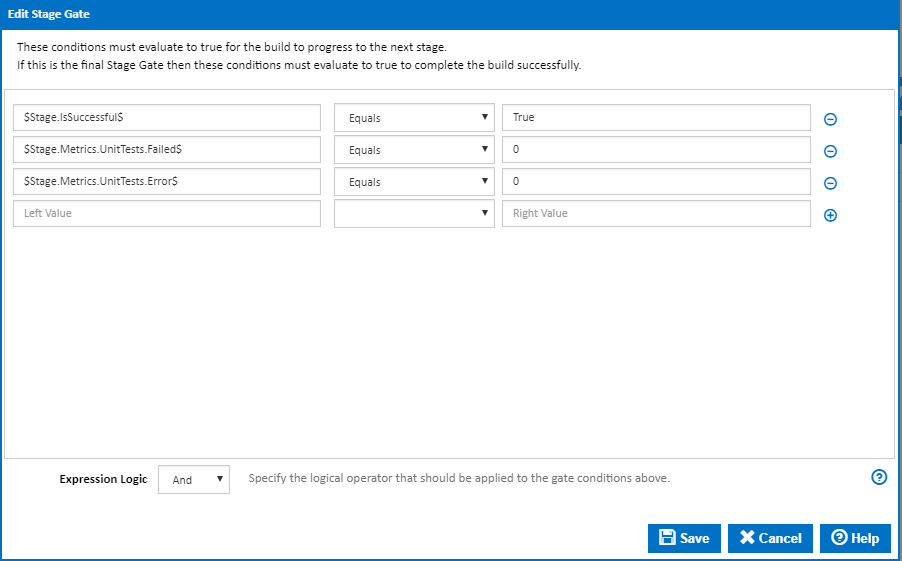
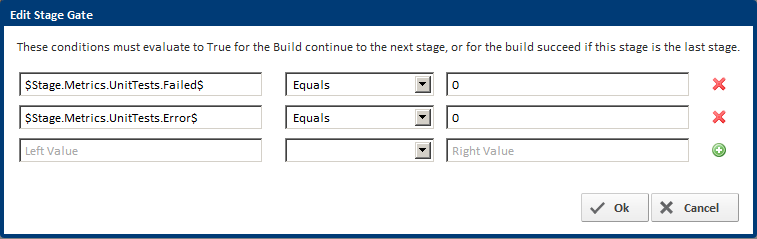
Stage Gates are attached to a Stage Gates are attached to the previous stage and are simply a list of conditions that must be met before the next stage is executed. For example, you can creat create a condition where it will only evaluate to true once the server's local time reaches midnight. Stage Gates also come with default conditions which specify that all unit tests that ran in the previous stage must have passed. You can however choose to remove these default conditions.
Action Workflow
See Actions for details on editing the action workflow