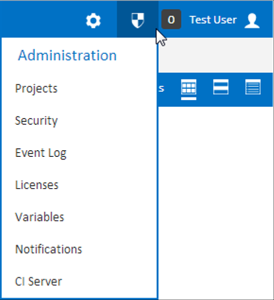
The Users page can be found in the administration menu under Security. The user's page lists all the users in Continua and allows you to create, edit and delete them.provides the functionality for managing all users.
| Table of Contents |
|---|
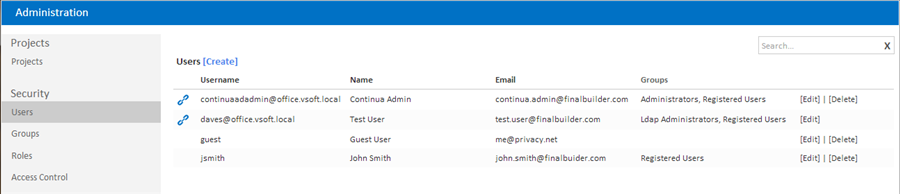
When using LDAP or Mixed authentication mode, a link icon is used to denote users which that are linked to a Windows user account.
Windows Users vs Standard Login Users
Within Continua, there are two types of users:
- Windows users. Windows users do not need to login to Continua CI as their Windows credentials and authentication are automatically passed in. Windows users are only available when Continua authentication mode is configured to either LDAP or Mixed modes. All windows users are denoted in the users list by a blue chain icon.
- Standard login users. These users are created completely within Continua CI and require the user logs in to Continua with their own unique username and password. Standard login users are only available when Continua's authentication mode is configured to either Forms or Mixed modes.
Creating a
...
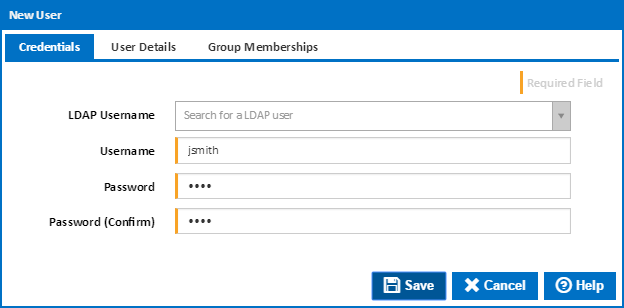
Clicking the "Create" link will pop up a dialog with all the input fields needed to create a new user.

Windows user in LDAP or Mixed authentication modes
There are two ways that Windows users can be created within Continua CI. During installation, an admin group was specified that linked Continua to an associated Active Directory administration group. This was designed so that when any user within this Active Directory administration group attempts to login to Continua, they will automatically be created as a user with administration privileges.
If a user is not present in the Active Directory administration group mentioned above, they will need to be created as a Continua CI user before they can access Continua's environment. When creating a Windows user, the matching LDAP Username must be selected.
Continua synchronises its user and group lists with Active Directory every 30 minutes so if a change has been made to Active Directory and it isn't being reflected within Continua, you can use the Synchronise LDAP functionality to force Continua to update its LDAP lists.
Creating a standard login user
Apart from the initial administrator and guest user, every standard login user must be explicitly created by a Continua administrator.
Guest User Account
A special Guest user account is created within Continua which allows administrators to control the level of access of users that do not have login credentials for Continua. By default, the guest account has no permissions and cannot do anything within the Continua environment, however this can be changed so that non-logged in users can access everything, nothing, or somewhere in between.
While the guest account cannot be deleted, it can be disabled. By disabling the guest account, no user will be able to access Continua without a login.
Disabling User Accounts
User accounts can be disabled to deny a particular user access to Continua. If a user account is disabled, they will not be able to login to Continua as that user. However, if the guest account is active, they will still be able to access the Continua environment as a guest user (including all permissions that belong to the guest account). If the guest account has been disabled then a disabled user will be completely locked out of the Continua environment.
Creating a User
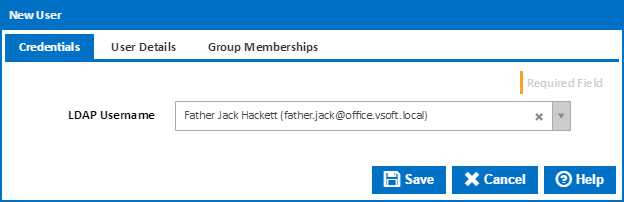
The fields displayed when creating a user The fields displayed will depend on the current authentication mode. In LDAP or Mixed mode, the 'Ldap usernameLDAP Username' selection box is available which will allow you to link the user to an existing Windows user. If an Ldap username LDAP Username is selected, the Username and a Password fields are removed. If a standard user is being created, the LDAP Username MUST be left empty.
Standard User
To create a standard Continua CI user, enter a username and password,
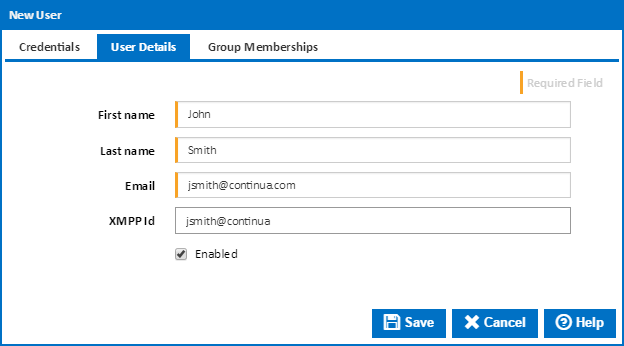
Then add the name, email and XMPP details.
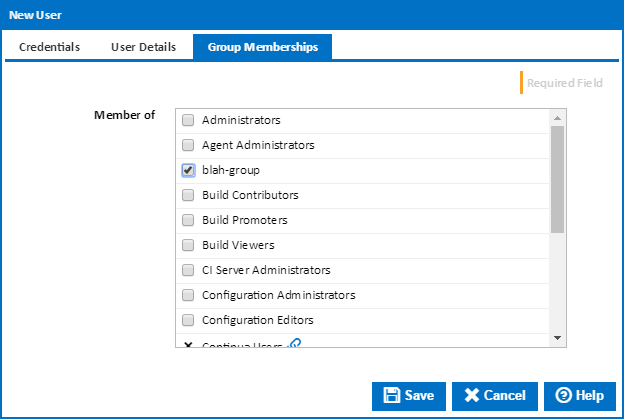
Finally, allocate the user to any Continua CI groups.
Window User
To create a Windows user, type some letters in the user's name and select an LDAP Username from the dropdown.
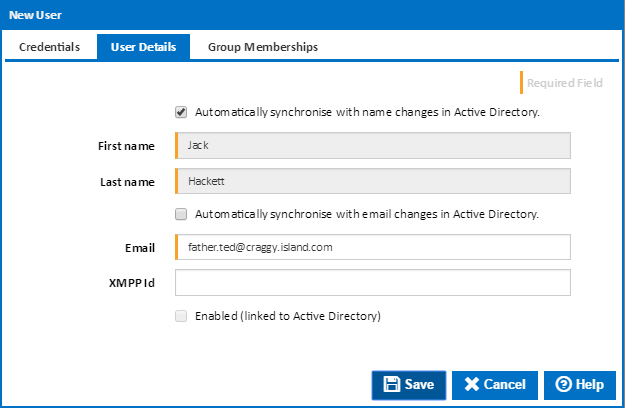
You can then choose to automatically synchronise the name and email, or make change the name and email loaded from Active Directory. You can also change the XMPP Id. Note that the user will only be enabled, if enabled in Active Directory via Windows Administration tools.
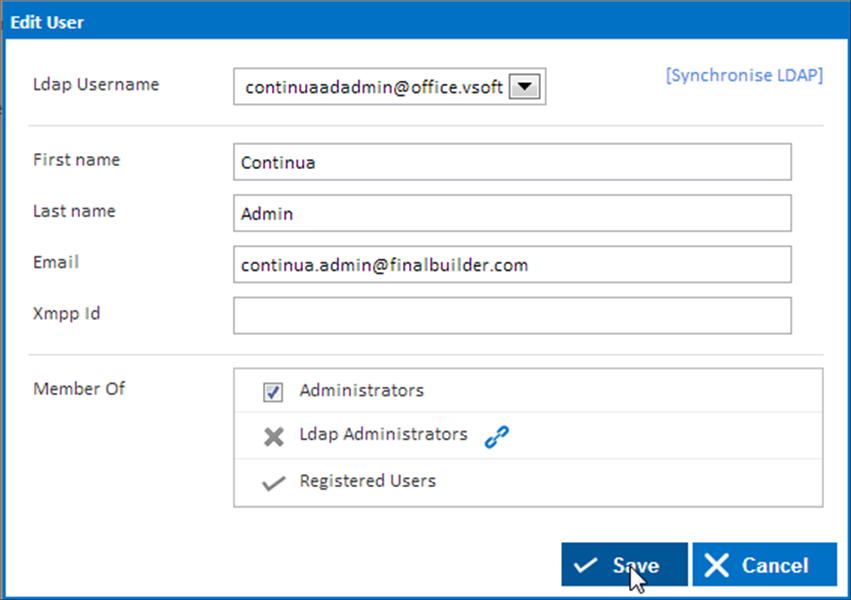
You can also allocate the user to any Continua CI groups. NOTE: you All displayed fields are required except for the Xmpp Id. You can also optionally choose to add the user to a group by selecting the group or groups from the "Member Of" section. NOTE: you cannot add a user to a group which is linked to an LDAP group here. Membership of LDAP groups can be managed via Windows Administration tools.
The list of available Ldap users and their group membership is automatically synchronised with Windows every 30 minutes. This process can be triggered immediately by clicking on the 'Synchronise LDAP' link.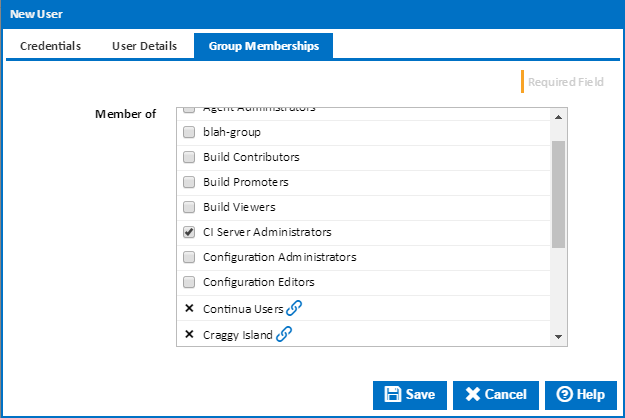
Editing a User
Clicking the "Edit" link at the end of each row will pop up a dialog with all the input fields needed to edit the selected user.
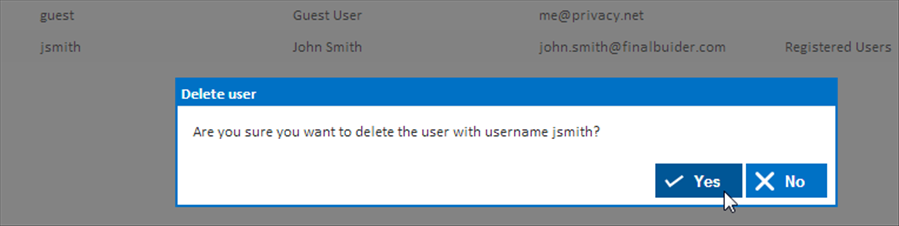
Clicking the "Delete" link at the end of each row will pop up a confirmation prompt. Click 'Yes' to delete the user.
The edit options are the same as the options provided when creating a user. The only difference being that the password field is locked. To change a users password, click the edit icon to the right of the password field (which unlocks the password) and specify the new password.