...
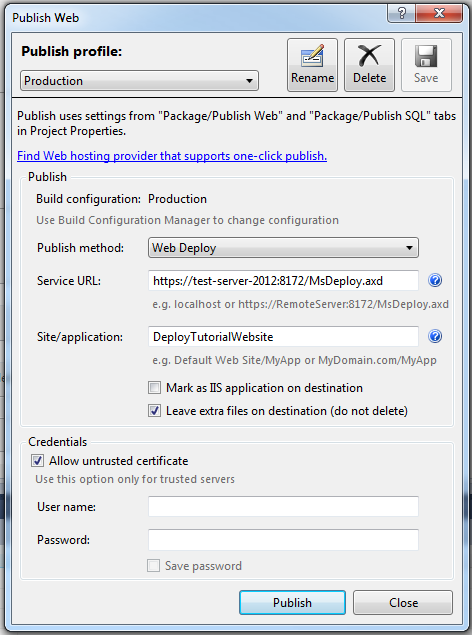
- First, make sure the Publish Profile dropdown is set to Production.
- Change the Publish method to Web Deploy.
- Next we need to specify our Web server. The Web Deployment Handler listens on port 8172 so for the Service URL property needs to be in the following format: https://<server_name>:8172/MsDeploy.axd.
- For the Site/application property we need to define our IIS Website name. So lets set Site/application to DeployTutorialWebsite.
- Finally, check Allow untrusted certificate. This allows non administrator users on the web server to publish changes to your website. Depending on your development setup, you may want this on or off, but for the sake of this tutorial lets leave it on for now.
Now lets publish our Websitewebsite. If everything has gone according to plan then the Publish will have succeeded. Now if you check your website you should see the site up and running. If there were any issues publishing your website, these will need to be resolved before moving on to automating your publish with Continua.
...
By splitting our build into a Build and Deploy stage we are compartmentalising our build into two seperate separate processes. For a standard build process, you would never want to deploy your website unless your solution compiled correctly, passed all unit tests, etc. By breaking your process into two separate stages, you can use Stage Gates to fail the build if any of these tests fail.
...
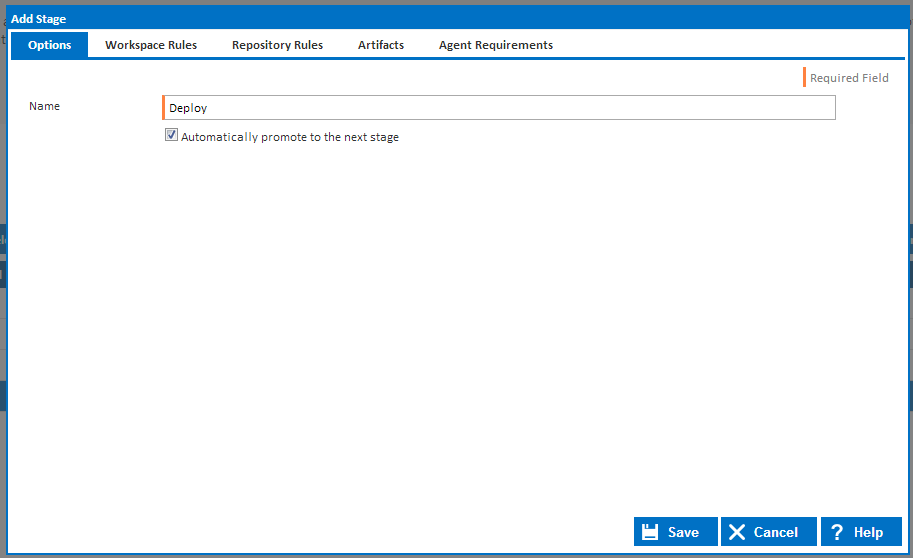
Navigate back to your Workflow editor and click Add Stage to create a new stage after our Build stage.
This will bring up the Add Stage Dialog as shown below. There are plenty of options and rules that can be set for a stage but for now we only need to worry about the Stage Name. So lets call our new stage Deploy and then save the stage.
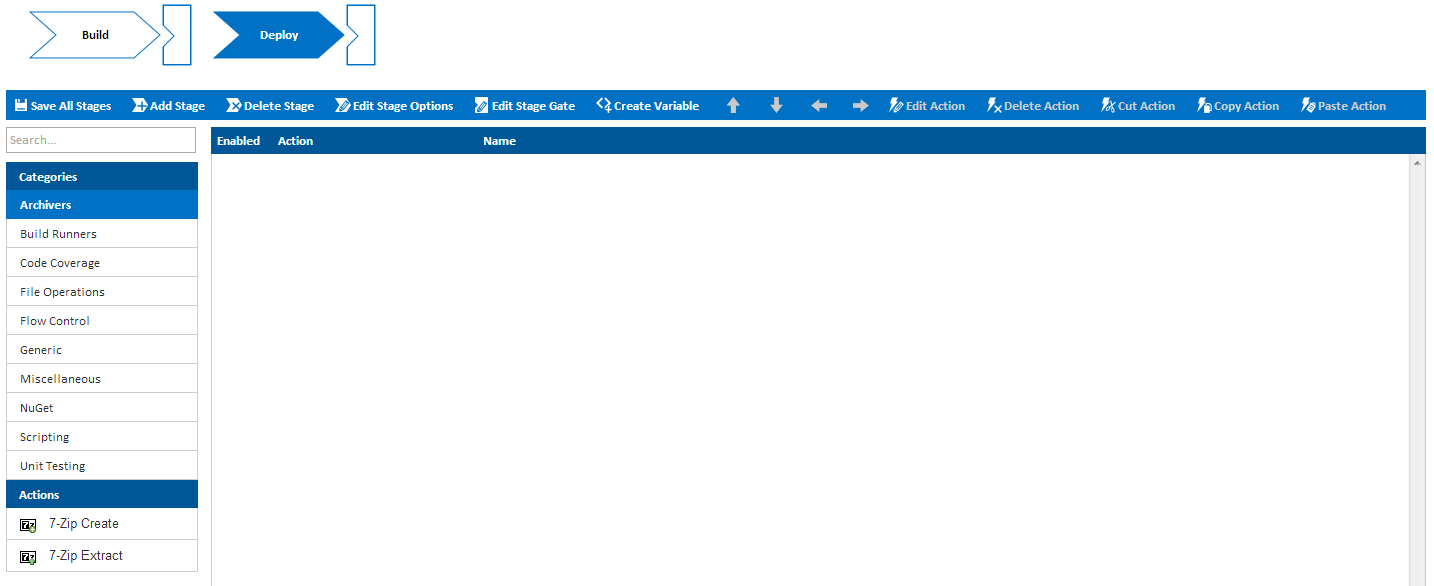
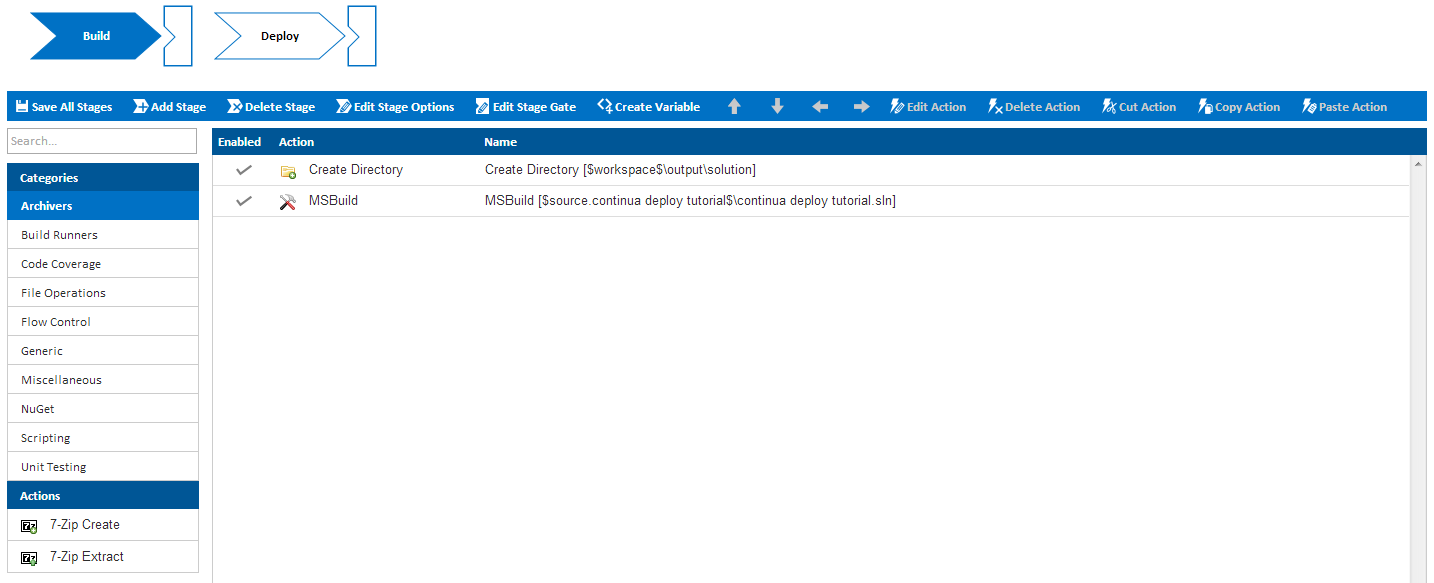
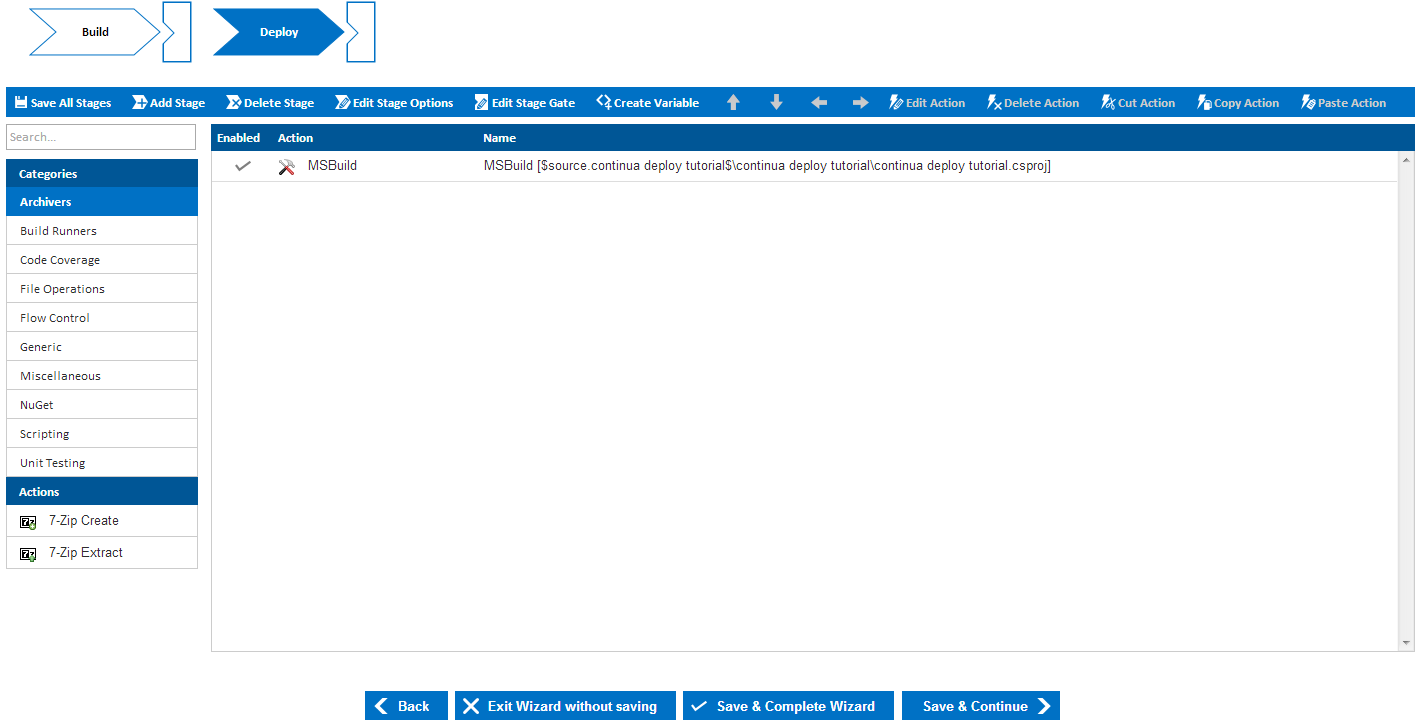
Once you have saved your stage, you should now see your two stages, Build and Deploy, listed across the top of the page. You may notice that when the Deploy stage is selected, our actions disappear! When the Deploy stage is selected, we are shown the workflow editor for the Deploy stage. If you select the Build stage, you will then see all our previously created actions as they belong to the Build stage workflow.
Move our Deploy Actions to the Deploy Stage
...
Once the actions have been copied over, you should have two stages that look like this:
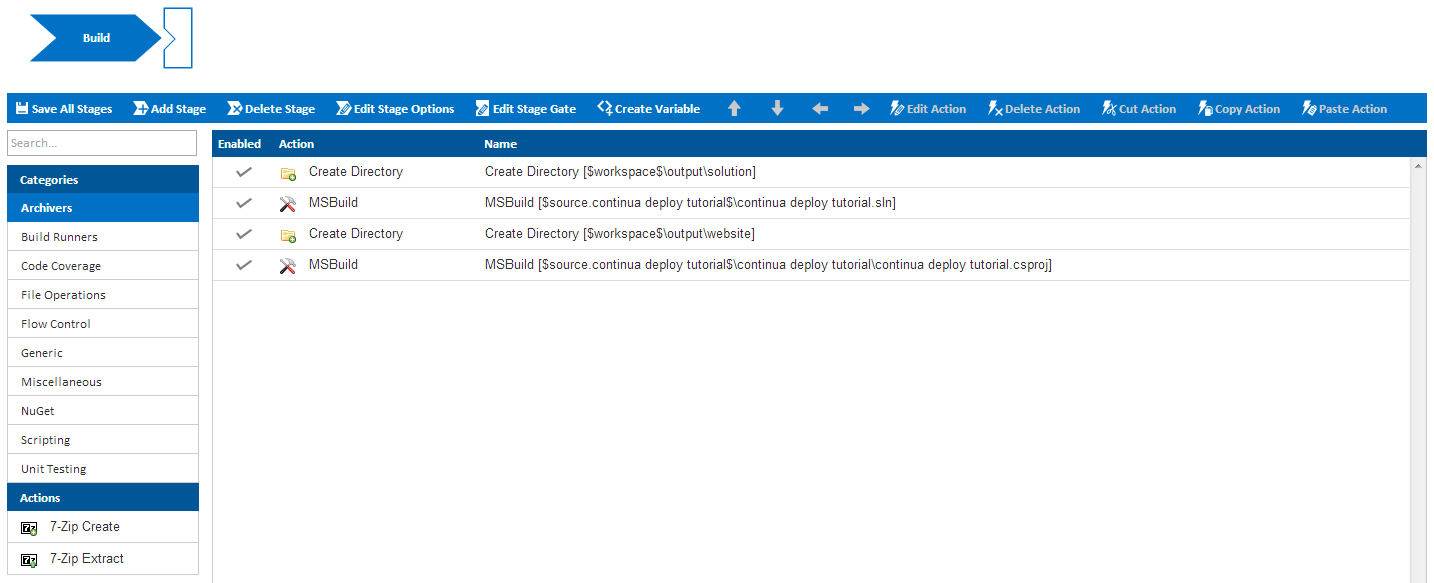
Your Build Stage:
Your Deploy Stage:
Automatically Publish and Package our
...
Website
Now that we have broken our build process into two stages, we can change our Deploy MSBuild action so that it automatically Packages and Deploys our website. Basically, we now need to configure this action so that we incorporate all the information regarding packaging the website into the MSBuild Action.
...
Properties take the form of <property_name>=<property_value> and each new property must begin on a new line. So lets add the following properties so that our Action can successfully deploy and package our web sitewebsite.
| Code Block |
|---|
DeployOnBuild=True MsDeployServiceUrl=https://<server_name>:8172/MsDeploy.axd AllowUntrustedCertificate=True MSDeployPublishMethod=WMSvc CreatePackageOnPublish=True UserName=<domain>\<username> Password=<password> |
...
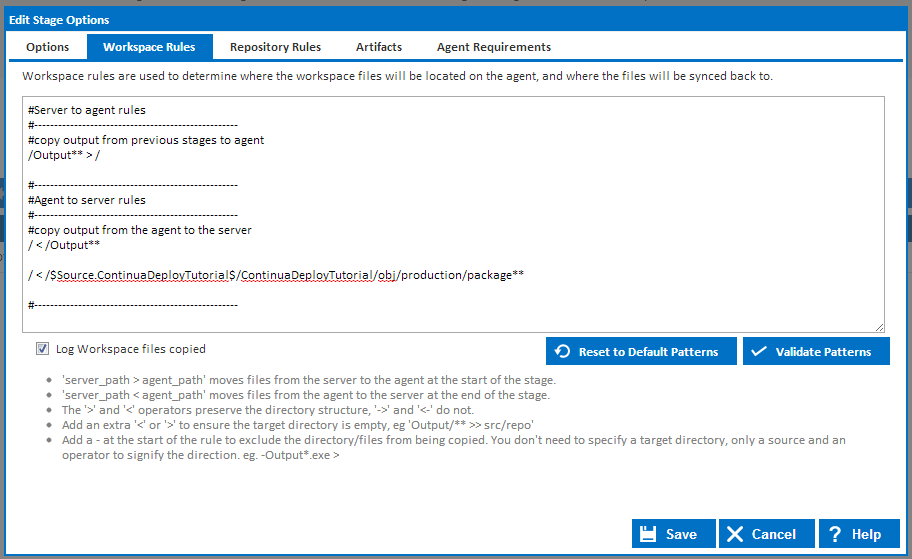
Your Workspace Rules should look something like this:
Registering our Website as an Artifact
...
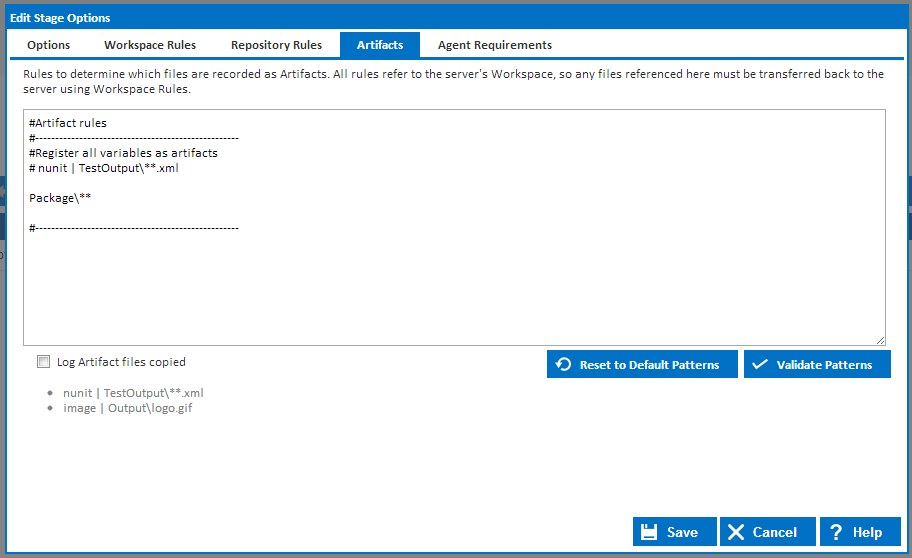
Your Artifact rules should now look something like this:
Save your stage settings, then click Save & Continue.
...
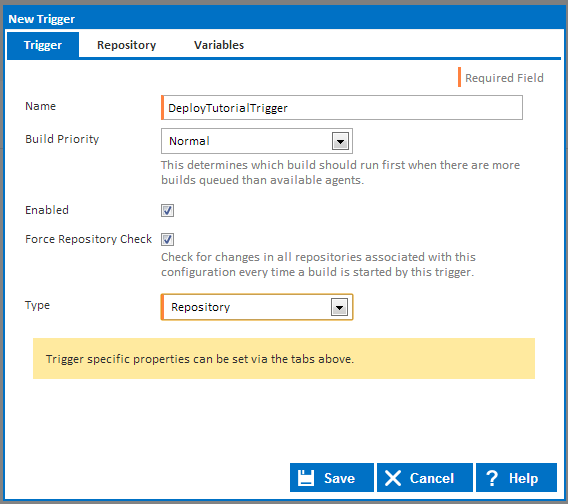
- Name: DeployTutorialTrigger
- Type: Repository
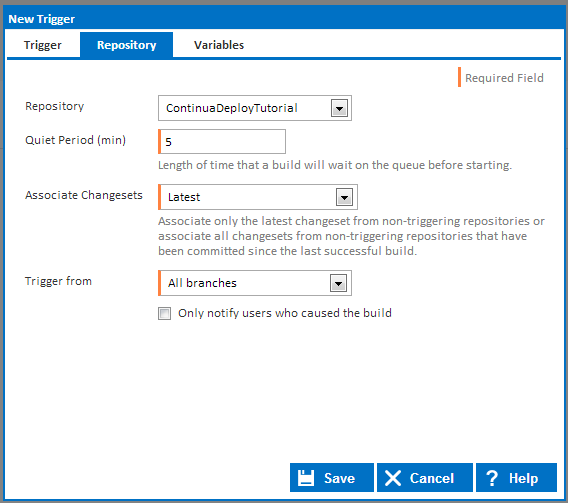
Once the Repository type has been selected, a repository tab will appear at the top of the dialog. Navigate to the Repository tab and set the Repository property to ContinuaDeployTutorial.
Once those properties have been saved, you have then successfully created a trigger that will monitor your repository for any changes and automatically trigger a build. More information can be found on the Repository Trigger page.
Deploy our Website
...
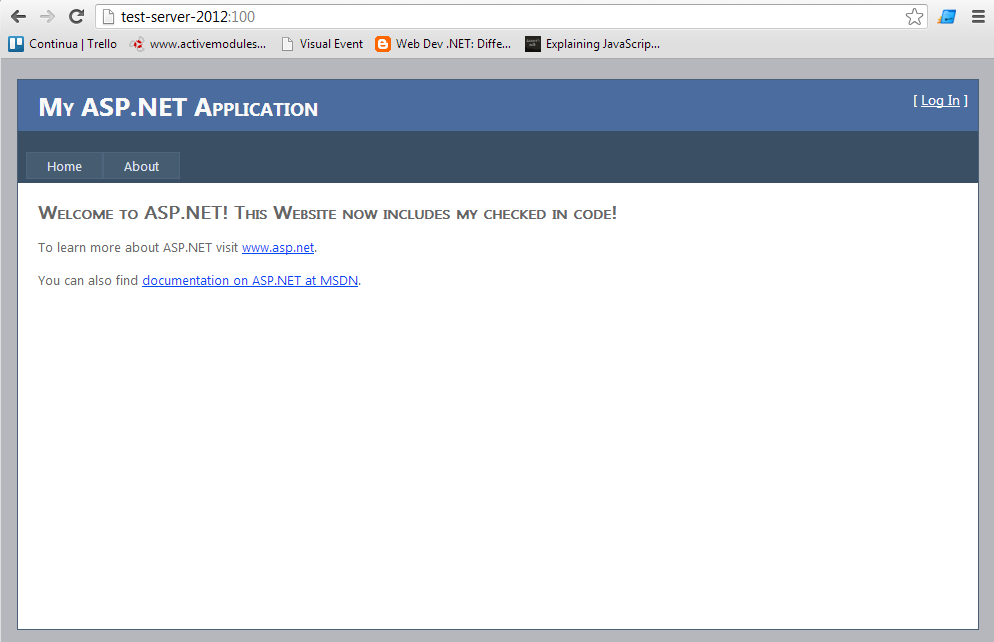
Once the build completes successfully, navigate to your website and the source code from the latest checkin should now be deployed on your website, as shown below.
Once your build has finished building, clicking the build number will bring up the Build Details page. If you then navigate to the artifacts page, you will then see all the files that were part of the website package. If you ever need to roll back a deploy then you can do so through this page.
...
- Use Continua Variables to specify which web server you are deploying. For example, you can setup your trigger to set the following variables depending on which branches of your repository were checked in.
- Set a variable that tells MSBuild which Configuraiton Configuration Solution it should use to build the web project.
- Set a variable that tells MSBuild which Server the web site website should be deployed to.
- So if a 'master' branch is checked in, it will deploy to your production server, while if a 'dev' branch is checked in, it should deploy to your test server.
- Add an Issue Connector to your repository.
- Add Unit tests and code coverage tests to your build process.
...