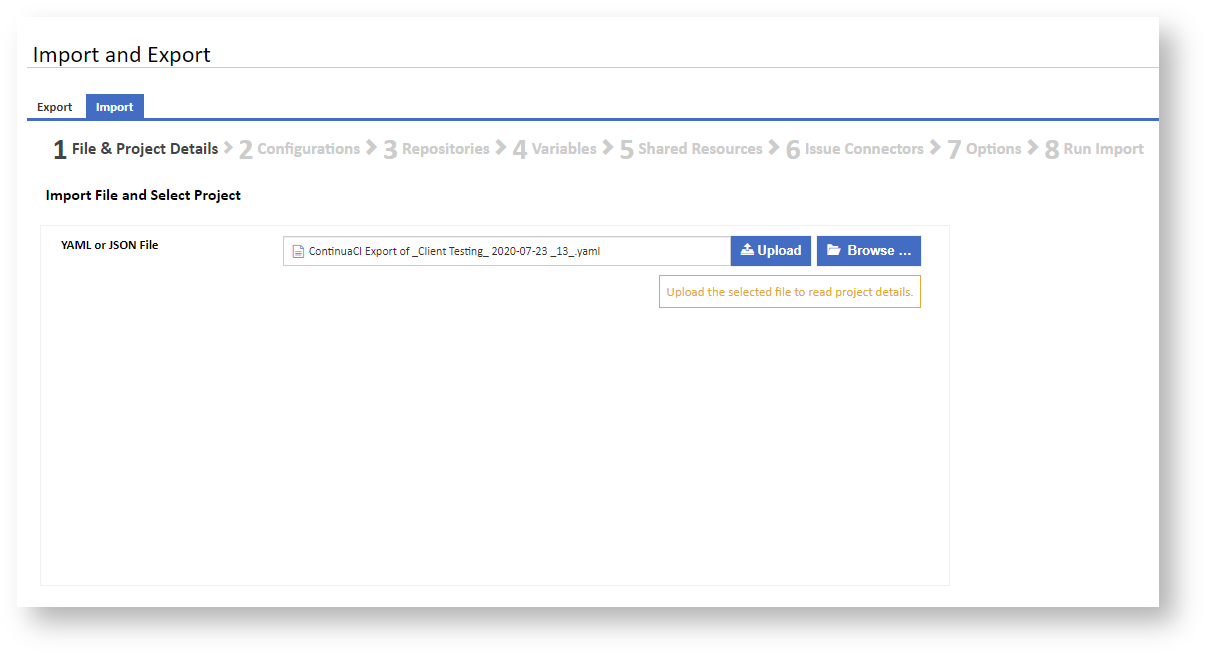
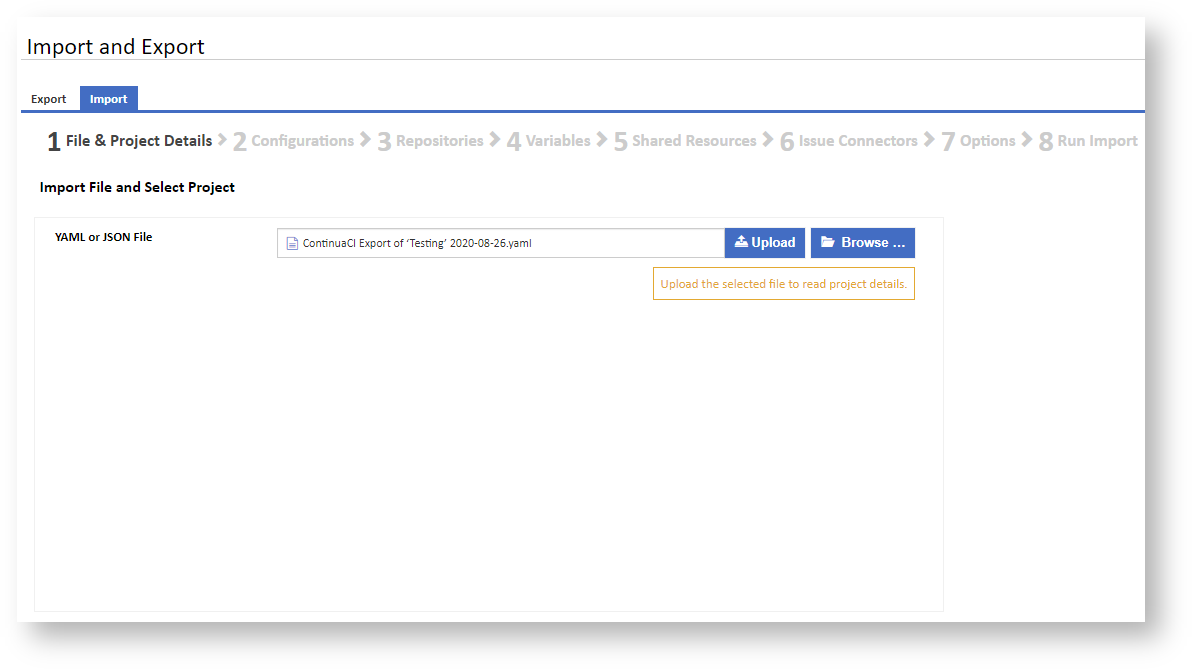
Once you are on the Import and Export page in the Administration section, ensure that the Import tab is selected to start the Import Wizard. Click Browse to select a file to upload, then click the Upload button to send the file to the server for processing.
File & Project Details
The main details about the imported file will be displayed and you will be provided with options allowing you to either Import to a new project, Import to any existing project or, if matching project is found, Import to a matching project.
Import to a matching project
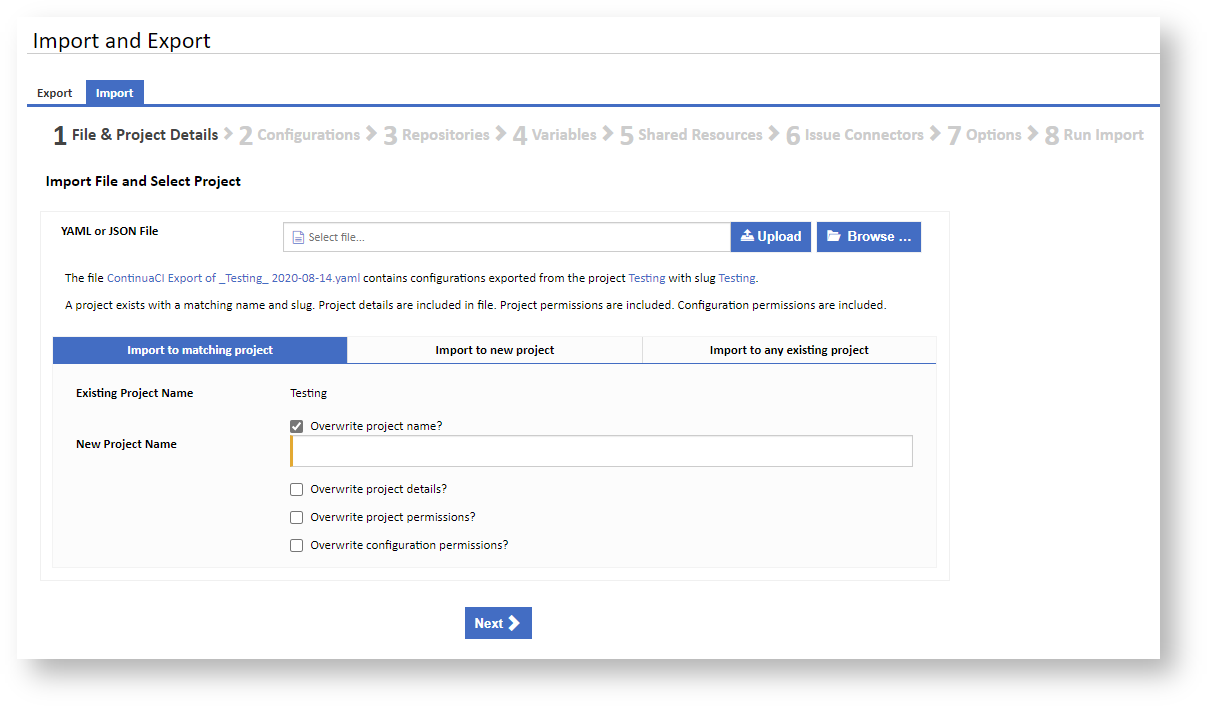
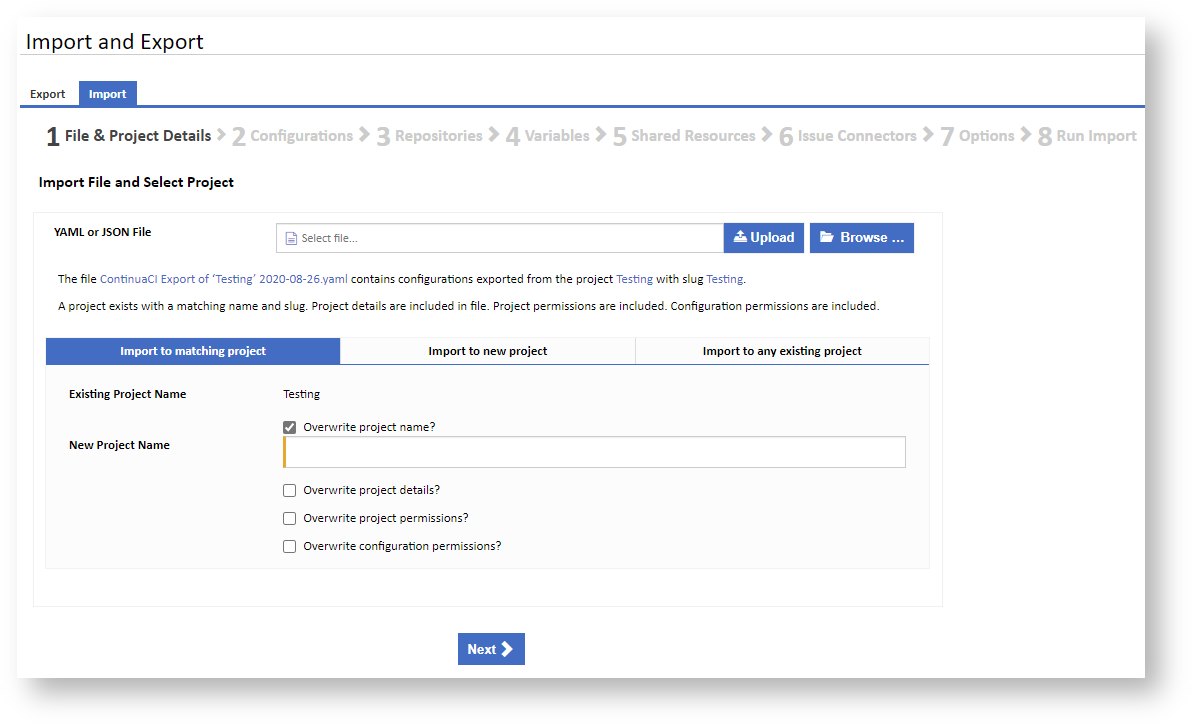
If a matching project is found on the server, you can choose to overwrite the project. You can optionally choose to Overwrite the project name and provide a New Project Name for the matching project. If project details exist in the imported file, then you can optionally Overwrite project details in the matching project. Likewise, if project permissions exist in the imported project, you can optionally Overwrite project permissions in the matching project. In later steps, you will also have the option to overwrite configurations in the matching project, if configuration permissions exist and you choose Overwrite configuration permissions here, then the permissions will be overwritten in all selected configurations.
...
| Info |
|---|
| Note when importing over existing items, that the changes that are made can not be undone. It is advisable to take a full database backup first. |
Import to a new project
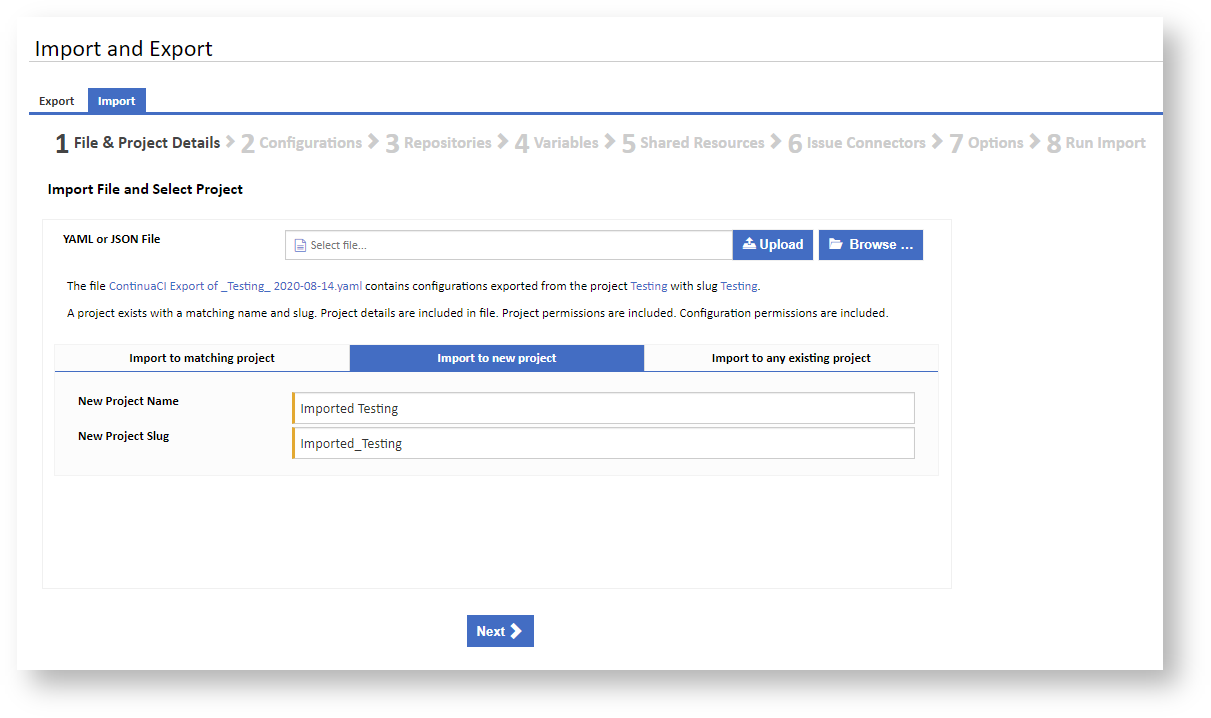
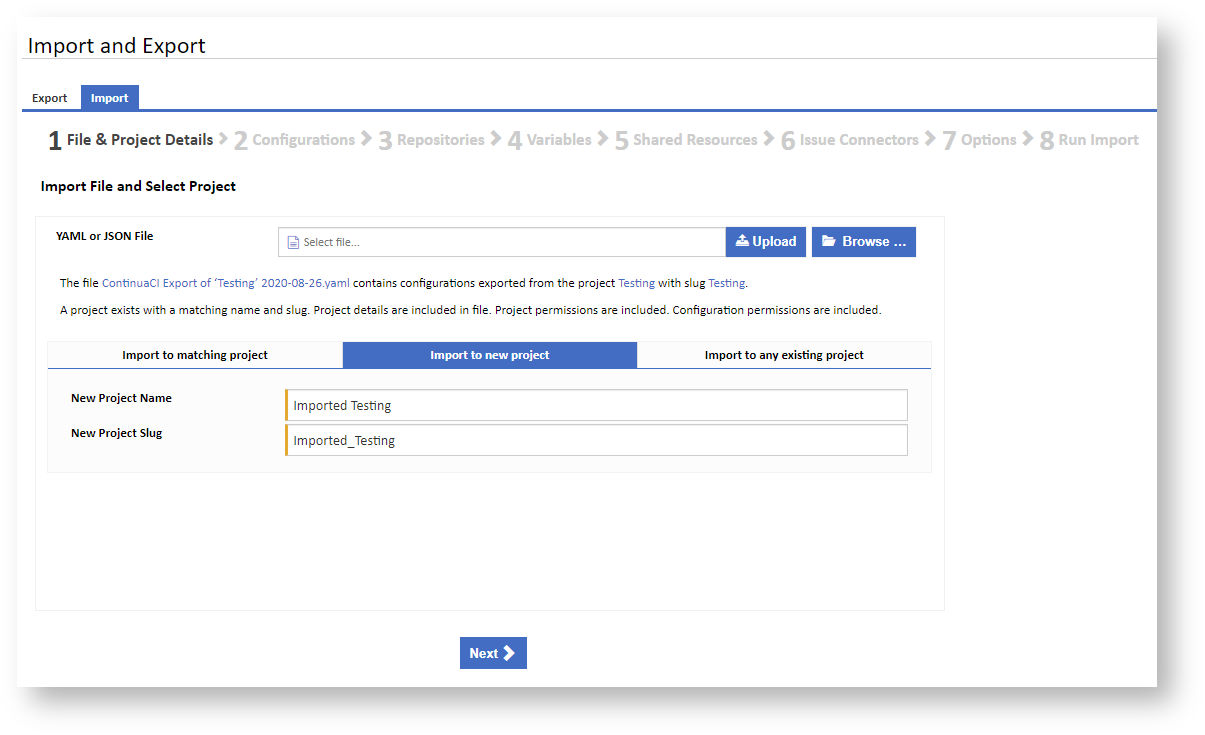
You can choose to import the project as a new project and give in a New Project Name and New Project Slug. All project details, permissions and configurations will be imported to this new project.
Import to any existing project
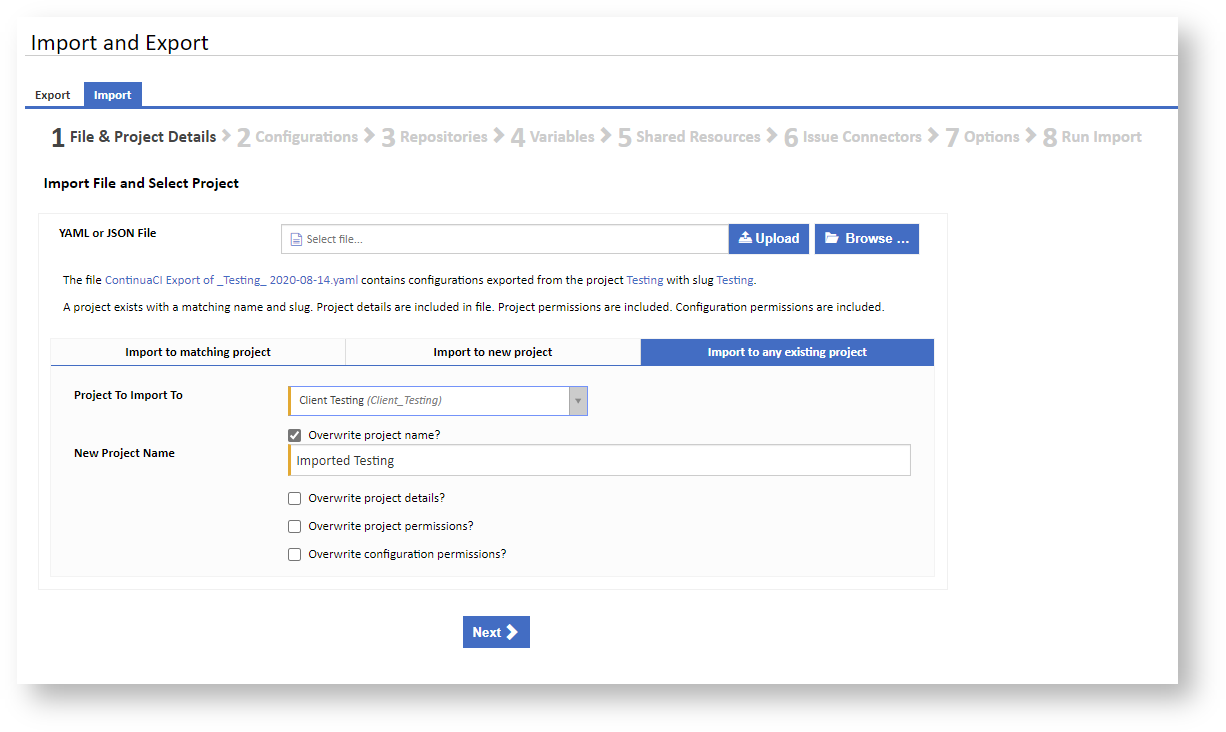
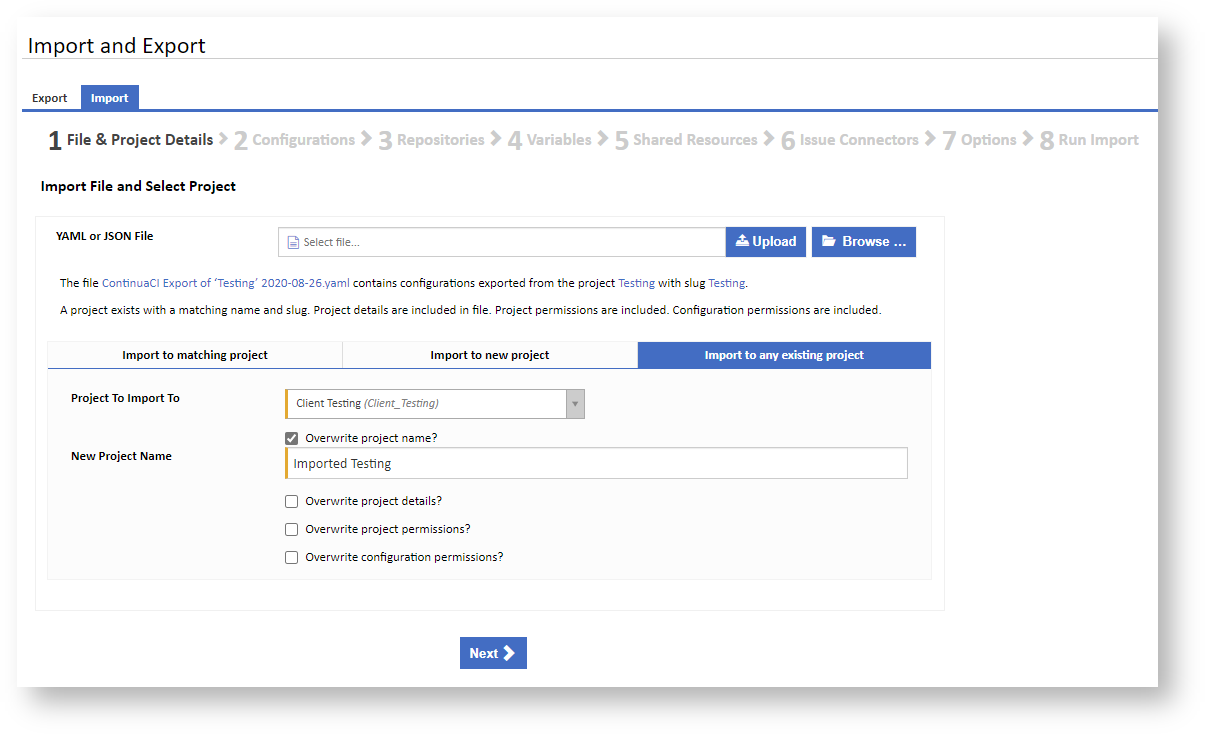
You can choose to select an existing project to overwrite. If project details exist in the imported file, then the existing project details will be replaced with these details. You can optionally choose to Overwrite the project name and provide a New Project Name for the existing project. In later steps, you will also have the option to overwrite configurations in the existing project.
...
The Configurations step of the Import wizard shows a list of all the configurations in the imported document. Checkboxes Check boxes are provided allowing you to choose which configurations to import.
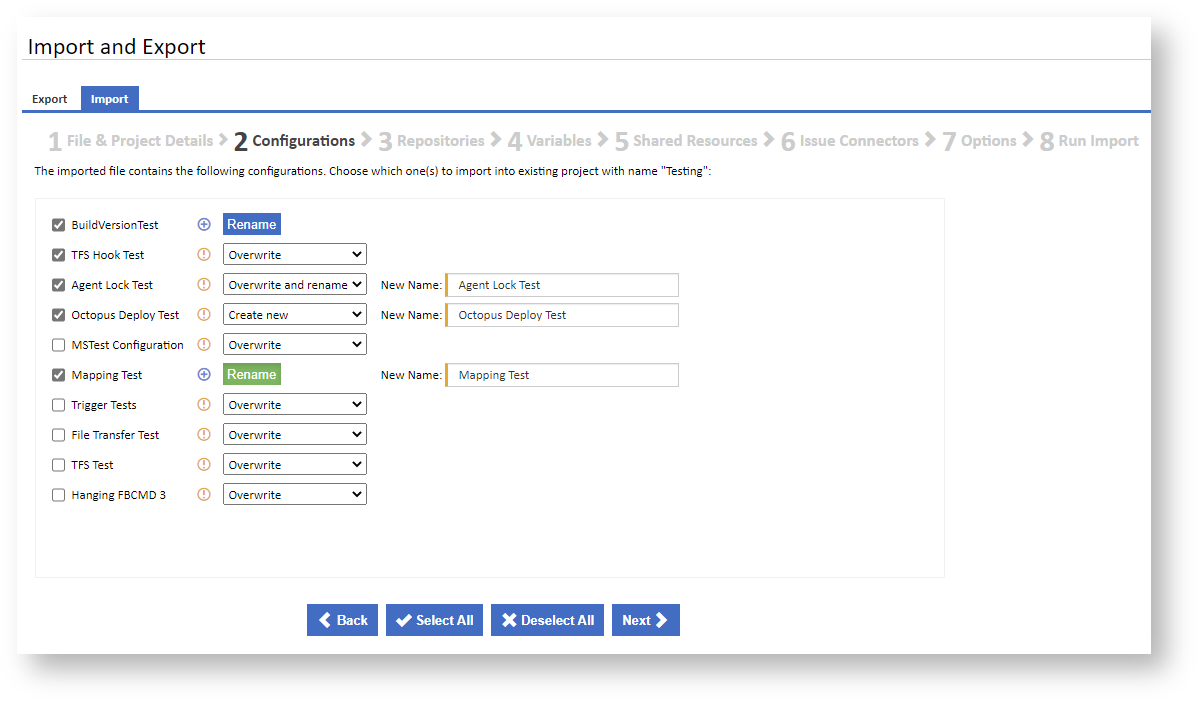
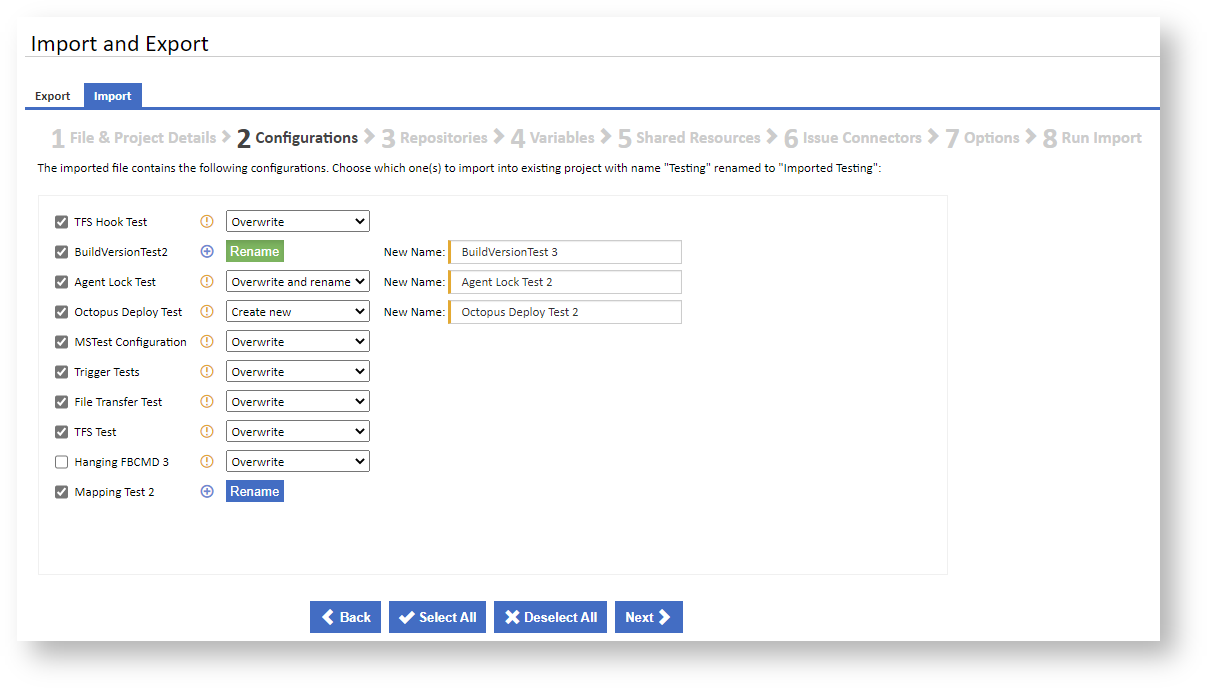
If importing to a new or empty project, or if no match is found for a configuration, a![]() icon is displayed, indicating the configuration is new. You can optionally give the new configuration a new name by clicking on the Rename button. A New Name text box is shown allowing you to enter the new name.
icon is displayed, indicating the configuration is new. You can optionally give the new configuration a new name by clicking on the Rename button. A New Name text box is shown allowing you to enter the new name.
...
The Repositories step of the Import wizard shows a list of all the repositories in the imported document. Checkboxes Check boxes are provided allowing you to choose which repositories to import.
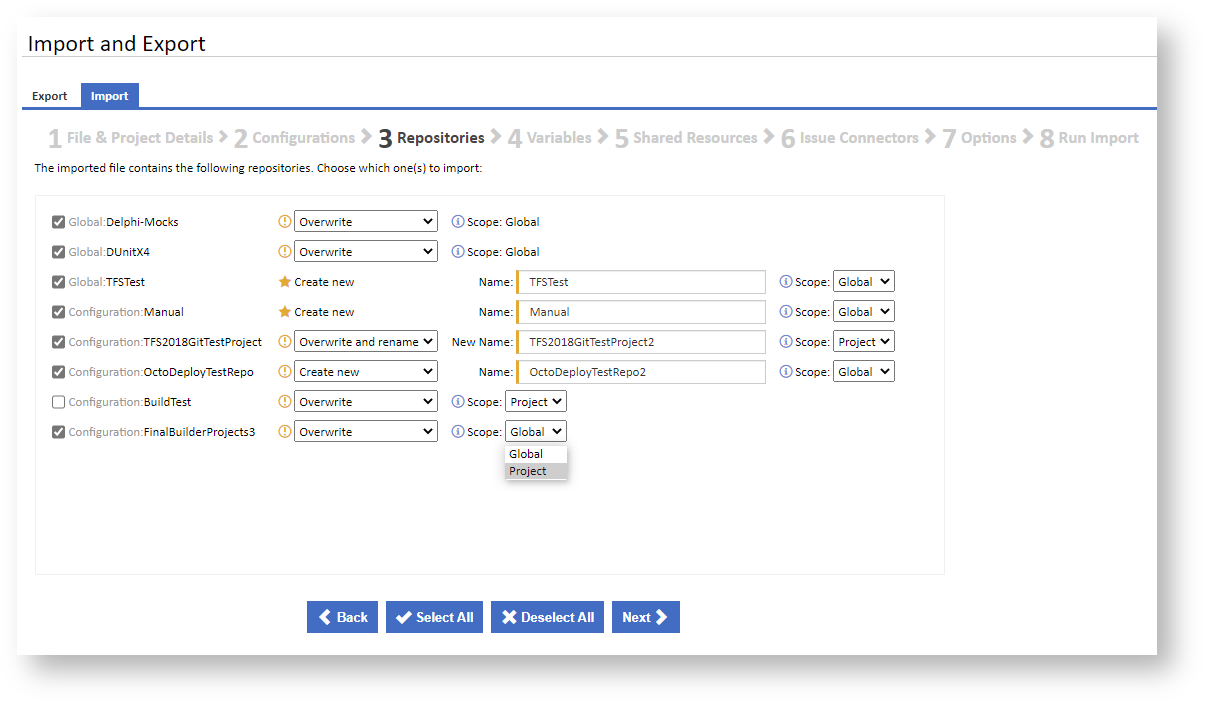
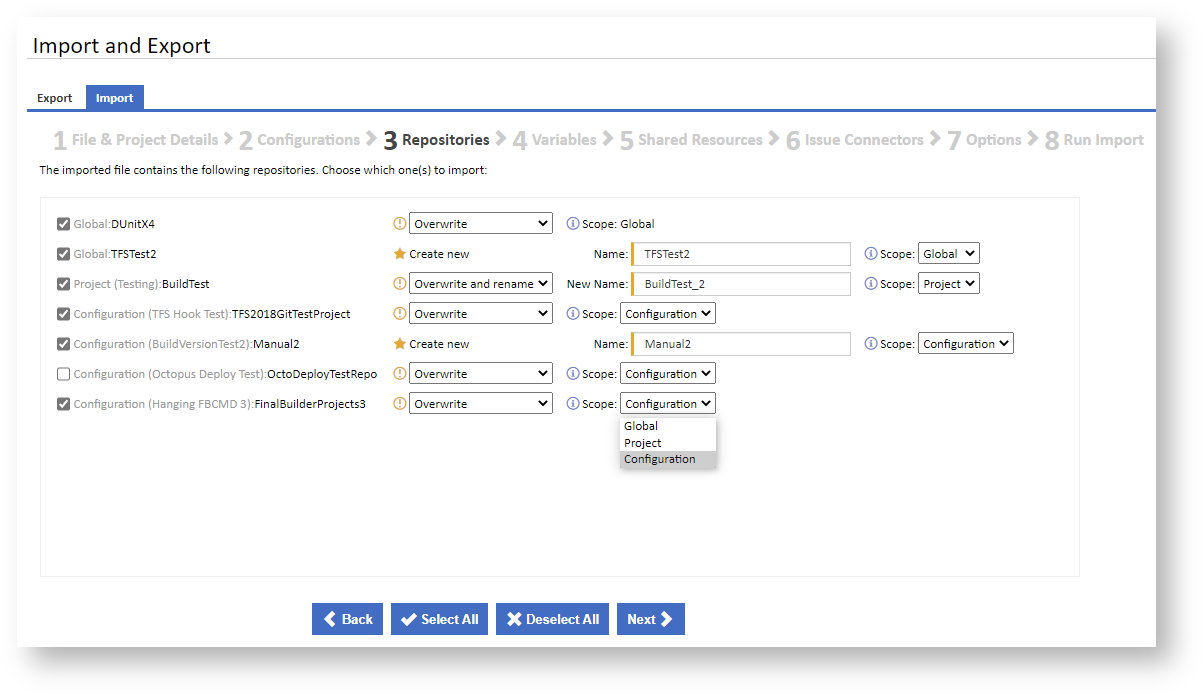
If an existing matching repository is not found a![]() icon is displayed and, if the repository is selected, it will be created as a new repository. You can optionally edit the Name and change the Scope for the new repository to Global, Project or Configuration. Note that Configuration scope is only available if you are importing a single configuration.
icon is displayed and, if the repository is selected, it will be created as a new repository. You can optionally edit the Name and change the Scope for the new repository to Global, Project or Configuration. Note that Configuration scope is only available if you are importing a single configuration.
...
The Variables step of the Import wizard shows a list of all the variables in the imported document. Checkboxes Check boxes are provided allowing you to choose which variables to import.
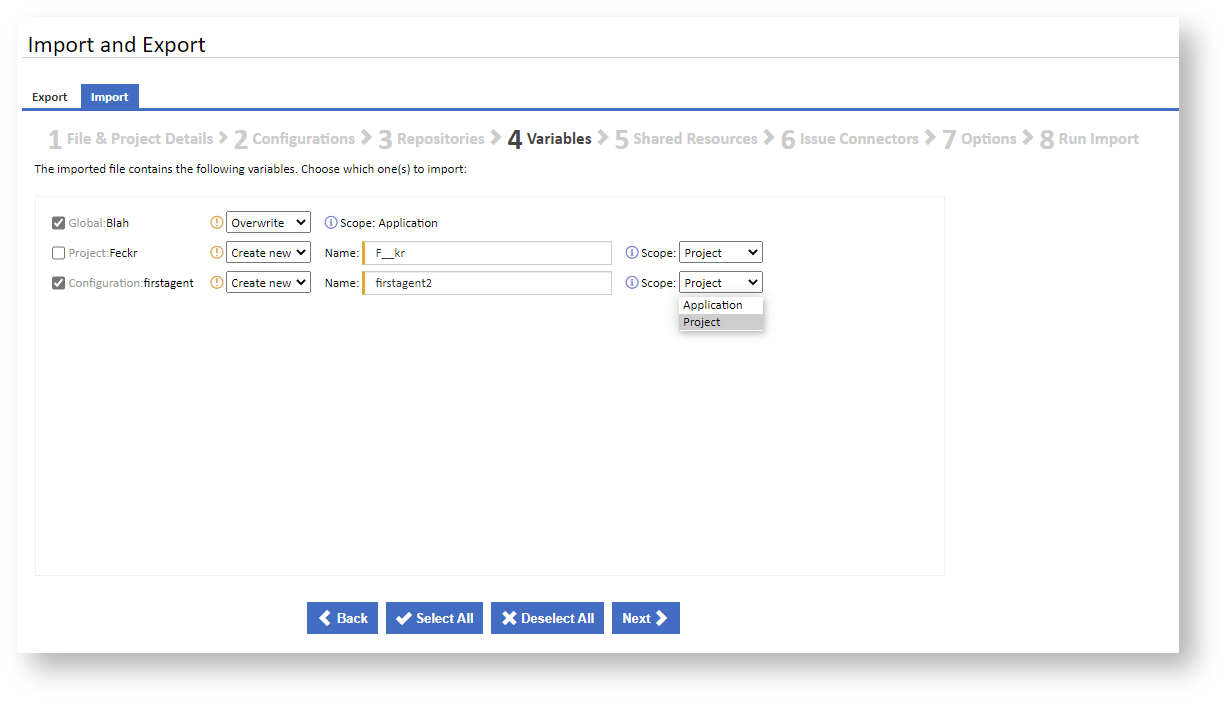

If an existing matching variable is not found a![]() icon is displayed and, if the variable is selected, it will be created as a new variable. You can optionally edit the Name and change the Scope for the new variable to Application, Project or Configuration. Note that Configuration scope is only available if you are importing a single configuration.
icon is displayed and, if the variable is selected, it will be created as a new variable. You can optionally edit the Name and change the Scope for the new variable to Application, Project or Configuration. Note that Configuration scope is only available if you are importing a single configuration.
...
The Shared Resources step of the Import wizard shows a list of all the shared resources in the imported document. Checkboxes Check boxes are provided allowing you to choose which shared resources to import.
<image>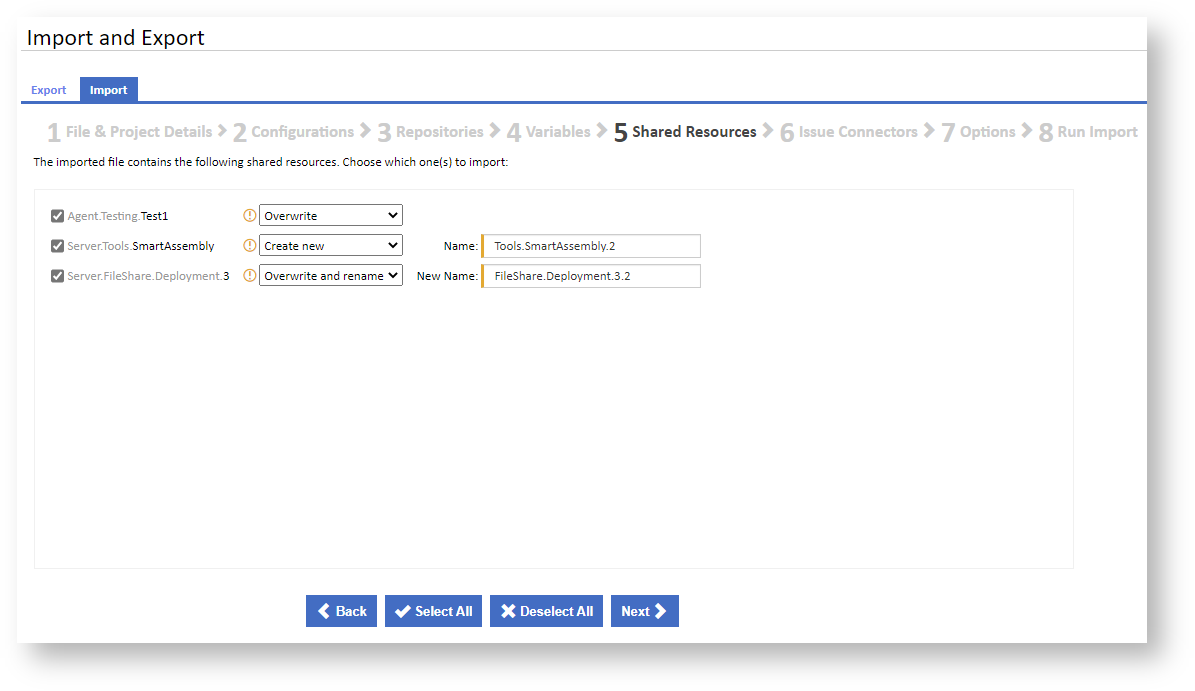
If an existing matching shared resource is not found a![]() icon is displayed and, if the shared resource is selected, it will be created as a new shared resource. You can optionally edit the Name for the new shared resource.
icon is displayed and, if the shared resource is selected, it will be created as a new shared resource. You can optionally edit the Name for the new shared resource.
...
The Issue Connectors step of the Import wizard shows a list of all the issue connectors in the imported document. Checkboxes Check boxes are provided allowing you to choose which issue connectors to import.
<image>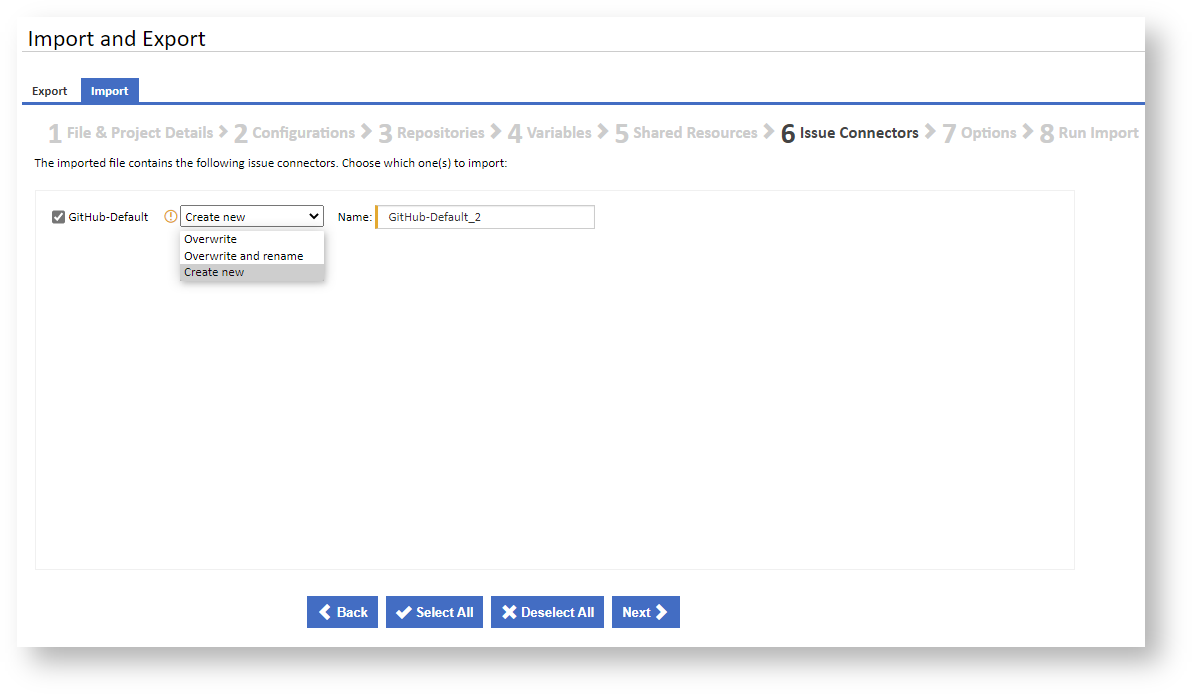
If an existing matching issue connector is not found a![]() icon is displayed and, if the issue connector is selected, it will be created as a new shared resource. You can optionally edit the Name for the new issue connector.
icon is displayed and, if the issue connector is selected, it will be created as a new shared resource. You can optionally edit the Name for the new issue connector.
...
This step of the Import wizard allows you to choose options related to the import process.
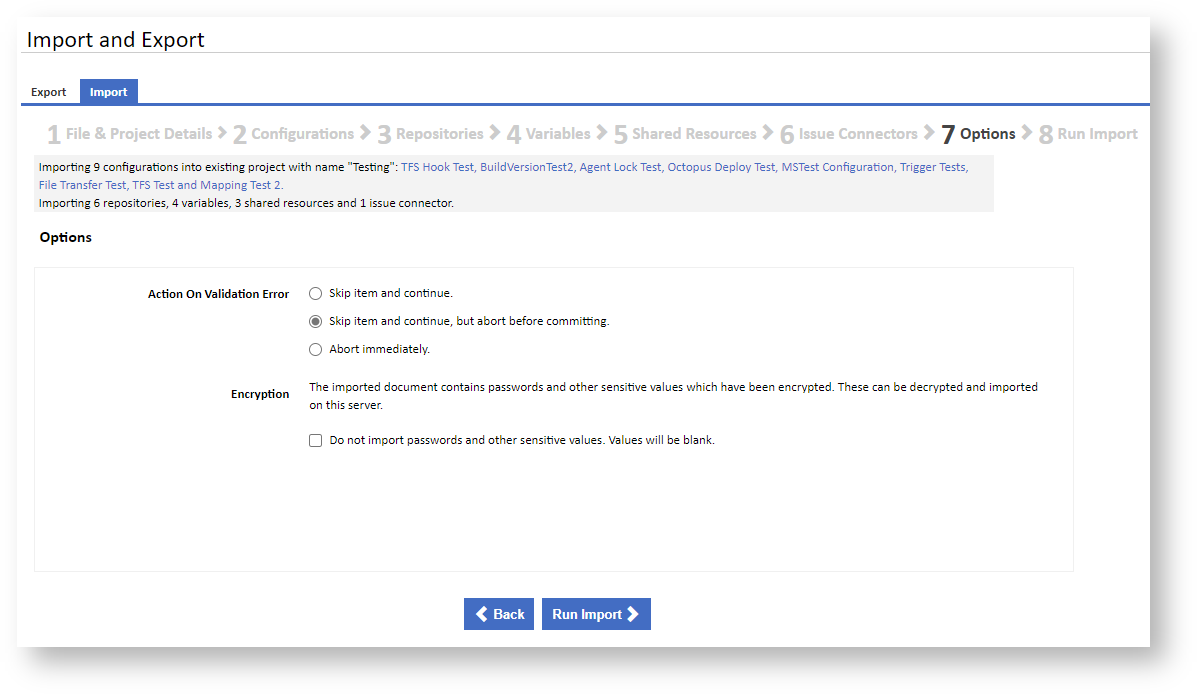
Action On Validation Error
...
If the imported file contains encrypted passwords and other sensitive values, then you can choose whether to import them.
If you are running the import a file exported on a different server, the encryption keys will be different. In this case, input boxes will be provided to allow you to enter the encryption parameters.
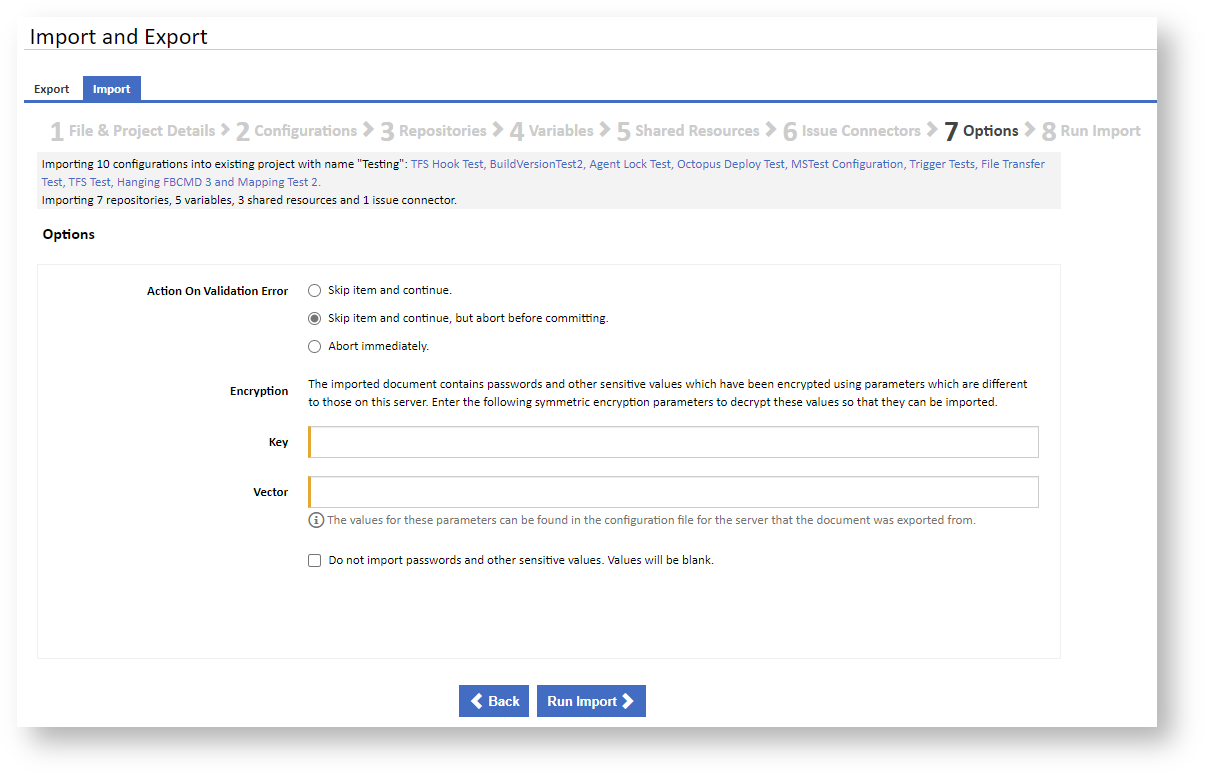
The encryption Key and Vector can be found in the appSettings section of server configuration file under the keys "Continua.SymmetricEncryptionKey" and "Continua.SymmetricEncryptionVector".
e.g.
| Code Block |
|---|
<appSettings> <!-- DO NOT remove or change the keys BELOW --> <!-- They are set during the first installation, changing them will require you to re-enter all passwords fields --> <!-- We recommend that you keep a backup of these values --> <add key="Continua.HashSalt" value="**************"/> <add key="Continua.SymmetricEncryptionKey" value="**************" /> <add key="Continua.SymmetricEncryptionVector" value="**************" /> <!-- DO NOT remove these the keys ABOVE --> ..... </appSettings> |
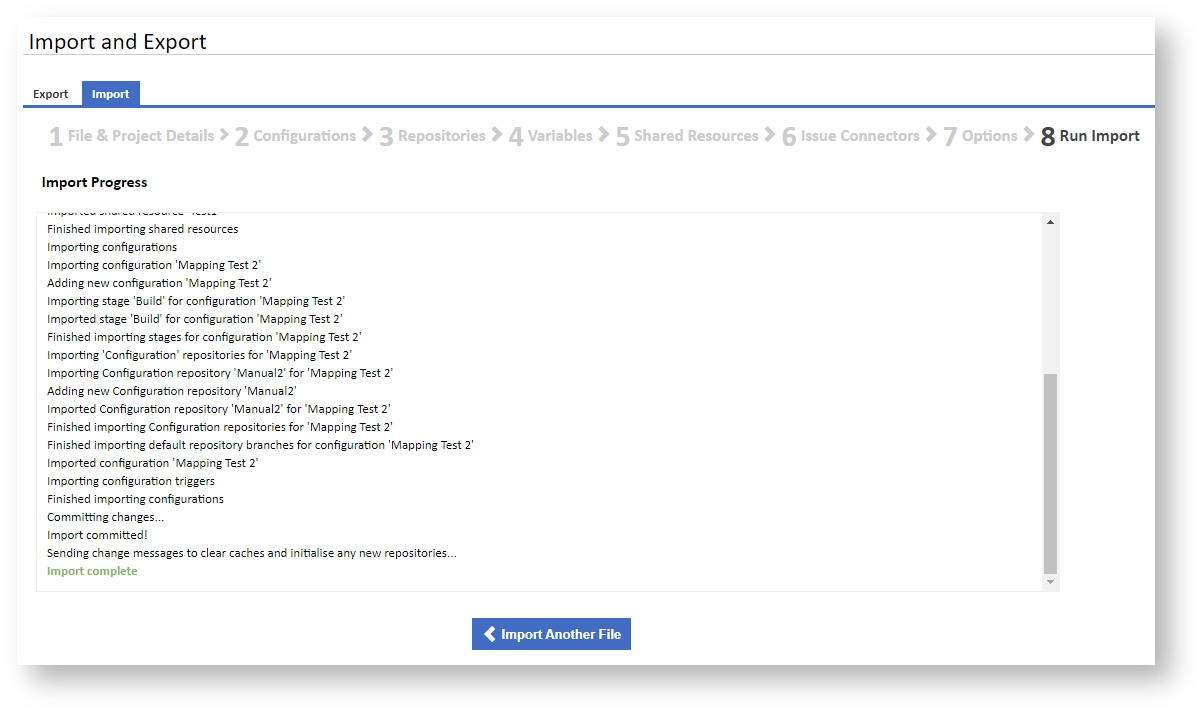
Once you have entered the required details, click Run Import to start the import process.
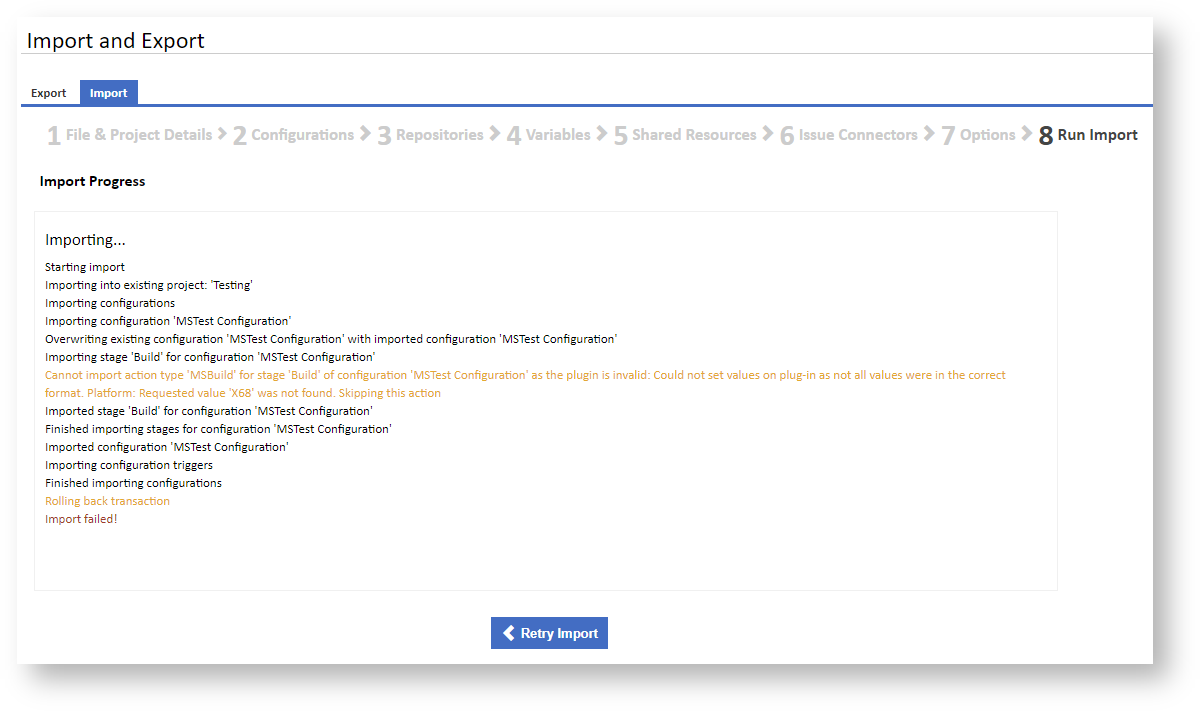
Run Import
While the import is running, progress messages are displayed.
If the import is successful, a green Import complete message and an Import Another File button is displayed.
If the import fails, a red Import failed! message and a Retry Import button is displayed.