In this tutorial we will be creating a website and then deploying our Web Application to it, via Visual Studio and then via Continua CI. This is part 4 of our Deploying Websites with Continua CI tutorial so make sure you have completed all previous steps in this tutorial.
This tutorial will be broken down into the following areas:
Installing Web Deploy for IIS 7 & 7.5
Before we can deploy to our web server using MSBuild, we must first install the Web Deployment Handler. Head over to http://www.iis.net/learn/publish/using-web-deploy/configure-the-web-deployment-handler for an in-depth guide on how to install the Web Deployment Handler.
Create an IIS Deploy Tutorial Website
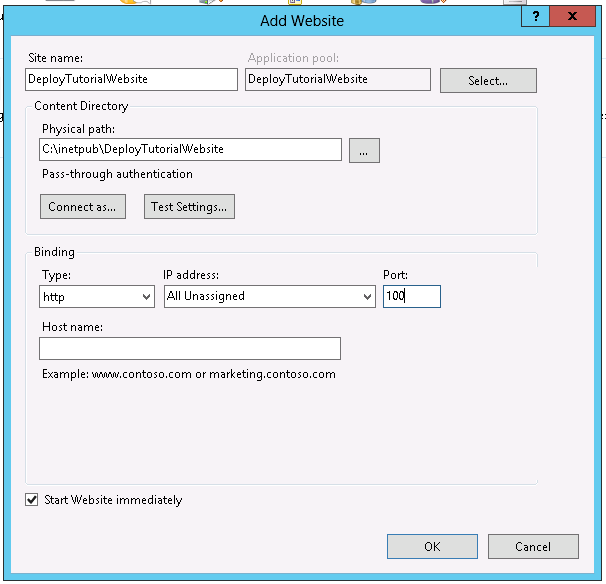
Before we are able to deploy our website to IIS, we need to create a website on our web server. For this tutorial I am creating a website called DeployTutorialWebsite that will be mapped to port 100 on my web server.
Configure our ContinuaDeployTutorial to Publish to our Website
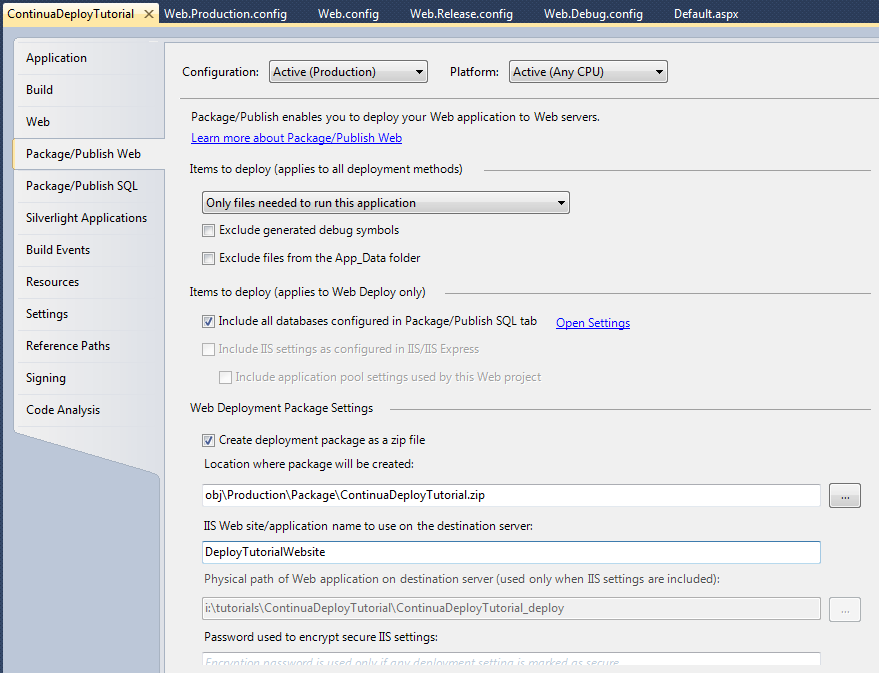
Now that we have created our website in IIS we will need to configure our ContinuaDeployTutorial project so that it publishes to our website. Open up your project and right click the ContinuaDeployTutorial project and select properties. Once the properties menu has opened, select Package/Publish Web which will bring up all the options for packaging and publishing your project.
There are two settings that we need to set:
- First, make sure that Configuration is set to our Production Configuration Solution. This will be automatically selected if Production is the currently set Configuration Solution.
- Second, we need to point our project to our IIS website. So lets set IIS Web site/application name to use on the destination server to our website, DeployTutorialWebsite.
Once these have been set, we are ready to publish our website.
Publishing our Website
Before we head back over to Continua we should attempt to publish our website through Visual Studio. So lets run through a test publish.
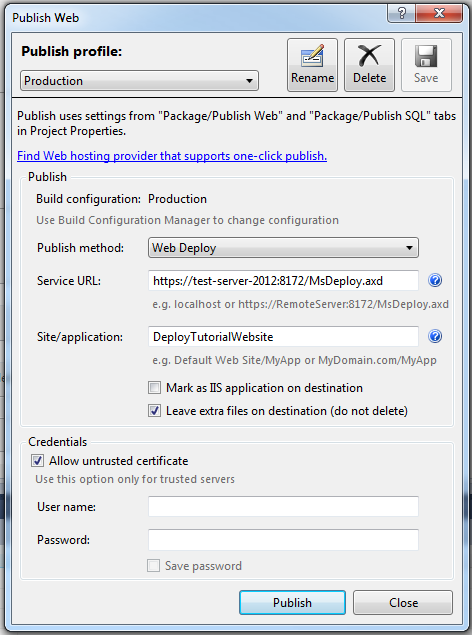
In Visual Studio, right click your project and select Publish, which will bring up the Publish Web dialog. Previously we published our website to a folder location, however this time we want to publish to our newly created IIS Website. So lets set the following properties:
- First, make sure the Publish Profile dropdown is set to Production.
- Change the Publish method to Web Deploy.
- Next we need to specify our Web server. The Web Deployment Handler listens on port 8172 so for the Service URL property needs to be in the following format: https://<server_name>:8172/MsDeploy.axd.
- For the Site/application property we need to define our IIS Website name. So lets set Site/application to DeployTutorialWebsite.
- Finally, check Allow untrusted certificate. This allows non administrator users on the web server to publish changes to your website. Depending on your development setup, you may want this on or off, but for the sake of this tutorial lets leave it on for now.
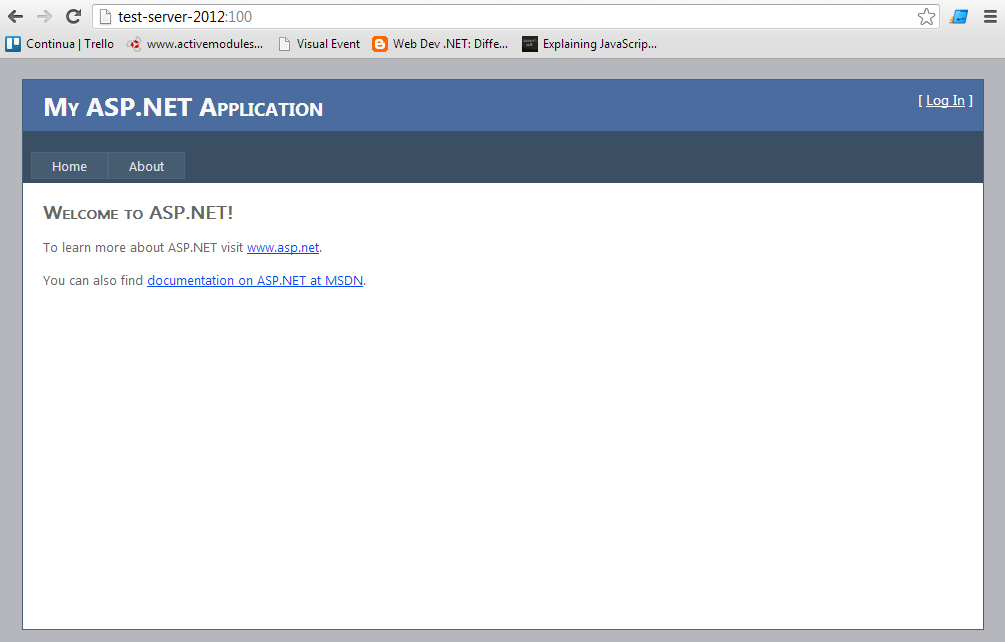
Now lets publish our website. If everything has gone according to plan then the Publish will have succeeded. Now if you check your website you should see the site up and running. If there were any issues publishing your website, these will need to be resolved before moving on to automating your publish with Continua.
As a side note, if you are receiving an error regarding end points not listening or actively blocked then check that the Web Deployment Handler is installed and configured correctly.
Create a Deploy Stage in Continua
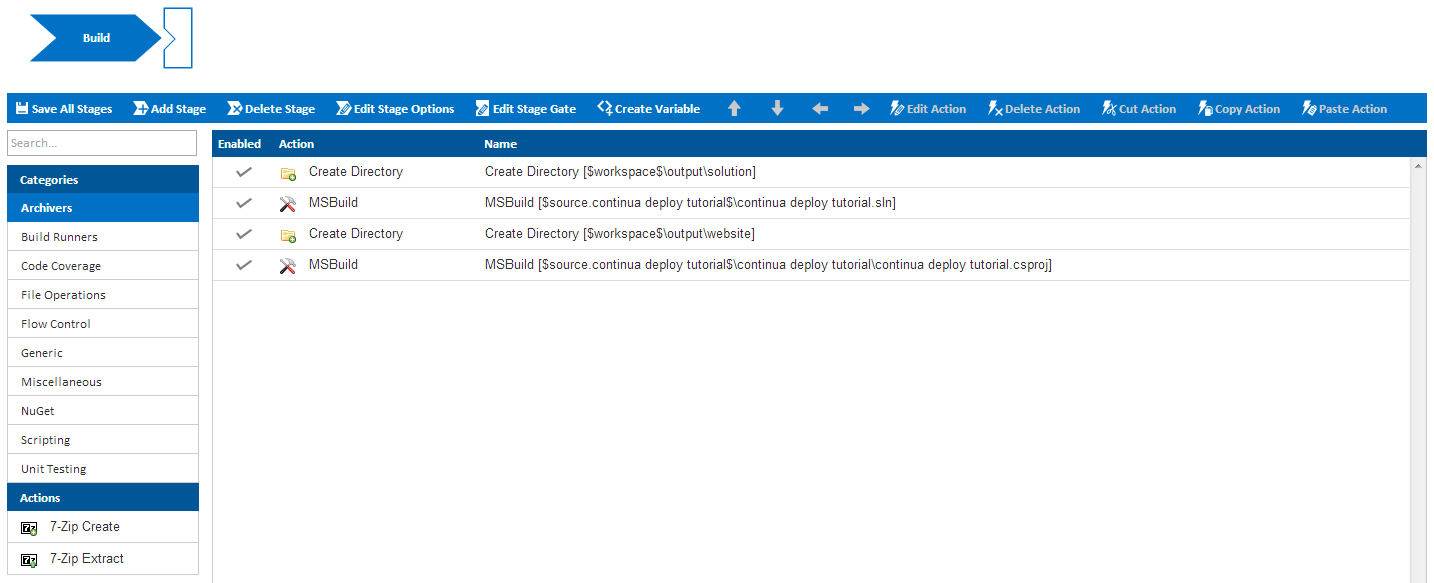
Now that we have our Web Application building and publishing successfully through Visual Studio, we need to do a bit of rearranging of our build workflow in Continua. Currently we only have one stage called Build, however what we really want is two stages broken up into the following functionality:
- Build Stage: This stage will be responsible for building our Web Application solution, running any unit tests, coverage tests, etc. Basically, the build stage should be responsible for building our project and checking that our project is ready to be deployed.
- Deploy Stage: The deploy stage, which will run straight after the Build Stage, will be responsible for packaging and deploying our Web Application to our deployment server.
Why Split our Build over 2 Stages?
By splitting our build into a Build and Deploy stage we are compartmentalising our build into two separate processes. For a standard build process, you would never want to deploy your website unless your solution compiled correctly, passed all unit tests, etc. By breaking your process into two separate stages, you can use Stage Gates to fail the build if any of these tests fail.
By default, once a stage completes successfully it will automatically start executing the next stage of the build. This may not be ideal if you are pushing to your live environment and you have a build being triggered off every check-in made to your Version Control System. If this is the case then you edit your Build Stage and prevent it from automatically promoting to the Deploy stage. This means that you can still automatically build every checkin but it will never deploy to the live site until it is manually promoted by a Continua user that has permission to promote stages.
Create a Deploy Stage
Navigate back to your Workflow editor and click Add Stage to create a new stage after our Build stage.
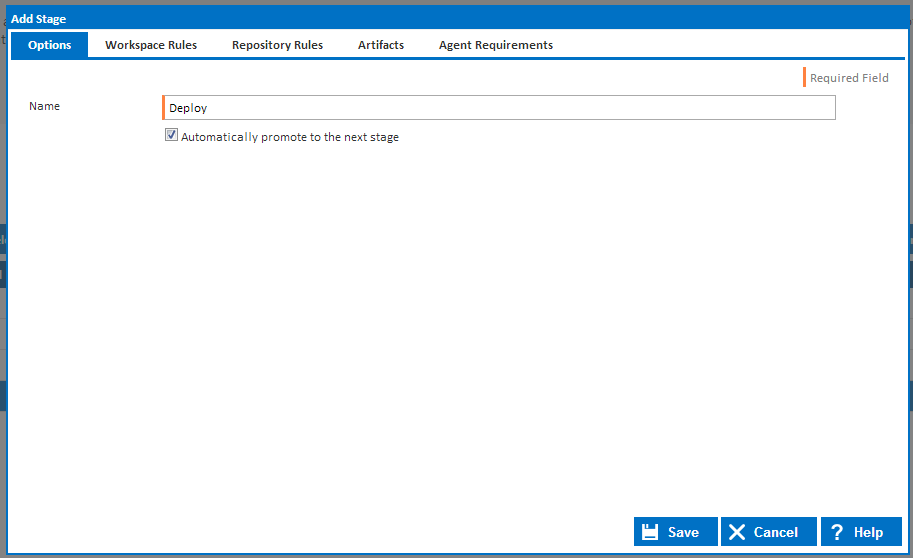
This will bring up the Add Stage Dialog as shown below. There are plenty of options and rules that can be set for a stage but for now we only need to worry about the Stage Name. So lets call our new stage Deploy and then save the stage.
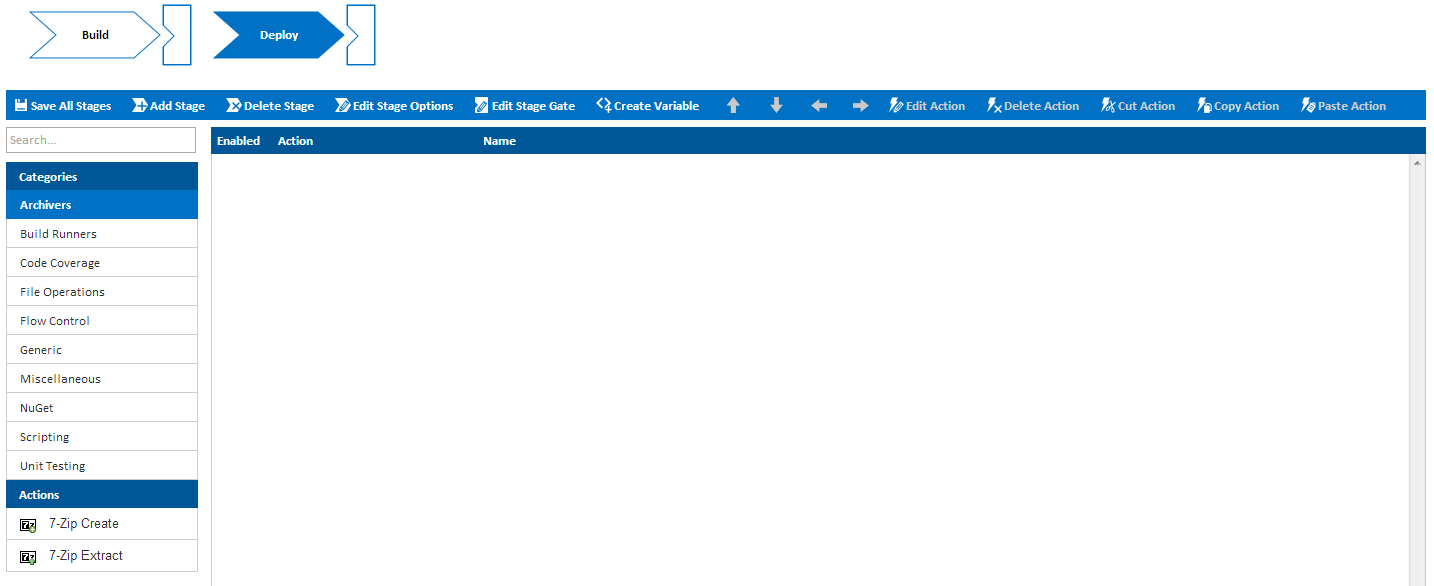
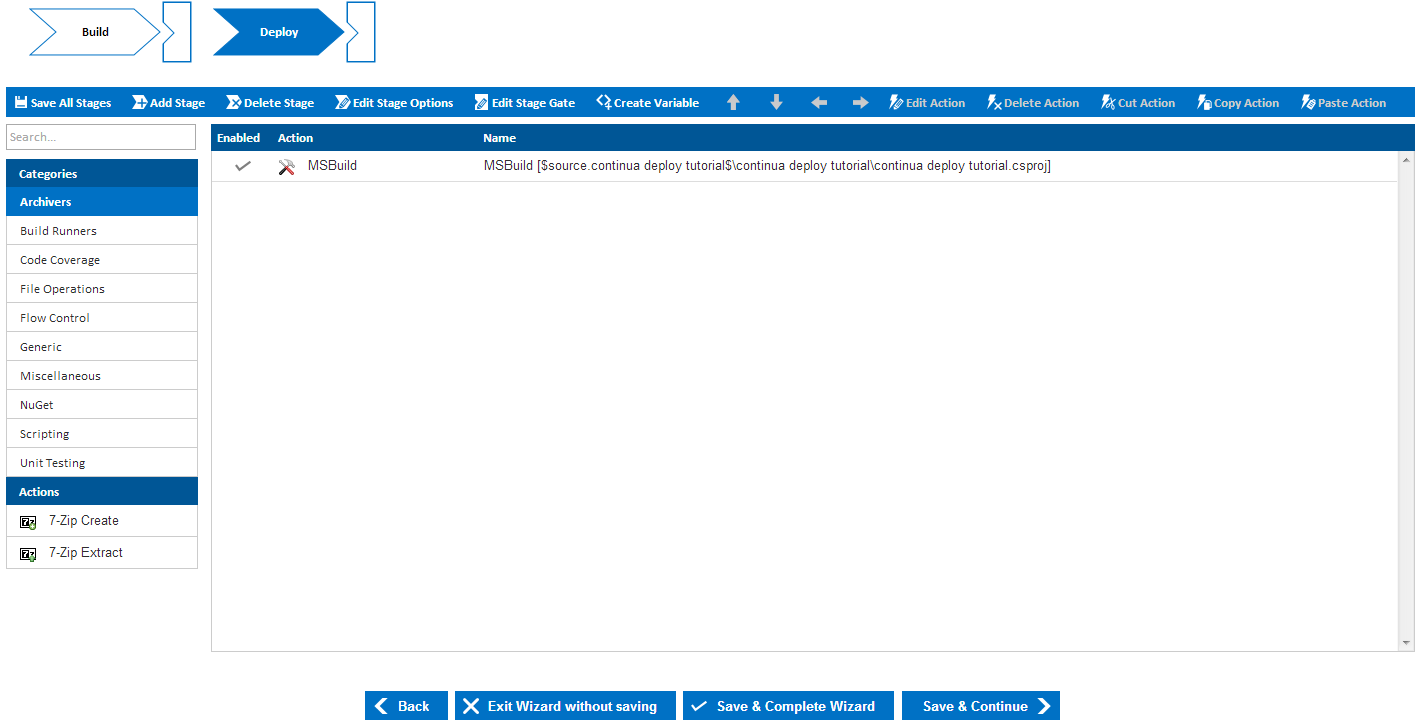
Once you have saved your stage, you should now see your two stages, Build and Deploy, listed across the top of the page. You may notice that when the Deploy stage is selected, our actions disappear! When the Deploy stage is selected, we are shown the workflow editor for the Deploy stage. If you select the Build stage, you will then see all our previously created actions as they belong to the Build stage workflow.
Move our Deploy Actions to the Deploy Stage
Now that we have a deploy stage, let rearrange our build workflow.
- First, lets delete our second Create Directory Action. As we will be deploying and packaging straight to our web server, we no longer need to package to a file directory beforehand.
- Second, we now need to move our second MSBuild action (the action that is building the web project, NOT the solution), to the deploy stage. Actions can be moved by selecting an action and using the Cut Action and Paste Action buttons.
Once the actions have been copied over, you should have two stages that look like this:
Your Build Stage:
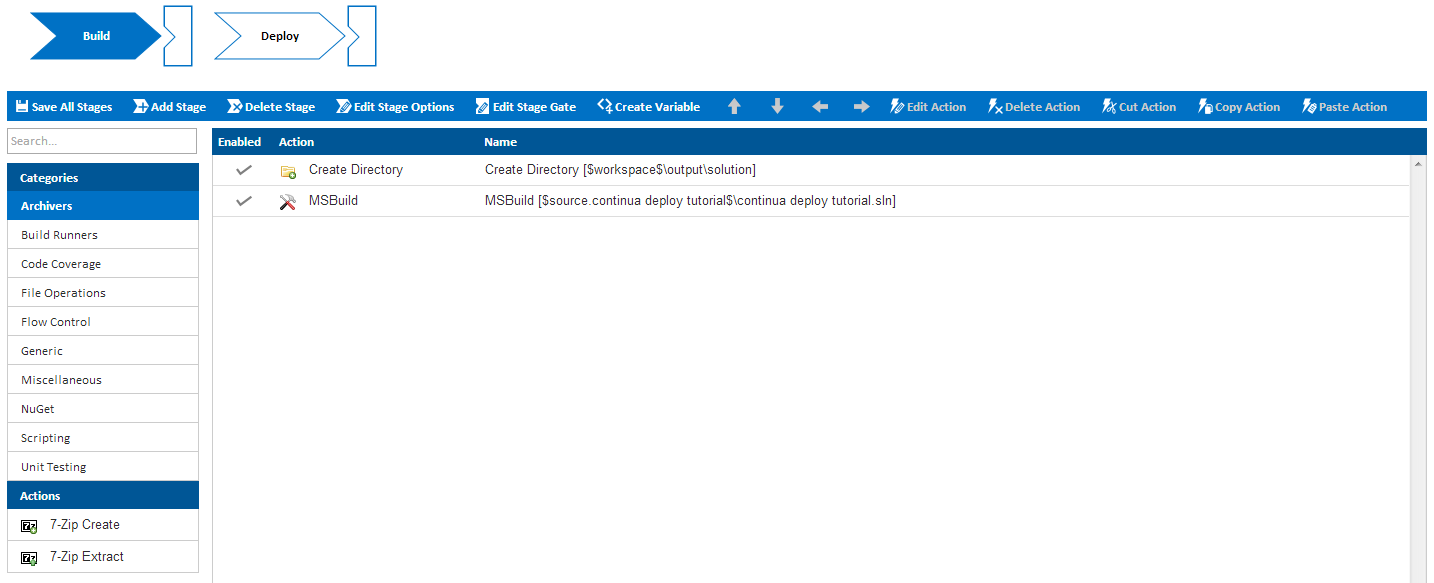
Your Deploy Stage:
Automatically Publish and Package our Website
Now that we have broken our build process into two stages, we can change our Deploy MSBuild action so that it automatically Packages and Deploys our website. Basically, we now need to configure this action so that we incorporate all the information regarding packaging the website into the MSBuild Action.
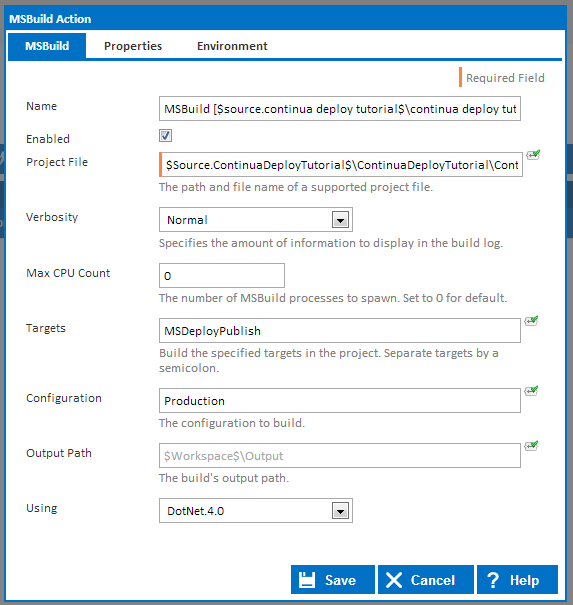
Open the MSBuild action that is on the Deploy Stage. We now need to change the following properties:
- Set the Targets property to MSDeployPublish. This is basically telling MSBuild that we want to deploy our website. Note that even though we are deploying, MSBuild will still create a local copy that we can access before it deploys. This is always a good idea as it enables you to quickly revert your website back to a previous version.
- Remove the output path. As we are now deploying our project, we cannot specify an output path. Further down in this tutorial will instead access our packaged website straight from the obj folder of our source code.
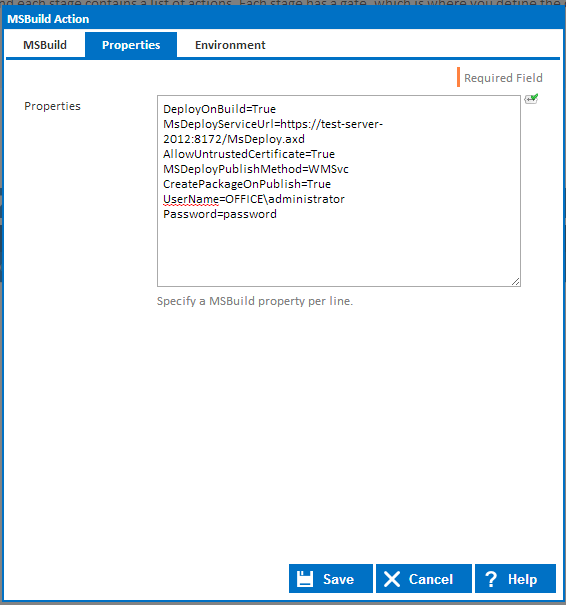
Once these properties have been modified, we will need to provide additional parameters to our MSBuild actions. Additional properties can be added by clicking the Properties tab of the dialog.
Properties take the form of <property_name>=<property_value> and each new property must begin on a new line. So lets add the following properties so that our Action can successfully deploy and package our website.
DeployOnBuild=True
MsDeployServiceUrl=https://<server_name>:8172/MsDeploy.axd
AllowUntrustedCertificate=True
MSDeployPublishMethod=WMSvc
CreatePackageOnPublish=True
UserName=<domain>\<username>
Password=<password>
Lets run through these properties:
- DeployOnBuild=True: This is telling MSBuild that we want to deploy our website once it has finished building.
- msDeployServiceUrl: This is the url to our Web deployment handler on our web server. This should be the same url as you used when we manually published our build.
- AllowUntrustedCertificate=true: This flag is the same as the Allow Untrusted Certificate check that is used when manually publishing a build.
- MSDeployPublishMethod=WMSvc: This tells MSBuild to use the Web deployment handler to publish the build.
- CreatePackageOnPublish=True: Creates a local package when deploying the website.
- UserName=<domain>\<username>: The username that will be used to deploy.
- Password=<password>: The username's password. Note that you can mask your password from the UI and build logs by using a password variable. Once you have your password in a password variable, you can call it here by using Password=%myPasswordVariable%
The properties tab should look something like this:
Save the MSBuild action.
Copy our Website From the Continua Agent to the Server
Now that we have an action that packages and deploys our website, we need to copy our local packaged version of the website back to the Continua Server. By keeping a local copy, we are creating an easy rollback system in case something goes wrong during deployment.
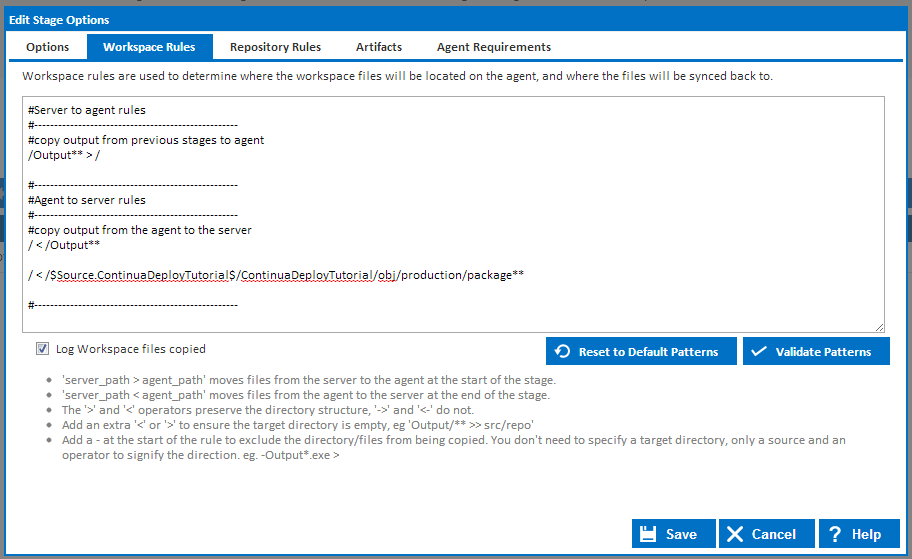
To send our packaged website back to server we need to add a new Workspace Rule to our Deploy Stage. So lets edit our Deploy Stage and Navigate over to the Workspace Rules tab.
Workspace rules define which files get sent between the server and agent at the end of each stage. By default, each stage is configured to transfer any Output folders and subfolders between each stage, hence why our previous Builds were being transferred back to the Server at the end of each build.
So lets add a rule that will copy our website's package folder back to the server. Add the following line to the Agent to server rules section.
/ < /$Source.ContinuaDeployTutorial$/ContinuaDeployTutorial/obj/production/package**
This rule is saying that we want to copy the package folder and all sub folders back to the server's workspace.
Your Workspace Rules should look something like this:
Registering our Website as an Artifact
Registering artifacts allows you to keep track of important build files through the Continua interface once a build has completed.
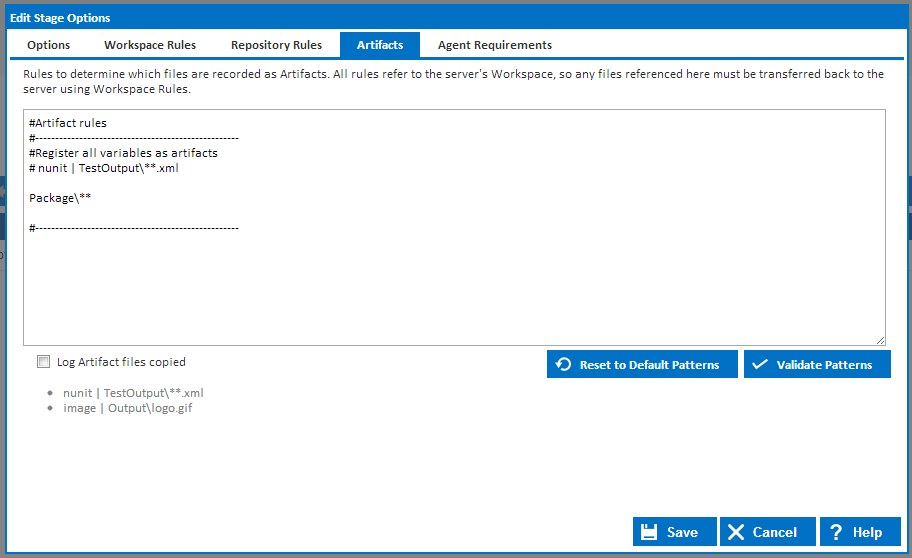
To add our packaged website as an artifact of the build, select the Artifacts tab from the Deploy Edit Stage dialog.
Add the following line to the Artifact rules:
Package\**
This is telling Continua that every file in <server_workspace>/package should be added as an artifact to Continua.
Your Artifact rules should now look something like this:
Save your stage settings, then click Save & Continue.
Integrating Continuous Integration
Now that our Build Workflow is complete, we have one more task to create a Continuous Integration build process.
The Save & Continue button should take you to the Triggers page of Continua CI. If not, this page can be found in the Configuration Wizard.
The final step of building this build process is to add a repository trigger that will monitor our ContinuaDeployTutorial VCS for any checkins and automatically deploy those changes to our web server.
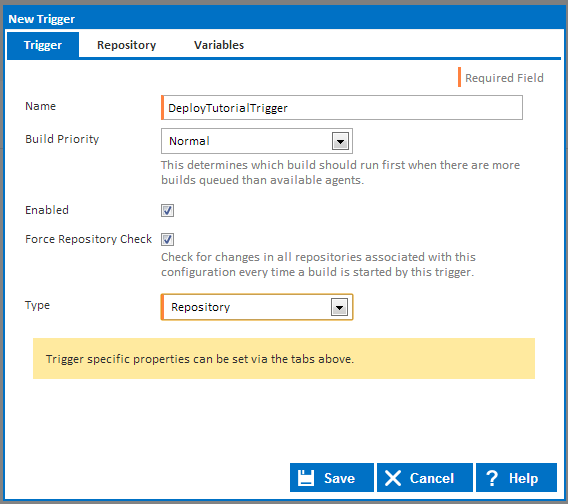
On the Triggers page, click [Create] which will bring up the Create Trigger dialog.
Set the following properties:
- Name: DeployTutorialTrigger
- Type: Repository
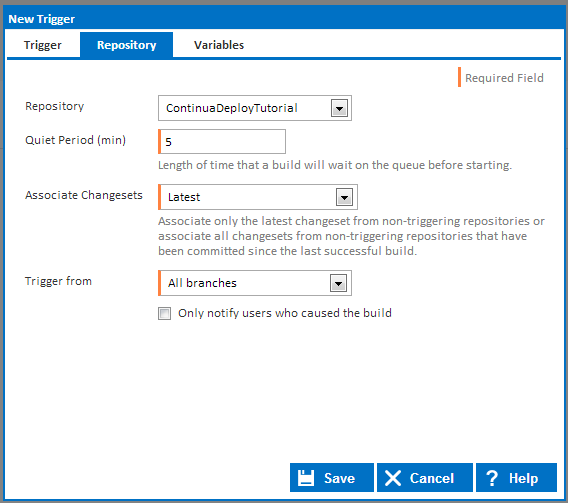
Once the Repository type has been selected, a repository tab will appear at the top of the dialog. Navigate to the Repository tab and set the Repository property to ContinuaDeployTutorial.
Once those properties have been saved, you have then successfully created a trigger that will monitor your repository for any changes and automatically trigger a build. More information can be found on the Repository Trigger page.
Deploy our Website
Now that our Build Workflow is complete and we have a trigger that is monitoring our website VCS, we are ready to deploy our website to our production server. Head back to Visual studio and make a change to your website. Save your changes and check them in to your VCS.
Once a change has been detected, head over to the configuration page and you will see that a build is queued and it is waiting for it's quiet period to end. Quiet periods briefly pauses the build and waits for any other quick changes to be checked in. End the quiet period and watch as the build is executed.
If the build fails, check the build log to retrieve MSBuild's output and determine the issue that is preventing the build from completing successfully.
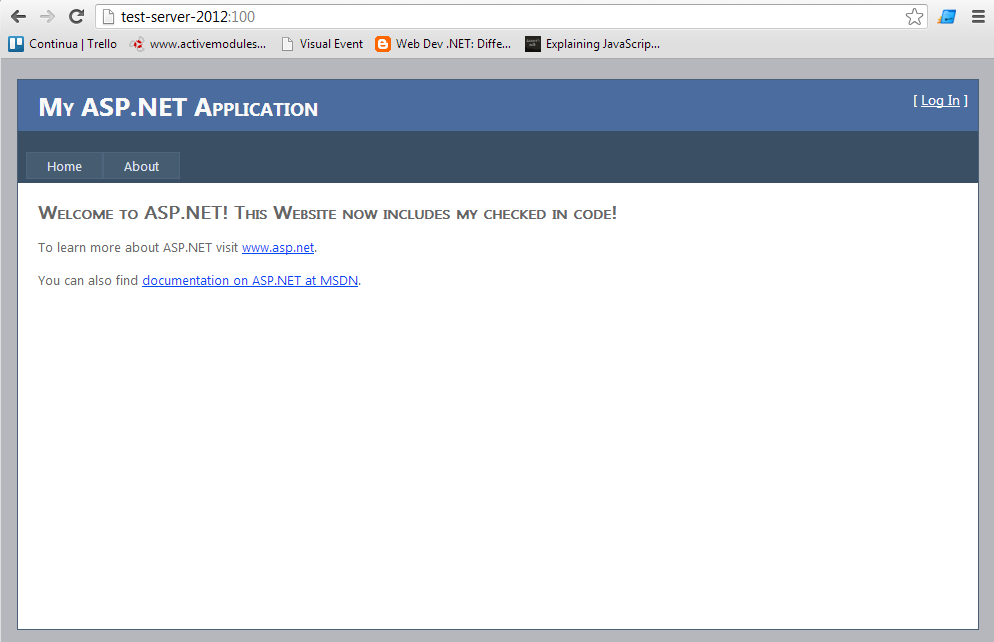
Once the build completes successfully, navigate to your website and the source code from the latest checkin should now be deployed on your website, as shown below.
Once your build has finished building, clicking the build number will bring up the Build Details page. If you then navigate to the artifacts page, you will then see all the files that were part of the website package. If you ever need to roll back a deploy then you can do so through this page.
Note that these files can also be accessed from the Continua Server by navigating to the server's workspace. The workspace takes the following formatting: <ContinuaShare>/Ws/<Project_name>/<Build_ID>
Conclusion
This tutorial demonstrates the correct way of managing Web deployment in a Continuous Integration environment. While this tutorial has made your web project deployable, there are still improvements that can be made to your build process:
- Use Continua Variables to specify which web server you are deploying. For example, you can setup your trigger to set the following variables depending on which branches of your repository were checked in.
- Set a variable that tells MSBuild which Configuration Solution it should use to build the web project.
- Set a variable that tells MSBuild which Server the website should be deployed to.
- So if a 'master' branch is checked in, it will deploy to your production server, while if a 'dev' branch is checked in, it should deploy to your test server.
- Add an Issue Connector to your repository.
- Add Unit tests and code coverage tests to your build process.