...
- Launch the Internet Information Services (IIS) Manager via the Administrative Tools.
- Select the 'Default Web Site' in the 'Connections' tree and then press the 'Stop' button.

- Right click on the 'Sites' folder and select 'Add Web Site'.
- In the 'Add Web Site' dialog set the following options:
- Site name to 'Continua'
- Application pool to 'ASP.NET v4.0'
- Physical path to 'C:\Program Files\VSoft Technologies\ContinuaCI\Web', this may be different depending on where you've installed Continua to.
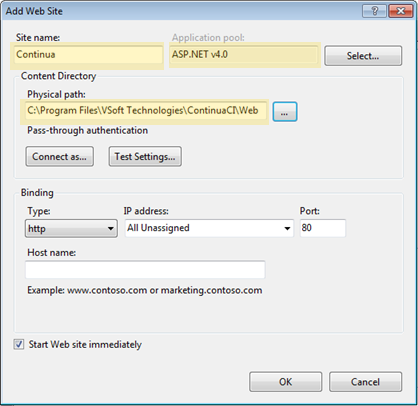
- After clicking 'OK' you will be warned that port 80 is already assigned to another site, the default web site, since we disabled it in step 1, this can be ignored by pressing 'Yes'.
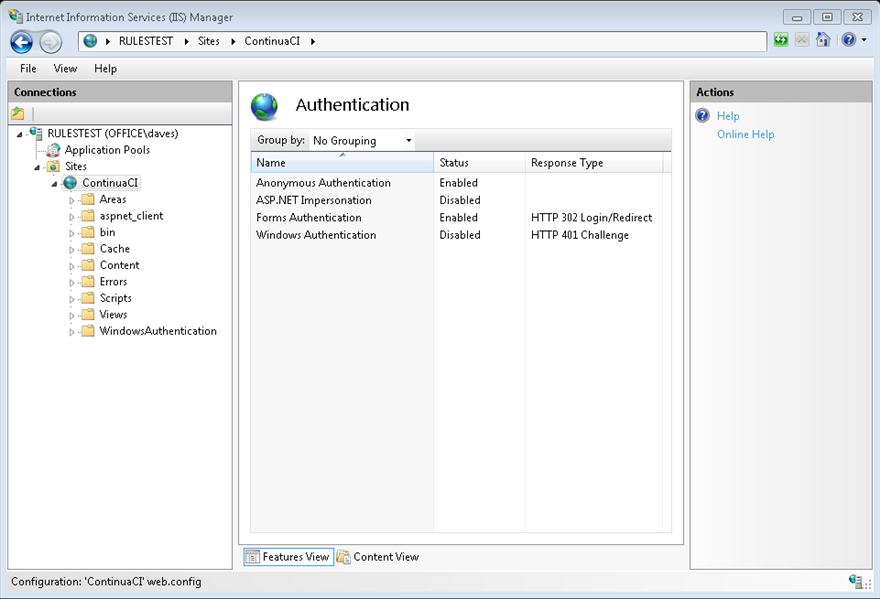
- Ensure the website you just created is selected and double click on the Authentication icon. Ensure that only Anonymous Authentication and Forms Authentication are enabled. Windows Authentication and ASP.NET Impersonation should be disabled.
If you plan on using LDAP or Mixed authentication modes for Continua, you must convert the 'WindowsAuthentication' folder to an Application. Right click on the folder and select Convert to Application. Click 'OK' on the 'Add Application' dialog and the icon for the 'WindowsAuthentication' folder will change to show that it is now an application.
Ensure the application you just created is selected and double click on the Authentication icon. Ensure that only Windows Authentication is enabled. Anonymous Authentication, Forms Authentication and ASP.NET Impersonation should be disabled.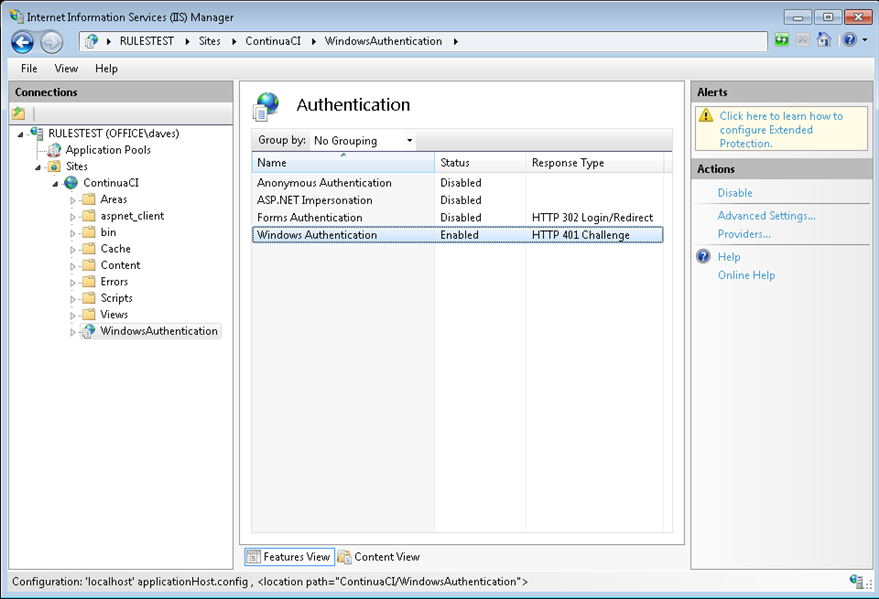
- The configuration has been completed. You can now navigate to the server in a browser to begin the getting started wizardGetting Started Wizard