...
All projects are created and edited in Continua's Project Wizard. The project wizard can be found in a couple of ways depending on whether Continua has just been installed or already has some projects setup.
Navigating to the Project Wizard for newly installed copies of Continua
If you just installed Continua CI then you should see the following screen:
...
To begin creating your first project click the Create Project button
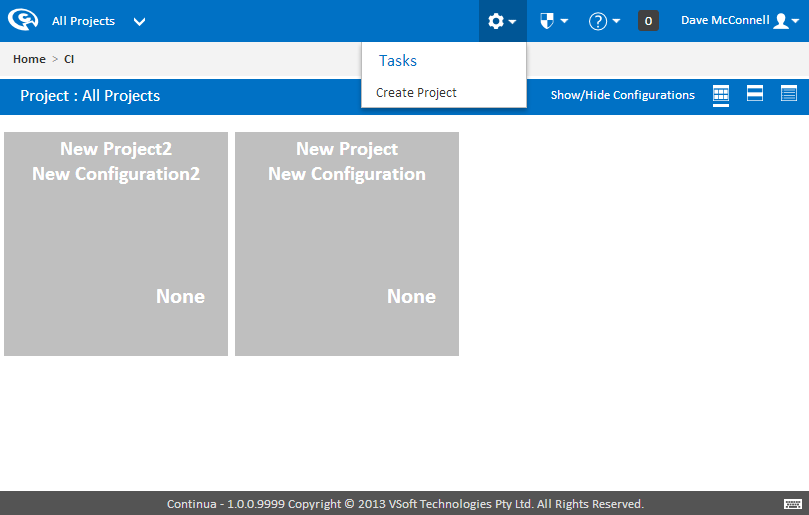
Navigating to the Project Wizard for existing Continua environments
If your Continua environment has already been setup, you can create a new project by navigating to the Tasks menu and clicking Create Project.
Project Wizard
Once you've clicked Create Project, you will be redirected to the Project Wizard's start page where you can create your first project. The project wizard is also where you can set all the properties regarding projects. For this tutorial we will only be creating the most basic Continua projects.
...
Once your project has a name and slug, lets save it. In the Project Wizard you can save your project with either Save & Complete Wizard button or the Save & Continue button. For now we don't want to set any other properties on the project so lets complete the wizard by hitting Save & Complete Wizard.
Project Created
Congratulations, you have created your first project. Once the project is created, you should see the following screen:
...
Lets click Create a Configuration and move on to Part 2 of this tutorial.