The Try, Catch and Finally actions are used as a way to deal with actions that fail at performing the task required. You can use these three actions in a few different ways, the important thing to note is that they're all parent actions which means for them to work how you intend they need to have child actions. Using them is simple, you place the action in your work flow editor then place actions as children of them. If you want to use the actions in conjunction with each other then they need to be at the same indentation level in the work flow. Below are some walk-throughs, but first you need to know the combinations of Try, Catch and Finally that work.
- Having a try on its own is rather pointless, it has the same effect as using the Group action.
- A Try action can be coupled with a Catch, and/or a Finally. Eg. Try/Catch/Finally, Try/Catch, Try/Finally, Catch/Finally.
- A Finally and Catch action can still work without a Try action.
Try Action

Name
A friendly name for this action (will be displayed in the actions workflow area).
Enabled
Determines if this action will be run within the relevant stage.
Catch Action

Name
A friendly name for this action (will be displayed in the actions workflow area).
Enabled
Determines if this action will be run within the relevant stage.
Finally Action
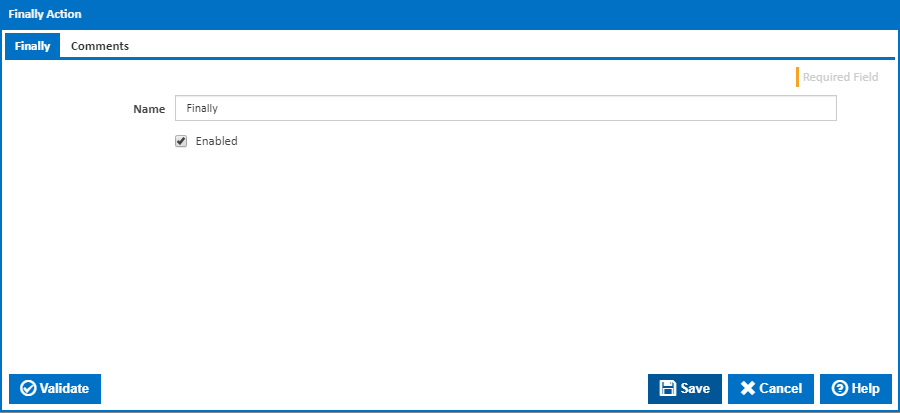
Name
A friendly name for this action (will be displayed in the actions workflow area).
Enabled
Determines if this action will be run within the relevant stage.
Examples
Example 1 - Try, Catch, Finally
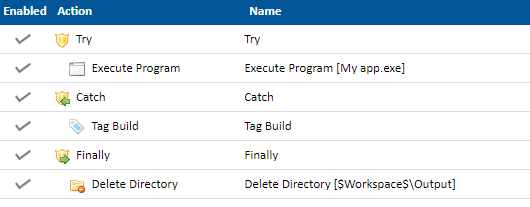
In this example I have setup a simple work flow which will attempt to execute a program by placing a Try action in the work flow editor and an Execute Program action as a child of the Try action. If that fails, the Catch action's children will then execute, in this example it will run the Tag Build action which I've setup to give it the tag "Failed". I've then placed a Finally action at the end with a Delete Directory action as its child. The Finally action will always execute in this situation regardless of the result of the Try or Catch actions.
Note: Actions placed after the Finally action's block will continue to execute provided the actions in Try/Catch didn't include a Stop action and those actions didn't throw fatal exceptions that Continua couldn't handle.
Example 2 - Catch
The Catch action will only execute its children if the previous sibling action failed. In Example 1, any children actions of the Try action that fail will bubble up and fail the Try action. Since the Catch action is the next sibling action of the Try action, it will handle any failed actions that happened in the Try action. By the same token, the Catch action can handle any action that returns a failure, not just a Try action.
Note: The Catch action won't execute if the action above it threw an exception, for example if the previous action couldn't find a file it required then that's an exception rather than a failed result. In those situations you would use the Finally action.
If you have a series of actions that could possibly fail but you want all of them to run regardless of the previous result and you don't want the build to fail, then you can place a Catch action after each one. Suppose you want to run two test executables and don't care if the any of them fail but you want both to run regardless. The verbose way of doing this would be to surround each NUnit action with a Try/Catch. A simpler way is the following.
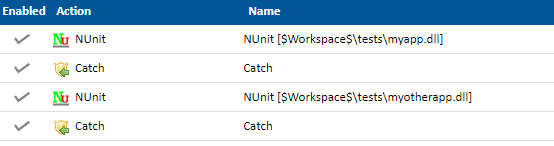
In this example I've placed a Catch action directly after each NUnit action. The result is, if the NUinit action fails, the failure will be caught and subsequently ignored since we haven't given the Catch action any children actions to execute. In this case, the work flow will fall through to the next NUnit action.
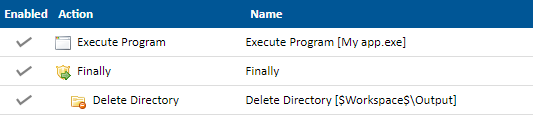
Example 3 - Finally
The Finally action can also be used on its own without having a Try or Catch action associated with it. Using the Finally action on its own is handy for times when you want to perform an action or actions regardless of the result of the previous action. If there's only one previous action you care about then there's really no point placing it in a Try action. For example, if you want to use the Execute Program action which outputs its files to $Workspace$\Output then you may want to put a Finally action directory after the Execute Program action and within that Finally action put a Delete Directory action which deletes everything in $Workspace$\Output. Doing it this way ensures the Delete Directory action always runs regardless of the Execute Program action result and you also save on having to use the Try action method. Here's what that work flow would look like.